Free Shipping on Domestic Orders $75+

Nabi Big Tab HD24 Screen Replacement

What you need

  1. Nabi Big Tab HD24 Screen Replacement, Back Assembly: step 1, image 1 of 1
    • Ensure that the tablet is facing you with the screen on the table.

    • Locate the four red rubber stops at the corners.

    Ask FixBot

    Add Comment

  2. Nabi Big Tab HD24 Screen Replacement: step 2, image 1 of 1
    • Use your fingers to carefully peel them off the device to reveal the screws underneath.

    Ask FixBot

    Add Comment

  3. Nabi Big Tab HD24 Screen Replacement: step 3, image 1 of 1
    • Use a Phillips #1 screwdriver to remove the 9.5 mm screw in each of the four corners.

    Ask FixBot

    Add Comment

  4. Nabi Big Tab HD24 Screen Replacement: step 4, image 1 of 1
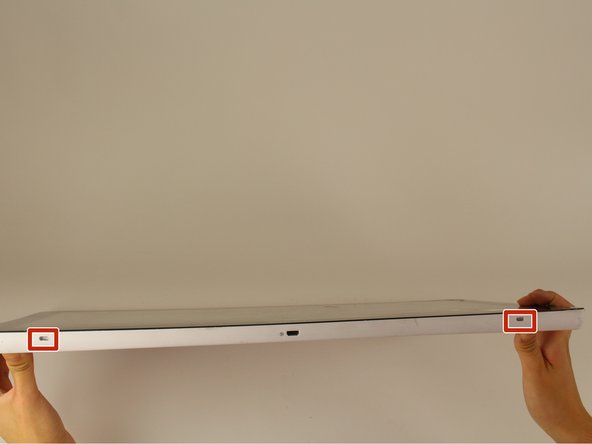
    • Flip the tablet over such that the screen is facing upwards.

    • Locate the the 4 small openings on the sides of the tablet.

    • There should be 2 on the bottom of the tablet, 1 on each side of the tablet viewing it from the front as if you were using it.

    • Do not confuse the openings with the charging port or the USB ports. The openings will be labelled with an icon of a small fan, the Nabi logo.

    Ask FixBot

    Add Comment

  5. Nabi Big Tab HD24 Screen Replacement: step 5, image 1 of 1
    • Insert a metal spudger into one of the openings and carefully pop the device open by applying a steady downward force.

    • Repeat for the other three openings.

    Ask FixBot

    Add Comment

  6. Nabi Big Tab HD24 Screen Replacement: step 6, image 1 of 2 Nabi Big Tab HD24 Screen Replacement: step 6, image 2 of 2
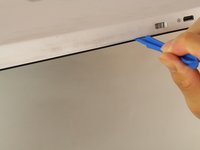
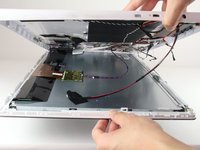
    • Flip the device over so that the back assembly is facing you.

    • Use a plastic opening tool to carefully pry open the device from its hinges.

    • Take care when opening the device as there are cables running internally that are connected to both the front and the back assemblies.

    Ask FixBot

    Add Comment

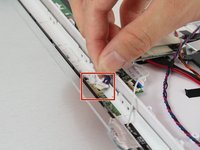
  7. Nabi Big Tab HD24 Screen Replacement: step 7, image 1 of 2 Nabi Big Tab HD24 Screen Replacement: step 7, image 2 of 2
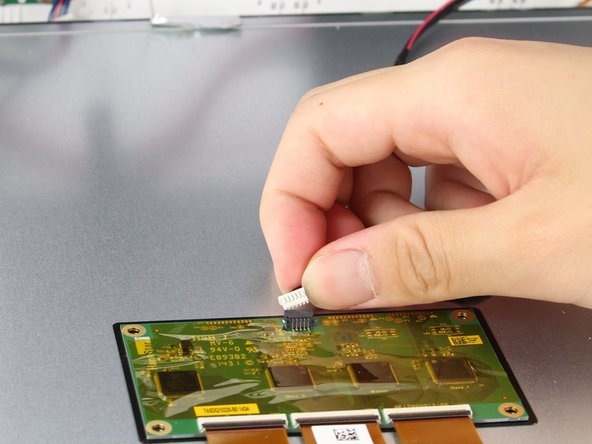
    • Locate the white port that connects the back panel to the circuit board on the back of the display.

    • Carefully pull the plastic connector straight out.

    Ask FixBot

    Add Comment

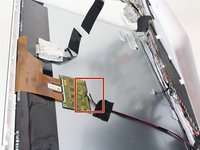
  8. Nabi Big Tab HD24 Screen Replacement: step 8, image 1 of 1
    • Be careful of the aluminum foil tape, as it can easily rip.

    • Carefully lift up the aluminum foil tape with your fingers so that the ribbon connector reveals itself.

    • Do not try to pull the ribbon cables off the screen as there is a plastic piece surrounding the ribbon cables glued onto the metal display.

    Ask FixBot

    Add Comment

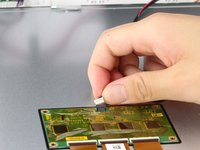
  9. Nabi Big Tab HD24 Screen Replacement: step 9, image 1 of 1
    • Firmly press the two switches located on the sides of the connector and disconnect the connector from its connections.

    • Leave the connector disconnected but still intact with the metal display.

    Ask FixBot

    Add Comment

  10. Nabi Big Tab HD24 Screen Replacement: step 10, image 1 of 1
    • Use a plastic opening tool and carefully push it underneath the grey plastic case surrounding the ribbon cable.

    • Apply a downward force to carefully peel the grey plastic off of the metal display.

    Ask FixBot

    Add Comment

  11. Nabi Big Tab HD24 Screen Replacement: step 11, image 1 of 1
    • Locate the two cables running on both sides of the device found at the bottom side of the screen.

    Ask FixBot

    Add Comment

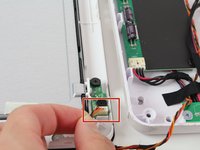
  12. Nabi Big Tab HD24 Screen Replacement: step 12, image 1 of 2 Nabi Big Tab HD24 Screen Replacement: step 12, image 2 of 2
    • Carefully grab both sides of the white plastic piece with your fingers and gently pull directly upward.

    • Do not pull from the red and black cable as it is not very sturdy and may come undone from the connector.

    Ask FixBot

    Add Comment

  13. Nabi Big Tab HD24 Screen Replacement, Screen: step 13, image 1 of 1
    • Take out the two black 4.5 mm screws with your Phillips # 1 screwdriver and remove the circuit board.

    • You want to remove this circuit board so you can remove the silver screw that the circuit board is blocking.

    Ask FixBot

    Add Comment

  14. Nabi Big Tab HD24 Screen Replacement: step 14, image 1 of 2 Nabi Big Tab HD24 Screen Replacement: step 14, image 2 of 2
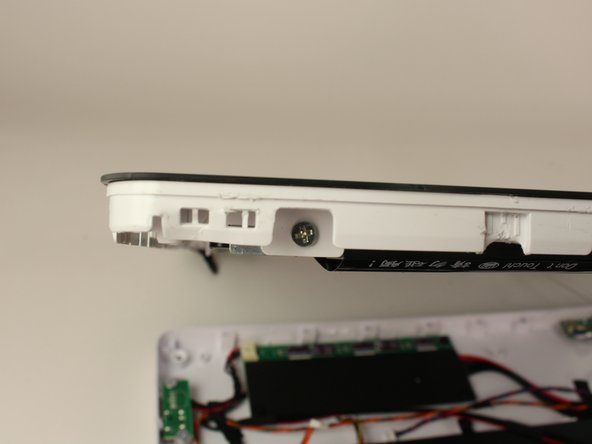
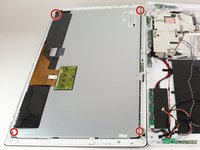
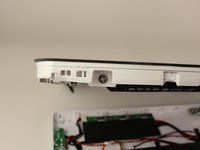
    • Remove each of the 6.5 mm silver screws located on the edges of the display's corners.

    Ask FixBot

    Add Comment

  15. Nabi Big Tab HD24 Screen Replacement: step 15, image 1 of 1
    • Use a heating gun to heat up the side up the side of the screen you want to pry open.

    • Evenly distribute the heat around the frame of the screen for optimal results.

    • Do not focus the heat on one specific point for long periods of time as this may cause the glass to crack.

    Ask FixBot

    Add Comment

  16. Nabi Big Tab HD24 Screen Replacement: step 16, image 1 of 1
    • Place several iOpeners along the sides of the screen that you are not heating up with the heat gun.

    • Spread them out around the device so the heat can evenly melt the adhesive on the screen.

    • Be careful when handling the iOpeners as they are hot and contain a gel that can burn skin if exposed from the packet.

    Ask FixBot

    Add Comment

  17. Nabi Big Tab HD24 Screen Replacement: step 17, image 1 of 1
    • Use the jimmy and stick it in between the screen and the frame and wiggle the jimmy around to try and loosen the glass screen from the frame.

    • It may take some strength and patience since the adhesive is still very sticky.

    Ask FixBot

    Add Comment

  18. Nabi Big Tab HD24 Screen Replacement: step 18, image 1 of 1
    • Once you create a space between the screen and the frame stick an i fixit pick in the crack to keep the crack open.

    • Keep inserting more picks every time you create some space, so eventually the screen will be completely separated from the frame.

    • Use the plastic opening tool to carefully remove the screen from the frame.

    Ask FixBot

    Add Comment

Conclusion

To reassemble your device, follow these instructions in reverse order.

Cancel: I did not complete this guide.

2 other people completed this guide.

Kelvin Cao

Member since: 10/06/16

449 Reputation

3 Guides authored

Team

Cal Poly, Team 4-1, Livingston Fall 2016 Member of Cal Poly, Team 4-1, Livingston Fall 2016

CPSU-LIVINGSTON-F16S4G1

4 Members

14 Guides authored

6 Guide Comments

Where do you get parts for this thing tho

Nicholas Jones - Reply Share

Any luck finding screen

daymiel Moore - Reply Share

Where can you get this particular replacement screen?

Jay - Reply Share

did you ever find a screen?

LushLeah - Reply Share

Im looking for a screen too. Any luck on a referral?

Katherine Champion - Reply Share

Add Comment

View Statistics:

Past 24 Hours: 0

Past 7 Days: 10

Past 30 Days: 31

All Time: 3,997