Introduction
If the laser does not turn on and the batteries are in good condition, then this problem may be because of a faulty wire. In order to replace the faulty wire causing your N-Strike Nite Finder EX-3 problems, follow the steps in this guide.
What you need
-
-
-
Place the blaster upside down on the table, and remove the screw in the bottom of the handle.
-
Remove the battery door and take the batteries out.
 Ask FixBot
-
-
-
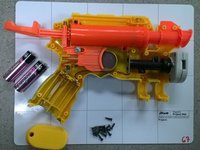
Set the blaster on its side with the screws facing up (the blaster will be placed on its left side). Remove all 14 phillips head, 8.2 mm screws and set them aside.
-
Lift the side of the blaster to expose its internal parts.
-
-
-
-
Visually inspect all the wires in order to find the break, fray, or any other problem.
-
Locate the end connections of the affected wire.
-
-
-
Use a hot soldering iron to melt the solder at one end of the wire until the wire can be pulled free from the connection.
-
Repeat on the other end of the connection to remove the wire from the blaster.
-
(End points marked on image are for the black wire)
-
-




To reassemble your device, follow these instructions in reverse order.

Team

Michigan Tech, Team 5-8, Lauer Spring 2014 Member of Michigan Tech, Team 5-8, Lauer Spring 2014
MTU-LAUER-S14S5G8
3 Members
108 Guides authored
