
Motorola Moto G7 Plus Front Camera Replacement

Jackson Anthony All and 2 other contributors
Last updated on May 15, 2023
Views: 1.3K
View statistics:
- Past 24 Hours:
- 2
- Past 7 Days:
- 19
- Past 30 Days:
- 67
- All Time:
- 1,328
Comments: 7
7 comments on steps.
Completed: 0 1
No one has marked this guide "completed." Will you be the first?
1 person has marked this guide "completed." It's you — great job!
Favorites: 0 1
No one has favorited (and subscribed to) this guide. Will you be the first?
1 person has favorited (and subscribed to) this guide — and that's you!
Needs Better Images
Better photos will improve this guide. Help out by taking, editing, or uploading new ones!
Better Introduction
Improve this guide by completing or revising its introduction.
Introduction
Go to step 1 ↓In this guide, we will show you how to remove the front camera for this device. We recommend that you have a tray or a magnetic pad to place the several small t5 screws which will be removed because they are easy to lose. Next, it is recommended that you have an iFixIt tool kit or at least a spudger, a Torx T5 screwdriver, and a pick to help with removing the components of this device.
Before you begin, download the Rescue and Smart Assistant app to backup your device and diagnose whether your problem is software or hardware related.
What you need
Tools
-
-
Spudger4.9


-
-
-
Insert an opening tool pick under the screen, starting at the top of the phone.
-
Slide the pick around the entire perimeter of the display to break the adhesive.
-
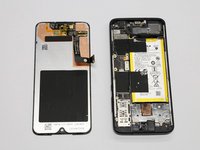
Once enough adhesive has been removed, you should be able to separate the screen by gently lifting it from the left side of the phone.
 Ask FixBot
-
-
-
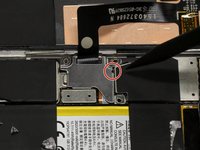
Remove the three 2.7 mm screws that surround the base of the display cable using the Torx T5 screwdriver.
-
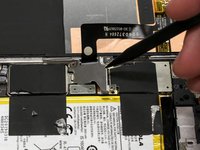
Gently remove the metal piece that covers the base of the display cable.
-
-
-
-
Underneath this metal piece is the base of the cable. Use a spudger to vertically lift the connection out of its port.
-
-
-
-
-
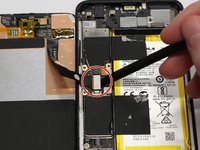
Disconnect the three highlighted connectors as seen in the diagram using the opening tools.
-
-
-
Pry the motherboard away from the frame of the phone using the opening tools.
-
Remove the camera from the motherboard.
-






To reassemble your device, follow these instructions in reverse order.

Team

The Citadel Military College of South Carolina, Team S1-G11, Eggleston Spring 2021 Member of The Citadel Military College of South Carolina, Team S1-G11, Eggleston Spring 2021
CMCSC-EGGLESTON-S21S1G11
3 Members
36 Guides authored
