
Free Shipping on Domestic Orders $75+

Milwaukee M12 2951-20 Back Panel Removal

What you need

  1. Milwaukee M12 2951-20 Back Panel Removal, Battery: step 1, image 1 of 3 Milwaukee M12 2951-20 Back Panel Removal, Battery: step 1, image 2 of 3 Milwaukee M12 2951-20 Back Panel Removal, Battery: step 1, image 3 of 3
    • Unplug the AC power cord from the side of the radio.

    • Press the release buttons on the M12 battery pack and slide it out of the battery bay.

    • CAUTION: Never open the device with the battery installed or the power cord connected.

    Ask FixBot

    Add Comment

  2. Milwaukee M12 2951-20 Back Panel Removal: step 2, image 1 of 3 Milwaukee M12 2951-20 Back Panel Removal: step 2, image 2 of 3 Milwaukee M12 2951-20 Back Panel Removal: step 2, image 3 of 3
    • Use a Phillips #1 screwdriver to remove the 15mm screw securing the battery cover.

    • Remove the cover and set it aside.

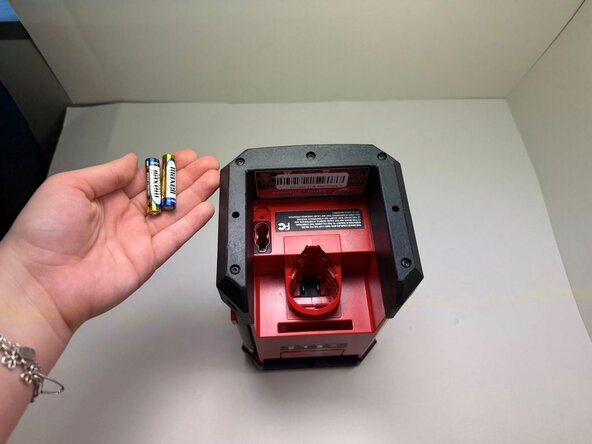
    • Remove the two AAA batteries from the compartment.

    Ask FixBot

    Add Comment

  3. Milwaukee M12 2951-20 Back Panel Removal, Back Panel: step 3, image 1 of 2 Milwaukee M12 2951-20 Back Panel Removal, Back Panel: step 3, image 2 of 2
    • Use a TR10 Torx screwdriver to remove the nine 14 mm screws securing the bottom housing.

    Ask FixBot

    Add Comment

  4. Milwaukee M12 2951-20 Back Panel Removal: step 4, image 1 of 3 Milwaukee M12 2951-20 Back Panel Removal: step 4, image 2 of 3 Milwaukee M12 2951-20 Back Panel Removal: step 4, image 3 of 3
    • Insert a plastic spudger between the base and the bottom housing.

    • Repeat on all sides until the housing is released.

    • You may feel some resistance due to the protective rubber gasket that keeps the radio weather-resistant.

    Ask FixBot

    Add Comment

  5. Milwaukee M12 2951-20 Back Panel Removal: step 5, image 1 of 2 Milwaukee M12 2951-20 Back Panel Removal: step 5, image 2 of 2
    • Turn the radio over to access the top housing.

    • Use a TR10 Torx screwdriver to remove the nine 14 mm screws securing the top housing.

    • Keep the screws in a magnetic tray or a safe spot, as they are specific to this housing.

    Ask FixBot

    Add Comment

  6. Milwaukee M12 2951-20 Back Panel Removal: step 6, image 1 of 2 Milwaukee M12 2951-20 Back Panel Removal: step 6, image 2 of 2
    • Insert an opening tool into the seam between the front and back plastic casings.

    • Start at the bottom corner and slowly slide the tool upward to release the top housing.

    • You may feel some resistance due to the protective rubber gasket that keeps the radio weather-resistant.

    Ask FixBot

    Add Comment

  7. Milwaukee M12 2951-20 Back Panel Removal: step 7, image 1 of 1
    • Use a TR10 screwdriver to remove thirteen 14mm screws securing the back panel.

    Ask FixBot

    Add Comment

  8. Milwaukee M12 2951-20 Back Panel Removal: step 8, image 1 of 1
    • Gently lift the back panel away from the front assembly.

    • CAUTION: Do not pull the panel away quickly. There are internal wires (speaker and antenna cables) connecting the back panel to the main circuit board.

    Ask FixBot

    Add Comment

Conclusion

To reassamble your device, follow these instructions in reverse order.

Pro Tip: When closing the case, make sure the rubber gasket is seated correctly in its groove to maintain the radio's water resistance.

Cancel: I did not complete this guide.

One other person completed this guide.

0 Guide Comments

Add Comment

View Statistics:

Past 24 Hours: 0

Past 7 Days: 5

Past 30 Days: 22

All Time: 127