Introduction
How to access and remove the motherboard of the Martian Smartwatch
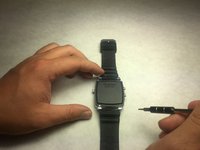
What you need
-
-
Carefully lift the back plate off the watch. You will notice a lithium battery and rubber gasket attached to the back plate.
-
-
-
Using the plastic removal tool, pry the battery from the backing plate. The battery is simply attached with glue.
-
-
-
-
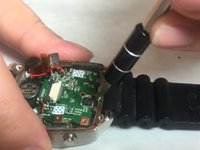
Desolder the battery connections from the motherboard. Learn how to solder components here!
-
-
Tool used on this step:Tweezers$4.99
-
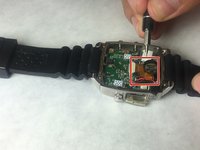
Use a spudger or tweezers to remove a white sticker that covers a Phillips head screw.
-
-
-
Use ESD safe tweezers to remove the gold ribbon cable.
-
This will expose a second 5.2mm Phillips head screw that can be removed with a PH00 screwdriver.
-
-
-
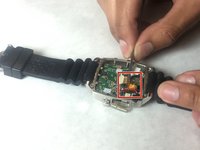
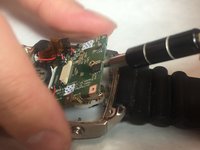
Use a spudger to gently pry on the motherboard towards the top of the watch, being towards the 12 o'clock position to loosen the motherboard.
-
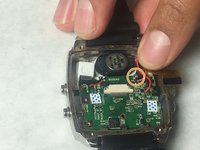
You can now access the parts and pieces on the bottom of, and below the motherboard.
-


To reassemble your device, follow these instructions in reverse order.
Team

IUPUI, Team 3-3, Baechle Fall 2016 Member of IUPUI, Team 3-3, Baechle Fall 2016
IUPUI-BAECHLE-F16S3G3
4 Members
8 Guides authored