
Makita XPH01 Forward/Reverse Switch Replacement

Eric Herwatt and 2 other contributors
Last updated on Nov 30, 2016
Views: 7K
View statistics:
- Past 24 Hours:
- 2
- Past 7 Days:
- 20
- Past 30 Days:
- 120
- All Time:
- 7,027
Comments: 0
No one has left comments on this guide. Will you be first?
Go to guide commentsCompleted: 4 5
4 people have marked this guide "completed." Will you be next?
5 people have marked this guide "completed." Including you — great job!
Favorites: 0 1
No one has favorited (and subscribed to) this guide. Will you be the first?
1 person has favorited (and subscribed to) this guide — and that's you!
Introduction
Go to step 1 ↓This guide will show you the necessary steps to replace the forward/reverse switch. It shows how to remove the battery and the outer casing, in order to locate the forward/reverse switch on the drill.
What you need
Tools

-
-
-
Hold the drill upright.
-
Place your finger on the white battery-release button.
 Ask FixBot
-
-
-
Slide the battery forward while pressing down on the white battery-release button.
-
-
-
-
-
Hold the drill upright with the back panel facing you.
-
Unscrew the two 18 mm screws from the back panel using a Phillips PH2 screwdriver.
-
-
-
Apply slight pressure to the sides of the backplate and pull away from the drill.
-
-
-
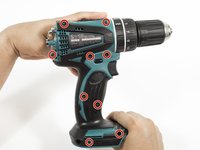
Unscrew the nine 18 mm screws from the outer casing using a Phillips PH2 screwdriver.
-
-
-
-
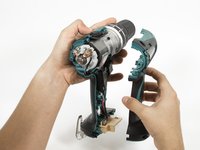
Apply slight pressure to the sides of the outer casing and pull away from the drill.
-
-
-
-
-
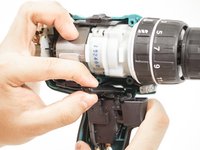
Grab onto the forward/reverse switch.
-
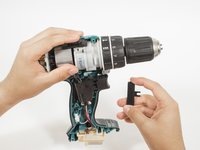
Gently pull the forward/reverse switch to separate it from the trigger assembly.
-








To reassemble your device, follow these instructions in reverse order.
Cancel: I did not complete this guide.
4 other people completed this guide.

Team

Cal Poly, Team 15-4, Livingston Fall 2016 Member of Cal Poly, Team 15-4, Livingston Fall 2016
CPSU-LIVINGSTON-F16S15G4
4 Members
84 Guides authored
