This guide has more recent changes. Switch to the latest unverified version.

Magimix Toaster Vision heating element replacement

PierreGlg and one other contributor
Last updated on Sep 2, 2026
Views: 279
View statistics:
- Past 24 Hours:
- 4
- Past 7 Days:
- 47
- Past 30 Days:
- 173
- All Time:
- 279
Comments: 0
No one has left comments on this guide. Will you be first?
Go to guide commentsCompleted: 0 1
No one has marked this guide "completed." Will you be the first?
1 person has marked this guide "completed." It's you — great job!
Favorites: 0 1
No one has favorited (and subscribed to) this guide. Will you be the first?
1 person has favorited (and subscribed to) this guide — and that's you!
Community-Contributed Guide
An awesome member of our community made this guide. It was not created by iFixit staff.
Needs More Images
A few more images would make this guide's procedures crystal clear.
Missing Details
Some of this guide's details are missing. Help users by adding tools, difficulty, or time.
Introduction
Go to step 1 ↓Please note that the heating elements are different between the upper and lower positions. Ensure you obtain the correct heating element.
The upper heating elements are marked 'U' on their base. The lower heating elements are marked 'L'.
-
-
-
Remove the crumb tray
-
Removal of the bottom screws
-
Turn the device over
-
Remove the 3 Phillips screws under each of the side panels
 Ask FixBot
-
-
-
Removal of the top screws
-
Unlock the side glass panels
-
Remove the top screws
-
The side panel is now unlocked and can be removed by sliding it upward
-
-
-
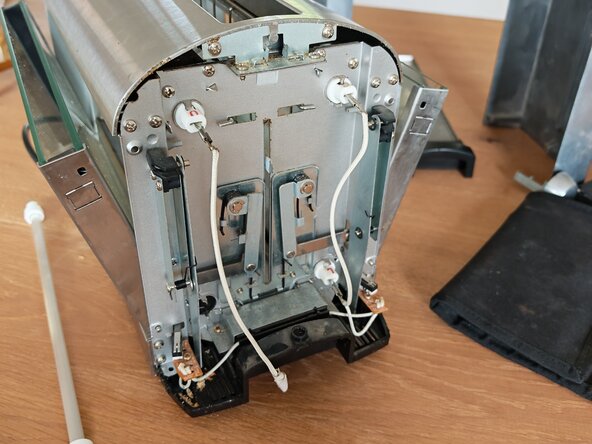
The ends of the four resistances appear on each side.
-
Unplug the terminals on each side of the resistance.
-
The resistance is held in place on the frame by tabs. Carefully spread the 2 tabs on each side of the resistance. Remove the resistance from its housing by sliding it out.
-
If the resistance is broken inside the device, remove all the pieces.
-
-
-
Insert the new resistance by sliding it into its slot from either side.
-
Return the tabs to their position on each side.
-
Connect the power wires on each side.
-
-
-
-
Install the cheeks by sliding them from top to bottom.
-
Reinstall the upper screws.
-
Reinstall the lower screws.
-
-




To reassemble your device, follow the instructions in reverse order.

