
Macintosh Powerbook 5300cs Keyboard Replacement

Ronan and 9 other contributors
Last updated on Dec 21, 2021
Views: 1.4K
View statistics:
- Past 24 Hours:
- 4
- Past 7 Days:
- 18
- Past 30 Days:
- 96
- All Time:
- 1,399
Comments: 2
2 comments on steps.
Completed: 1 2
1 person has marked this guide "completed." Will you be next?
2 people have marked this guide "completed." Including you — great job!
Favorites: 2 3
2 people have favorited (and subscribed to) this guide. Will you be next?
3 people have favorited (and subscribed to) this guide — including you!
Needs Better Images
Better photos will improve this guide. Help out by taking, editing, or uploading new ones!
Introduction
Go to step 1 ↓The Macintosh Powerbook 5300cs series was produced by Apple beginning in 1995.
Should you need to repair or replace the keyboard, this repair guide shows how to insert and remove the keyboard.
Repairing or replacing the keyboard will likely resolve any issues found with keyboard user input not registering on the machine.
There are no special skills required for this repair beyond familiarity with Apple products, including how to disconnect and reconnect the keyboard connector ribbon.
Tools needed include a Torx #9 screwdriver to remove the three .84 in. screws on the back of the laptop.
What you need
Tools

-
-
-
The battery compartment is located in the front-right side of the laptop.
 Ask FixBot
-
-
-
To insert the battery, gently slide it into the compartment until it clicks in place.
-
To remove, slide the button highlighted in the red rectangle to the right to release the battery and slide it from the compartment.
-
-
-
-
-
With the laptop upside down and with the battery removed, use a Torx #9 screw driver to remove the three .84 in. screws shown.
-
-
-
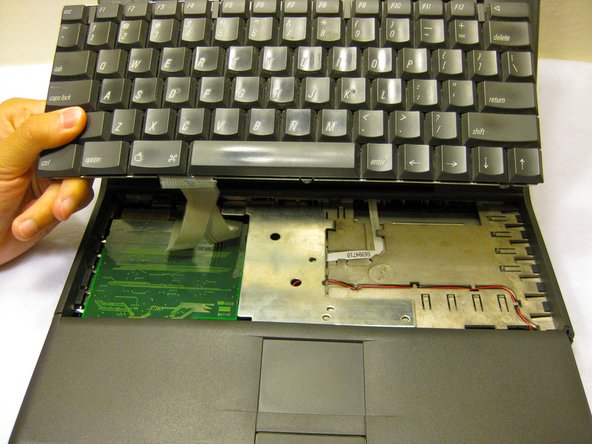
Carefully pull up on the front of the keyboard to pop it out from the case.
-
Then slide the back out so the keyboard becomes nearly free.
-
-
-
-
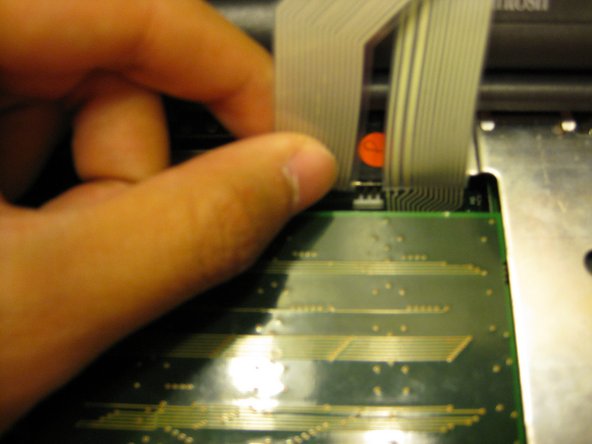
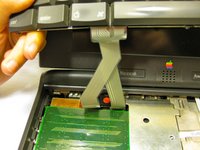
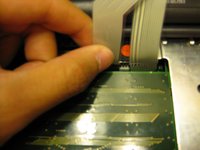
Disconnect the ribbon that is connecting the keyboard to the rest of the computer.
-
Pull the keyboard out and repair or replace as needed.
-
-



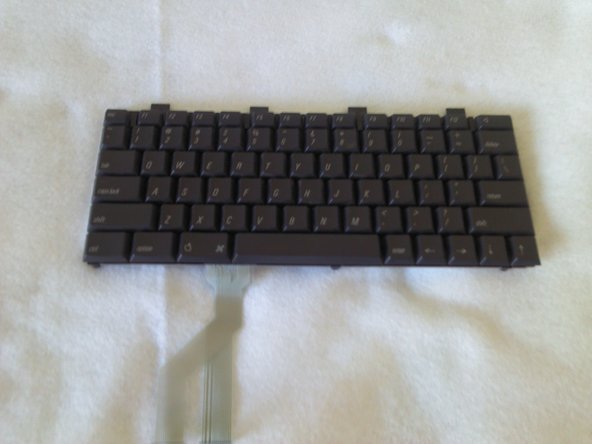
To reassemble your device, follow these instructions in reverse order.
Cancel: I did not complete this guide.
One other person completed this guide.

Team

Cal Poly, Team 6-1, Regan Fall 2011 Member of Cal Poly, Team 6-1, Regan Fall 2011
CPSU-REGAN-F11S6G1
4 Members
72 Guides authored

