MacBook Pro 15" Unibody Early 2011 RAM Replacement

Walter Galan and 8 other contributors
Last updated on Mar 21, 2018
Views: 145K
View statistics:
- Past 24 Hours:
- 5
- Past 7 Days:
- 34
- Past 30 Days:
- 180
- All Time:
- 144,669
Comments: 70
67 comments on steps, 3 guide comments.
Go to guide commentsCompleted: 216 217
216 people have marked this guide "completed." Will you be next?
217 people have marked this guide "completed." Including you — great job!
Favorites: 87 88
87 people have favorited (and subscribed to) this guide. Will you be next?
88 people have favorited (and subscribed to) this guide — including you!
Featured Guide
This guide has been found to be exceptionally cool by the iFixit staff.
Introduction
Go to step 1 ↓Accessing the RAM in this computer is straightforward and requires minimal disassembly.
What you need
Fix Kit
This kit contains all the parts and tools needed to complete this guide.

Parts


Tools
-
Spudger4.9


-
-
-
Remove the following ten screws securing the lower case to the upper case:
-
Three 13.5 mm (14.1 mm) Phillips screws.
-
Seven 3 mm Phillips screws.
 Ask FixBot
-
-
-
Using both hands, lift the lower case near the vent to pop it off two clips securing it to the upper case.
-
Remove the lower case and set it aside.
-
-
-
-
-
Use the edge of a spudger to pry the battery connector upwards from its socket on the logic board.
-
-
-
Bend the battery cable slightly away from its socket on the logic board so it does not accidentally connect itself while you work.
-
-
-
-
-
-
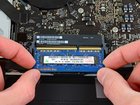
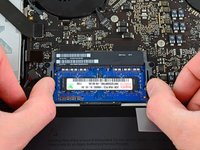
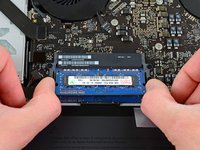
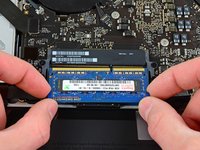
Release the tabs on each side of the RAM chip by simultaneously pushing each tab away from the RAM module.
-
After the RAM chip has popped up, pull it straight out of its socket.
-
-


To reassemble your device, follow these instructions in reverse order.
Cancel: I did not complete this guide.
216 other people completed this guide.

3 Guide Comments
Hi,
thanks for the guide, I plan to upgrade my 15” early 2011 2.3 GHz MBP today. I am changing my 750GB HDD to a Firecuda 2TB SSHD (can’t afford the SSD I wish I could get into currently), and I plan to upgrade my RAM from the 8GB to 16GB as well to give my 2011 a little sprucing up. I have performed a full time machine backup to my 2TB WD passport pro external HD (It’s set up as a RAID 0 device and has a thunderbolt 1 interface, which I was glad for bc a USB 2.0 interface would have taken like 3 days or blown up my computer.
My questions are:
1. Is there a preferred order to switch out the internal hard drive and memory? Do I need to switch out one first then boot up and shutdown, or can you safely upgrade the HD and RAM at the same time?
2. Is there anything else I need to do before upgrading the HD besides a time machine backup? Do I need a “bootable OS?” Whatever that is? Thanks!
