Free Shipping on Domestic Orders $75+

MacBook Pro 15" Retina Display Mid 2015 I/O Board Cable (Top) Replacement

What you need

  1. MacBook Pro 15" Retina Display Mid 2015 I/O Board Cable (Top) Replacement, Lower Case: step 1, image 1 of 1
    • Remove the following P5 pentalobe screws securing the lower case to the MacBook Pro:

    • Eight 3.1 mm

    • Two 2.3 mm

    Ask FixBot
  2. MacBook Pro 15" Retina Display Mid 2015 I/O Board Cable (Top) Replacement: step 2, image 1 of 2 MacBook Pro 15" Retina Display Mid 2015 I/O Board Cable (Top) Replacement: step 2, image 2 of 2
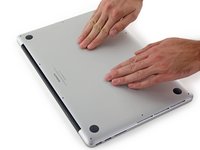
    • Lifting from the edge nearest the clutch cover, lift the lower case off the MacBook Pro.

    Ask FixBot
  3. MacBook Pro 15" Retina Display Mid 2015 I/O Board Cable (Top) Replacement: step 3, image 1 of 3 MacBook Pro 15" Retina Display Mid 2015 I/O Board Cable (Top) Replacement: step 3, image 2 of 3 MacBook Pro 15" Retina Display Mid 2015 I/O Board Cable (Top) Replacement: step 3, image 3 of 3
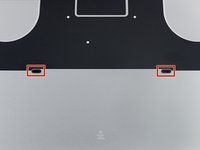
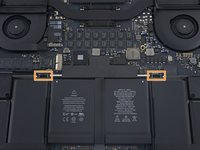
    • The lower case has two plastic pegs (red) that fit into plastic clips in the upper case (orange).

    • During reassembly, gently push down the center of the lower case to reattach the case to its two plastic clips.

    Ask FixBot
  4. MacBook Pro 15" Retina Display Mid 2015 I/O Board Cable (Top) Replacement, Battery Connector: step 4, image 1 of 1
    • Peel back the sticker covering the battery connector.

    Ask FixBot
  5. MacBook Pro 15" Retina Display Mid 2015 I/O Board Cable (Top) Replacement: step 5, image 1 of 3 MacBook Pro 15" Retina Display Mid 2015 I/O Board Cable (Top) Replacement: step 5, image 2 of 3 MacBook Pro 15" Retina Display Mid 2015 I/O Board Cable (Top) Replacement: step 5, image 3 of 3
    • Gently lift each side of the battery connector to pry the connector out of its socket on the logic board.

    • Bend the connector back toward the battery, ensuring that the battery connector doesn't accidentally make contact with the logic board.

    Ask FixBot
  6. MacBook Pro 15" Retina Display Mid 2015 I/O Board Cable (Top) Replacement, I/O Board Cable (Top): step 6, image 1 of 1
    • Remove the four 2.2 mm T5 Torx screws securing the I/O board cable connector covers.

    Ask FixBot
  7. MacBook Pro 15" Retina Display Mid 2015 I/O Board Cable (Top) Replacement: step 7, image 1 of 2 MacBook Pro 15" Retina Display Mid 2015 I/O Board Cable (Top) Replacement: step 7, image 2 of 2
    • Remove the left connector cover.

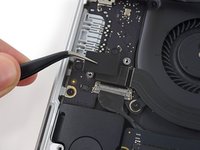
    • Use the flat end of a spudger to pry the left end of the I/O board cable up from its socket on the logic board.

    Ask FixBot
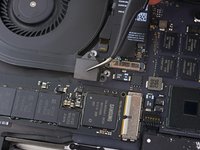
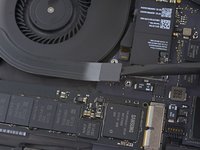
  8. MacBook Pro 15" Retina Display Mid 2015 I/O Board Cable (Top) Replacement: step 8, image 1 of 2 MacBook Pro 15" Retina Display Mid 2015 I/O Board Cable (Top) Replacement: step 8, image 2 of 2
    • Remove the right connector cover.

    • Use the flat end of a spudger to pry the right end of the I/O board cable up from its socket on the logic board.

    Ask FixBot
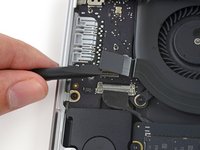
  9. MacBook Pro 15" Retina Display Mid 2015 I/O Board Cable (Top) Replacement: step 9, image 1 of 1
    • Peel the I/O board cable up from the adhesive securing it to the fan.

    • Remove the cable.

    Ask FixBot
Conclusion

To reassemble your device, follow these instructions in reverse order.

3 other people completed this guide.

Andrew Optimus Goldheart

Member since: 10/17/09

514,907 Reputation

407 Guides authored

Team

iFixit Member of iFixit

Staff

123 Members

25,719 Guides authored

0 Guide Comments

Add Comment

View Statistics:

Past 24 Hours: 2

Past 7 Days: 32

Past 30 Days: 170

All Time: 11,794