Introduction
Follow this guide to replace the logic board in a MacBook Neo.
The logic board contains the processor, system memory (aka RAM), and storage. If any of these components is defective, the entire logic board needs to be replaced.
For your safety, discharge the battery below 25% before disassembly. This reduces the risk of a dangerous fire if the battery is accidentally damaged during the repair. If your battery is swollen, take appropriate precautions and replace it using this guide.
What you need
-
-
-
Fully shut down the MacBook and close the lid. Keep the lid closed until you've physically disconnected the battery.
-
Disconnect any cables and accessories.
-
Flip the computer upside‑down on a clean work surface.
 Ask FixBot
-
-
-
-
-
Use a P5 pentalobe driver to remove the eight screws securing the bottom cover:
-
Six 4.1 mm‑long screws
-
Two 4.5 mm‑long screws
-
-
-
Use your fingers to lift the top right corner of the bottom cover, near the USB‑C ports, until the clip along the right edge releases.
-
Repeat this process on the left side to release its clip.
-
-
-
-
-
Use a Torx Plus 3IP driver to remove the two 1.7 mm‑long screws securing the battery connector cover.
-
-
-
Use the flat end of a spudger to pry up and disconnect the battery press connector.
-
-
-
-
-
Use a Torx Plus 3IP driver to remove the 1.7 mm‑long screw securing the antenna connector cover.
-
-
-
-
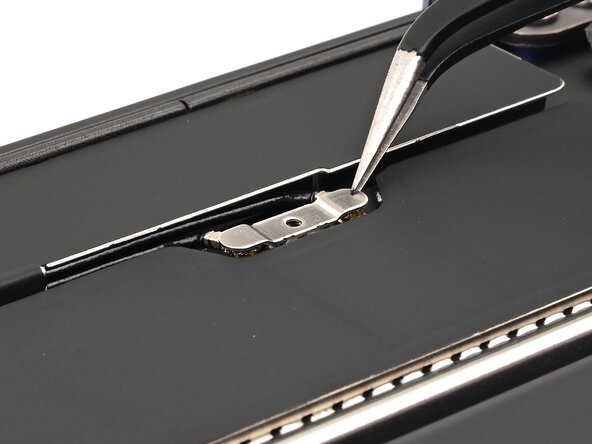
Insert one arm of angled tweezers under the metal neck of one of the antenna coaxial connectors and lift straight up to disconnect it.
-
Repeat the process to disconnect the second antenna cable.
-
-
-
Use a Torx Plus 3IP driver to remove the two 1.7 mm‑long screws securing the USB ports connector cover.
-
-
-
Use the flat end of a spudger to disconnect the USB ports press connector.
-
-
-
Insert the point of a spudger beneath the right speaker connector, located on the left side of the logic board directly above the battery, and pry it straight up to disconnect it.
-
-
-
Repeat to disconnect the headphone jack and left speaker press connectors, located on the opposite end of the logic board.
-
-
-
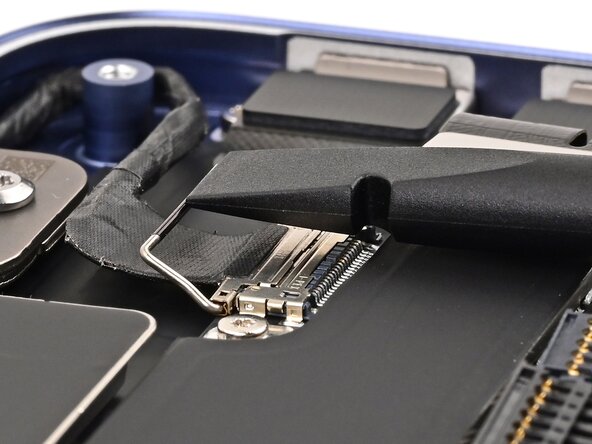
Use the flat end of a spudger to gently push under the metal buckle of the display cable connector, located on the top‑right corner of the logic board, to unclip it.
-
-
-
Grab the buckle and cable together and gently pull the connector straight out of its socket.
-
-
-
Repeat this procedure to disconnect the camera cable, located on the left edge of the logic board.
-
Grip the buckle and insert the connector fully into its socket. Realign it as necessary but don't try to force it in.
-
Flip the buckle over the socket and press it down until it clicks into place.
-
-
-
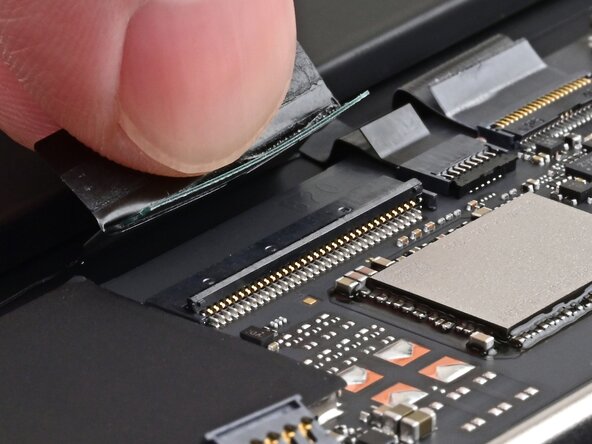
Use tweezers to peel up the black sticker over the keyboard cable, just until it comes off the socket on the board. Make sure it stays attached to the cable.
-
-
-
Use the flat end of a spudger to flip up the hinged locking flap on the keyboard cable ZIF connector.
-
-
-
Use tweezers or your fingers to gently grip the keyboard cable by its cover and slide the cable out of its socket.
-
-
-
Repeat the procedure to disconnect the microphone and trackpad cable ZIF connectors, adjacent to the keyboard cable connector.
-
-
-
Disconnect the Touch ID cable ZIF connector, located on the left edge of the logic board.
-
-
-
Use a Torx Plus 3IP driver to remove the five 1.7 mm‑long screws securing the logic board.
-
-
-
Carefully lift the logic board around the cables and out of the MacBook.
-
-
-
Keyboard, microphone, and trackpad cables
-
Audio board cable
-
USB ports cable
-
Touch ID board cable (if present)
-
-








Compare the new replacement part to the original part—you may need to remove protective covers from the new part before you install it.
To reassemble the MacBook, follow these instructions in reverse order.
Take your e-waste to an R2 or e-Stewards certified recycler.
Repair didn’t go as planned? Try some basic troubleshooting, or ask our Answers community for help.

