Free Shipping on Domestic Orders $75+

MacBook Air 13" Mid 2012 I/O Board Cable Replacement

What you need

    1. MacBook Air 13" Mid 2012 I/O Board Cable Replacement, Lower Case: step 1, image 1 of 1
      Tool used on this step:
      P5 Pentalobe Screwdriver Retina MacBook Pro and Air
      $5.99
      Buy
      • Before proceeding, power down your MacBook. Close the display and lay it on a soft surface, top-side down.

      • Use a P5 Pentalobe driver to remove ten screws securing the lower case, of the following lengths:

      • Two 9 mm screws

      • Eight 2.6 mm screws

      Ask FixBot

      Add Comment

    2. MacBook Air 13" Mid 2012 I/O Board Cable Replacement: step 2, image 1 of 1
      • Wedge your fingers between the display and the lower case and pull upward to pop the lower case off the Air.

      • Remove the lower case and set it aside.

      Ask FixBot

      Add Comment

    1. MacBook Air 13" Mid 2012 I/O Board Cable Replacement, Battery Connector: step 3, image 1 of 2 MacBook Air 13" Mid 2012 I/O Board Cable Replacement, Battery Connector: step 3, image 2 of 2
      • As a precaution against accidental discharge or shock, disconnect the battery connector from the logic board.

      • Grab the clear plastic pull tab attached to the battery connector and pull it toward the front edge of the Air to disconnect the battery from the logic board.

      • Be sure to pull the connector horizontally toward the battery, and not straight up from the Air, or you may damage the socket on the logic board.

      Ask FixBot

      Add Comment

    1. MacBook Air 13" Mid 2012 I/O Board Cable Replacement, I/O Board Cable: step 4, image 1 of 1
      • Use the flat end of a spudger to pry the I/O board cable connector upward out of its socket on the I/O board.

      Ask FixBot

      Add Comment

    2. MacBook Air 13" Mid 2012 I/O Board Cable Replacement: step 5, image 1 of 1
      • Carefully peel the I/O board cable from the top of the fan.

      Ask FixBot

      Add Comment

    3. MacBook Air 13" Mid 2012 I/O Board Cable Replacement: step 6, image 1 of 2 MacBook Air 13" Mid 2012 I/O Board Cable Replacement: step 6, image 2 of 2
      • The following connector has an especially deep socket. Use care when disconnecting it.

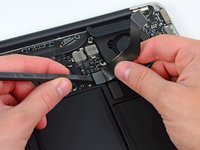
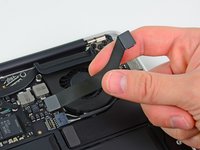
      • While gently pulling the I/O board cable upward near its connection to the logic board, use the tip of a spudger to pry upward on alternating sides of the connector to help "walk" it out of its socket.

      • Remove the I/O board cable.

      Ask FixBot

      Add Comment

Conclusion

To reassemble your device, follow these instructions in reverse order.

Cancel: I did not complete this guide.

11 other people completed this guide.

Andrew Optimus Goldheart

Member since: 10/17/09

515,529 Reputation

406 Guides authored

Team

iFixit Member of iFixit

Staff

123 Members

83,395 Guides authored

0 Guide Comments

Add Comment

View Statistics:

Past 24 Hours: 3

Past 7 Days: 12

Past 30 Days: 45

All Time: 7,060