Free Shipping on Domestic Orders $75+

MSI GP62MVR 6RF Leopard Pro Heatsink Replacement

What you need

    1. MSI GP62MVR 6RF Leopard Pro Heatsink Replacement, Bottom Cover: step 1, image 1 of 2 MSI GP62MVR 6RF Leopard Pro Heatsink Replacement, Bottom Cover: step 1, image 2 of 2
      • Place the laptop upside down.

      • Remove the sixteen 5.5 mm screws with a Phillips #0 screwdriver.

      Ask FixBot

      Add Comment

    2. MSI GP62MVR 6RF Leopard Pro Heatsink Replacement: step 2, image 1 of 2 MSI GP62MVR 6RF Leopard Pro Heatsink Replacement: step 2, image 2 of 2
      • Use the Jimmy tool to evenly pry loose the bottom cover.

      • Ensure that all sides are detached from the plastic hinging before attempting to remove the bottom cover.

      Ask FixBot

      Add Comment

    3. MSI GP62MVR 6RF Leopard Pro Heatsink Replacement: step 3, image 1 of 1
      • Remove the back cover.

      • Touching circuitry could damage components or result in personal shock; it is recommended that you now wear latex gloves to prevent both issues.

      Ask FixBot

      Add Comment

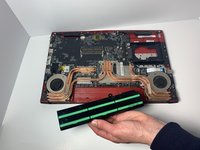
    1. MSI GP62MVR 6RF Leopard Pro Heatsink Replacement, Battery: step 4, image 1 of 3 MSI GP62MVR 6RF Leopard Pro Heatsink Replacement, Battery: step 4, image 2 of 3 MSI GP62MVR 6RF Leopard Pro Heatsink Replacement, Battery: step 4, image 3 of 3
      • Using a Phillips #0 Screwdriver, remove the single 5.5 mm screw fastening the battery to the body of the computer.

      • Remove the battery from the device.

      Ask FixBot

      Add Comment

    1. MSI GP62MVR 6RF Leopard Pro Heatsink Replacement, Speakers: step 5, image 1 of 1
      • Reorient the computer, if necessary, with a 180 degree turn so that the speakers face you.

      Ask FixBot

      Add Comment

    2. MSI GP62MVR 6RF Leopard Pro Heatsink Replacement: step 6, image 1 of 1
      • On the front panel near the right speaker, there is a connection from the motherboard to the speakers.

      • Detach the white and black wiring from the clip.

      Ask FixBot

      Add Comment

    3. MSI GP62MVR 6RF Leopard Pro Heatsink Replacement: step 7, image 1 of 1
      • Peel back the electrical tape holding the speaker wire in place.

      • Remove the speakers from the front panel, pulling upward.

      • Note that the screws holding the two speakers down were already removed during the bottom cover removal.

      Ask FixBot

      Add Comment

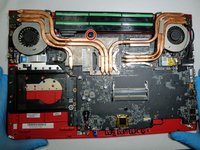
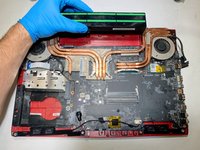
    1. MSI GP62MVR 6RF Leopard Pro Heatsink Replacement, Heatsink: step 8, image 1 of 3 MSI GP62MVR 6RF Leopard Pro Heatsink Replacement, Heatsink: step 8, image 2 of 3 MSI GP62MVR 6RF Leopard Pro Heatsink Replacement, Heatsink: step 8, image 3 of 3
      • Using a Phillips #0 screwdriver, remove twelve 4.5 mm screws fastening the heat sink to the motherboard.

      • Unclip the red, blue, and black intertwined wire gently from the left side of the motherboard.

      • Detach the black and red wire from the right side of the motherboard, as well as peel away the black tape connecting the large black wire to the motherboard.

      Ask FixBot

      Add Comment

    2. MSI GP62MVR 6RF Leopard Pro Heatsink Replacement: step 9, image 1 of 1
      • Remove the heatsink from the device.

      Ask FixBot

      Add Comment

Conclusion

To reassemble your device, follow these instructions in reverse order.

Cancel: I did not complete this guide.

Justin Ogihara

Member since: 09/18/17

31,431 Reputation

52 Guides authored

0 Guide Comments

Add Comment

View Statistics:

Past 24 Hours: 1

Past 7 Days: 7

Past 30 Days: 32

All Time: 1,114