Free Shipping on Domestic Orders $75+

MSI GE62 6QF Apache Pro Hard Drive Replacement

What you need

  1. MSI GE62 6QF Apache Pro Hard Drive Replacement, Optical Drive: step 1, image 1 of 1
    • Use a Phillips screwdriver to remove the 5mm screw securing the optical drive to the bottom case.

    Ask FixBot

    Add Comment

  2. MSI GE62 6QF Apache Pro Hard Drive Replacement: step 2, image 1 of 1
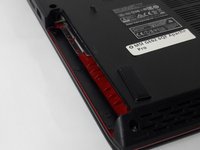
    • Slide Optical Drive out of the computer.

    Ask FixBot

    Add Comment

  3. MSI GE62 6QF Apache Pro Hard Drive Replacement, Bottom Case: step 3, image 1 of 1
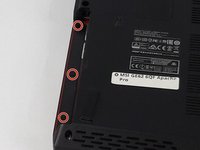
    • Use a Phillips screwdriver to remove the fourteen 5mm screws on the back of the laptop.

    • One of these screws is hidden under a sticker.

    Ask FixBot

    Add Comment

  4. MSI GE62 6QF Apache Pro Hard Drive Replacement: step 4, image 1 of 3 MSI GE62 6QF Apache Pro Hard Drive Replacement: step 4, image 2 of 3 MSI GE62 6QF Apache Pro Hard Drive Replacement: step 4, image 3 of 3
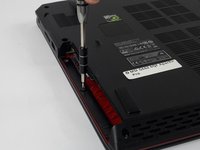
    • Remove the three PH #0 2mm screws that were hidden underneath the optical drive.

    Ask FixBot

    Add Comment

  5. MSI GE62 6QF Apache Pro Hard Drive Replacement: step 5, image 1 of 2 MSI GE62 6QF Apache Pro Hard Drive Replacement: step 5, image 2 of 2
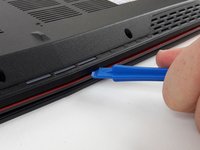
    • Use an opening tool to run along the seam of the case where the upper and bottom case meet.

    • Pry the bottom case and remove from the upper part.

    Ask FixBot

    Add Comment

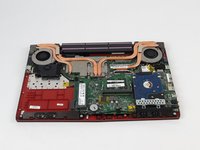
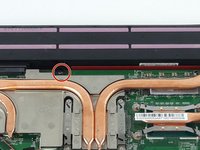
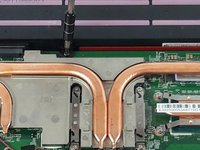
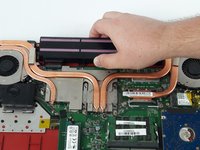
  6. MSI GE62 6QF Apache Pro Hard Drive Replacement, Battery: step 6, image 1 of 3 MSI GE62 6QF Apache Pro Hard Drive Replacement, Battery: step 6, image 2 of 3 MSI GE62 6QF Apache Pro Hard Drive Replacement, Battery: step 6, image 3 of 3
    • Remove the single PH #0 5mm screw holding the battery pack in place.

    • Remove the battery by sliding it away from the computer.

    Ask FixBot

    Add Comment

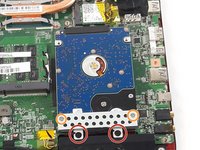
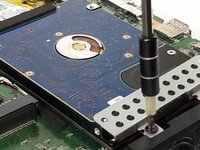
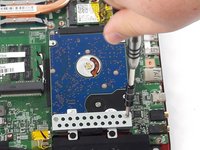
  7. MSI GE62 6QF Apache Pro Hard Drive Replacement, Hard Drive: step 7, image 1 of 3 MSI GE62 6QF Apache Pro Hard Drive Replacement, Hard Drive: step 7, image 2 of 3 MSI GE62 6QF Apache Pro Hard Drive Replacement, Hard Drive: step 7, image 3 of 3
    • Unscrew the two black PH #0 2mm screws holding the lower part the hard drive plate

    • Unscrew the two PH #0 4mm screws holding the upper part of the hard drive plate

    Ask FixBot

    Add Comment

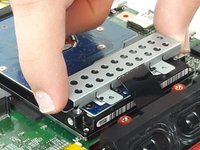
  8. MSI GE62 6QF Apache Pro Hard Drive Replacement: step 8, image 1 of 2 MSI GE62 6QF Apache Pro Hard Drive Replacement: step 8, image 2 of 2
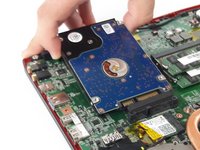
    • Remove the hard drive by gently lifting up and pulling the drive out of the connection slot

    Ask FixBot

    Add Comment

Conclusion

To reassemble your device, follow these instructions in reverse order.

Cancel: I did not complete this guide.

5 other people completed this guide.

Justice Owens

Member since: 09/26/17

604 Reputation

4 Guides authored

Team

USF Tampa, Team S2-G3, Passmore Fall 2017 Member of USF Tampa, Team S2-G3, Passmore Fall 2017

USFT-PASSMORE-F17S2G3

3 Members

5 Guides authored

4 Guide Comments

Saved my life, would have had no idea what to do without these instructions and would probably have broke something. My new 2tb ssd is working fine

Simon Porter - Reply Share

Upgraded the Memory to 32GB and the HDD to a 1TB SATA SSD.

Prabodha Elangasinha - Reply Share

Only issue I ran into was one of the optical drive screws was frozen in, stripped hard, and I had to fall back on Moodys to break it loose. Once done, everything else was cake.

Chuck Brewer - Reply Share

My ssd is working fine and the hdd has gone bad on mine... have not even opened mine yet but looking at the pics I wonder where the second drive is located?

Eric Jimenez - Reply Share

Add Comment

View Statistics:

Past 24 Hours: 1

Past 7 Days: 10

Past 30 Days: 48

All Time: 9,346