Free Shipping on Domestic Orders $75+

Logitech Webcam Pro 9000 Microphone Replacement

Views: 2.7K

View statistics:

Past 24 Hours:
2
Past 7 Days:
19
Past 30 Days:
101
All Time:
2,680
Comments: 0

No one has left comments on this guide. Will you be first?

Go to guide comments
Completed: 2

2 people have marked this guide "completed." Will you be next?

Favorites: 5

5 people have favorited (and subscribed to) this guide. Will you be next?

Time Required: 10 - 15 minutes
Difficulty: Moderate
Logitech Webcam Pro 9000 Microphone Replacement

Introduction

Go to step 1 ↓

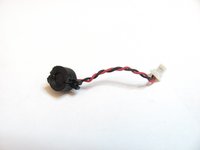
There are two parts to the microphone: the cover and the microphone and its casing. It takes about the same amount of time to remove the cover and the microphone.

What you need

Tools

    1. Logitech Webcam Pro 9000 Microphone Replacement, Front and Back Cover: step 1, image 1 of 2 Logitech Webcam Pro 9000 Microphone Replacement, Front and Back Cover: step 1, image 2 of 2
      • Remove the two 8 mm Phillips #0 screws on the back cover.

      • The motherboard connects the two covers together. DO NOT separate the two yet.

      • There is a button that loosens as the Phillips screws are removed. Don't be alarmed if it falls out.

      Ask FixBot

      Add Comment

    2. Logitech Webcam Pro 9000 Microphone Replacement: step 2, image 1 of 2 Logitech Webcam Pro 9000 Microphone Replacement: step 2, image 2 of 2
      • Remove the four 6mm Phillips #0 screws connecting the motherboard and front cover.

      • DO NOT detach the wire connecting the motherboard to the front cover.

      Ask FixBot

      Add Comment

    1. Logitech Webcam Pro 9000 Microphone Replacement, Microphone Connection: step 3, image 1 of 2 Logitech Webcam Pro 9000 Microphone Replacement, Microphone Connection: step 3, image 2 of 2
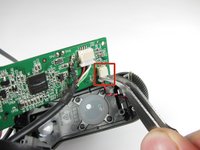
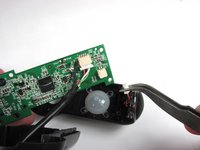
      • Grasp the white wire connector between the tabs and the socket.

      • Wiggle the connector back and forth to remove the front cover from the motherboard.

      Ask FixBot

      Add Comment

    1. Logitech Webcam Pro 9000 Microphone Replacement, Microphone: step 4, image 1 of 3 Logitech Webcam Pro 9000 Microphone Replacement, Microphone: step 4, image 2 of 3 Logitech Webcam Pro 9000 Microphone Replacement, Microphone: step 4, image 3 of 3
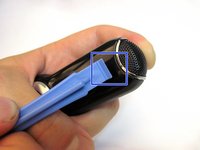
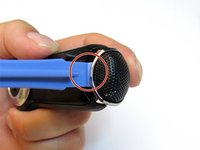
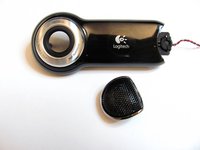
      • Wedge the plastic opening tool into the crack between the plastic cover and microphone guard.

      • Use the wedge to separate the two pieces.

      • It might take more force than expected.

      Ask FixBot

      Add Comment

    2. Logitech Webcam Pro 9000 Microphone Replacement: step 5, image 1 of 3 Logitech Webcam Pro 9000 Microphone Replacement: step 5, image 2 of 3 Logitech Webcam Pro 9000 Microphone Replacement: step 5, image 3 of 3
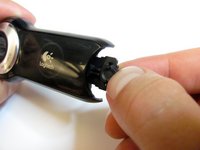
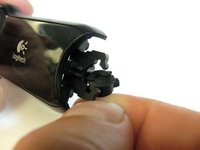
      • Twist the rubber casing and remove it from the plastic cover.

      Ask FixBot

      Add Comment

Conclusion

To reassemble your device, follow these instructions in reverse order.

Cancel: I did not complete this guide.

2 other people completed this guide.

nieko

Member since: 04/18/13

63 Reputation

2 Guides authored

Team

Cal Poly, Team 12-34, Amido Spring 2013 Member of Cal Poly, Team 12-34, Amido Spring 2013

CPSU-AMIDO-S13S12G34

4 Members

96 Guides authored

0 Guide Comments

Add Comment

View Statistics:

Past 24 Hours: 2

Past 7 Days: 19

Past 30 Days: 101

All Time: 2,680