
Logitech UE Hyperboom Top Panel Replacement

Ethan Abbott and 2 other contributors
Last updated on May 21, 2026
Views: 285
View statistics:
- Past 24 Hours:
- 2
- Past 7 Days:
- 24
- Past 30 Days:
- 88
- All Time:
- 285
Comments: 0
No one has left comments on this guide. Will you be first?
Go to guide commentsCompleted: 0 1
No one has marked this guide "completed." Will you be the first?
1 person has marked this guide "completed." It's you — great job!
Favorites: 0 1
No one has favorited (and subscribed to) this guide. Will you be the first?
1 person has favorited (and subscribed to) this guide — and that's you!
Introduction
Go to step 1 ↓Use this guide as a prerequisite for accessing other components
What you need
Tools
-
PliersOptional
-


-
-
-
Unscrew the two black flat-top screws that attach the handle to the speaker with your hands.
 Ask FixBot
-
-
-
-
-
Use your hands to carefully pry the plastic cover off of the speaker.
-
-
-
-
Use a Phillips #0 screwdriver to remove the ten 11.7mm screws on the top panel.
-
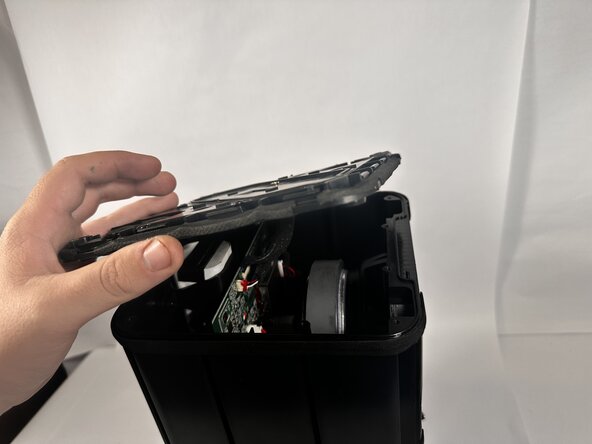
Remove the top panel to access the internal components.
-
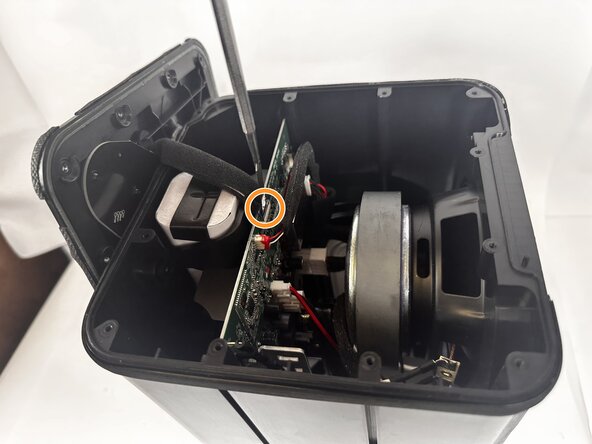
Use a metal spudger to completely disconnect the top panel.
-
-




To reassemble your device, follow these instructions in reverse order.

Team

Idaho State University, Team 1-2, Watkins Spring 2026 Member of Idaho State University, Team 1-2, Watkins Spring 2026
ISU-WATKINS-S26S1G2
3 Members
96 Guides authored
