Free Shipping on Domestic Orders $75+

Logitech RS H‑Shifter Chassis Replacement

What you need

  1. Logitech RS H‑Shifter Chassis Replacement, Before you begin: step 1, image 1 of 3 Logitech RS H‑Shifter Chassis Replacement, Before you begin: step 1, image 2 of 3 Logitech RS H‑Shifter Chassis Replacement, Before you begin: step 1, image 3 of 3
    • Before you begin your repair:

    • Unplug the H‑Shifter's USB cable.

    • Completely unmount the shifter from the clamp and remove any accessories so you're left with just the shifter.

    • Use a 4.0 mm hex screwdriver to remove the 31 mm‑long screws securing the shifter to the clamp.

    Ask FixBot

    Add Comment

  2. Logitech RS H‑Shifter Chassis Replacement, Remove the shift knob: step 2, image 1 of 3 Logitech RS H‑Shifter Chassis Replacement, Remove the shift knob: step 2, image 2 of 3 Logitech RS H‑Shifter Chassis Replacement, Remove the shift knob: step 2, image 3 of 3
    • Twist the shift knob counterclockwise to unscrew and remove it.

    Ask FixBot

    Add Comment

  3. Logitech RS H‑Shifter Chassis Replacement, Remove the top cover: step 3, image 1 of 2 Logitech RS H‑Shifter Chassis Replacement, Remove the top cover: step 3, image 2 of 2
    • Use a 2.5 mm hex screwdriver to remove the four 12 mm‑long screws securing the top cover.

    Ask FixBot

    Add Comment

  4. Logitech RS H‑Shifter Chassis Replacement: step 4, image 1 of 2 Logitech RS H‑Shifter Chassis Replacement: step 4, image 2 of 2
    • Lift the top cover straight up to remove it.

    • The metal shift gate is sitting loosely in the cover.

    Ask FixBot

    Add Comment

  5. Logitech RS H‑Shifter Chassis Replacement, Secure the gaiter: step 5, image 1 of 3 Logitech RS H‑Shifter Chassis Replacement, Secure the gaiter: step 5, image 2 of 3 Logitech RS H‑Shifter Chassis Replacement, Secure the gaiter: step 5, image 3 of 3
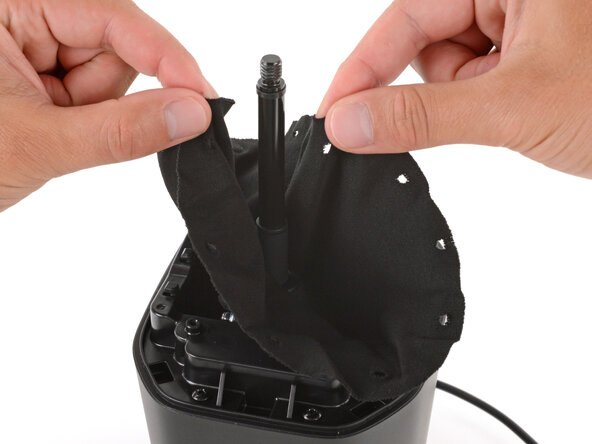
    • Completely unhook the fabric gaiter and use a rubber band to secure it to the shift lever.

    • During reassembly, hook the fabric back into its eight clips and four screw posts. You'll need to double up the fabric on the hooks.

    Ask FixBot

    Add Comment

  6. Logitech RS H‑Shifter Chassis Replacement, Remove the chassis: step 6, image 1 of 2 Logitech RS H‑Shifter Chassis Replacement, Remove the chassis: step 6, image 2 of 2
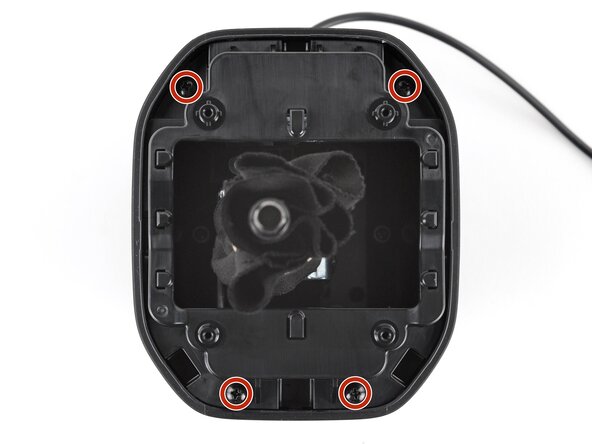
    • Use a Phillips screwdriver to remove the four 12 mm‑long screws securing the chassis.

    Ask FixBot

    Add Comment

  7. Logitech RS H‑Shifter Chassis Replacement: step 7, image 1 of 2 Logitech RS H‑Shifter Chassis Replacement: step 7, image 2 of 2
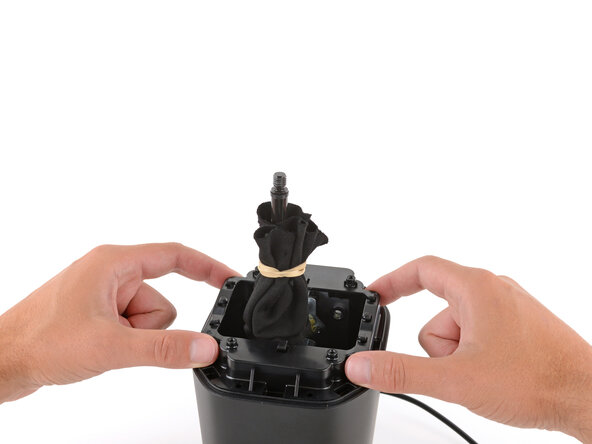
    • Lift the chassis straight up and remove it.

    Ask FixBot

    Add Comment

Conclusion

To reassemble your device, follow these instructions in reverse order.

Repair didn’t go as planned? Try some basic troubleshooting, or ask our Answers community for help.

Cancel: I did not complete this guide.

Spencer Day

Member since: 09/14/22

196,178 Reputation

1,243 Guides authored

0 Guide Comments

Add Comment

View Statistics:

Past 24 Hours: 0

Past 7 Days: 3

Past 30 Days: 37

All Time: 49