
Logitech M185 Wireless Mouse Disassembly

Karmanyaah Malhotra and 4 other contributors
Last updated on Mar 3, 2026
Views: 45K
View statistics:
- Past 24 Hours:
- 26
- Past 7 Days:
- 161
- Past 30 Days:
- 592
- All Time:
- 45,146
Comments: 16
4 comments on steps, 12 guide comments.
Go to guide commentsCompleted: 43 44
43 people have marked this guide "completed." Will you be next?
44 people have marked this guide "completed." Including you — great job!
Favorites: 1 2
1 person has favorited (and subscribed to) this guide. Will you be next?
2 people have favorited (and subscribed to) this guide — including you!
Community-Contributed Guide
An awesome member of our community made this guide. It was not created by iFixit staff.
What you need
Tools

-
-
-
Unscrew the Phillips #1 screw in the battery compartment after removing the battery.
-
Some mice have a smaller screw, directly down and to the side of the on/off slider. The rest of the disassembly is the same.
-
-
-
Wiggle the grey part of the top to remove it by pulling it towards you(away from the scroll wheel).
-
Reasoning by Jacob Hickey "because in the internal top part of the mouse where the buttons/scroll wheel is, there’s hinges-like “tooth” that’ll snap if you do pull on it. It’s like opening a jewelry box that has a hinge on one end of the box… if that makes sense…"
-
-
-
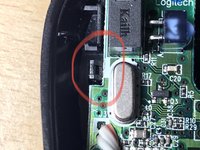
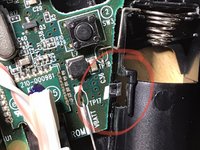
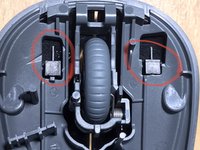
Push back small black clips to release the circuit board.
-
Slide up the metal battery connectors to free them from the casing. (Note that these are soldered to the circuit board.)
-
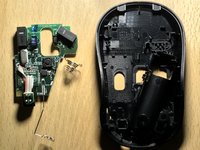
Fully remove the circuit board with the battery connectors and image sensor still attached.
-
-
-
-
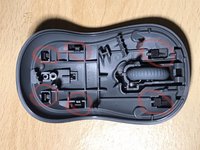
Working from back to front (left to right in the first image) unclip the first two pairs of black plastic clips.
-
Slide the black upper casing forwards over the mouse wheel whilst applying pressure the two front clips to release them.
-
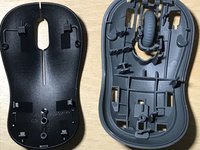
Separate the two casing layers fully.
-


 Ask FixBot




To reassemble your device, follow these instructions in reverse order.
Cancel: I did not complete this guide.
43 other people completed this guide.

12 Guide Comments
Thank you Karmanyaah Malhotra for takin’ the time to do this for everybody like me :-)
were can i buy these iems telll mee please
TElll me now or else
I will be sad
