
Logitech M100 Switch Replacement

Diego De La Fuente and 3 other contributors
Last updated on Jun 17, 2024
Views: 1.4K
View statistics:
- Past 24 Hours:
- 6
- Past 7 Days:
- 32
- Past 30 Days:
- 130
- All Time:
- 1,414
Comments: 0
No one has left comments on this guide. Will you be first?
Go to guide commentsCompleted: 2 3
2 people have marked this guide "completed." Will you be next?
3 people have marked this guide "completed." Including you — great job!
Favorites: 0 1
No one has favorited (and subscribed to) this guide. Will you be the first?
1 person has favorited (and subscribed to) this guide — and that's you!
Featured Student Guide
This guide has been the hard work of our awesome students and is found to be exceptionally cool by the iFixit staff.
Introduction
Go to step 1 ↓Common causes of a faulty mouse button are frequent use, clicking too hard, and dust getting into the switches. The purpose of this guide is to detail how to replace the switches on your Logitech M100 Mouse with the goal of prolonging the life of your mouse.
This guide does not require specialized knowledge except a basic understanding of a soldering iron. Soldering material is metal with a low melting point. Be cautious of the iron and solder's heat when replacing the mouse clicker, as it very hot and can burn skin. It's also important to work in a well ventilated area as the solder can emit fumes that are not good to breath. For more information about soldering, take a look at the How to Solder and Desolder Connections guide.
What you need
Tools


-
-
-
Disconnect the mouse from any devices before attempting to remove any parts or starting the repair.
-
Flip your mouse over so the bottom is facing up.
 Ask FixBot
-
-
-
Use a small Phillips #00 screwdriver to remove the single screw at the bottom of the mouse.
-
-
-
Turn your mouse over so it is facing right side up.
-
Use a spudger or your hands to carefully separate the top from the bottom housing.
-
-
-
Remove the circuit board from the mouse by pushing down at the back and lifting up at the front.
-
-
-
Pull the USB cable away from the connector in the same direction as the individual wires to remove it from the motherboard.
-
-
-
Find a suitable method to hold the circuit board in place so you don't have to hold it in your hands.
-
-
-
-
Use a soldering iron to heat the solder points securing both switches, and remove the switches using tweezers.
-
-


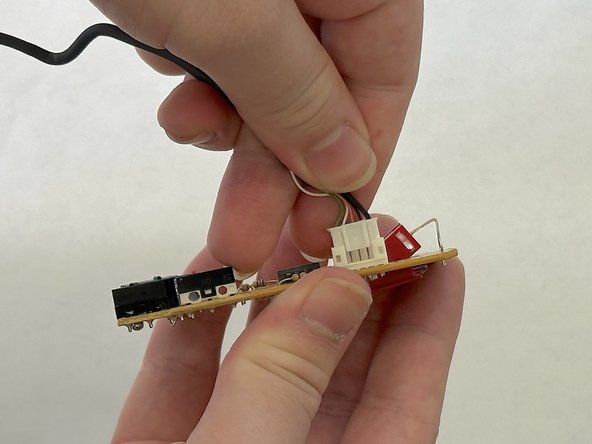


Congratulations, you have now replaced the clickers on your mouse and can continue using it!
Cancel: I did not complete this guide.
2 other people completed this guide.

Team

CSU Los Angeles, Team 7-2, Grodsky Spring 2024 Member of CSU Los Angeles, Team 7-2, Grodsky Spring 2024
CSULA-GRODSKY-S24S7G2
3 Members
12 Guides authored
