Introduction
I will make this as short as possible since there are probably many guides on how to open the keyboard
You can start ordering the usb-C board
Make sure it has the resistors already installed on the board .
one you have that take the Logitech board out of the keyboard *** disconnect battery **
desolder the old connector
Solder your jumper cables on the new usb-C
You only need GND and VOLTAGE , it should be identified as G and V on the usb-C board
Your voltage jumper cable should go On the back of the Logitech board you have resistor IC2 or LC2 check picture **
The GND can be anywhere but I chose a easy pad check picture ***GND*****
this is the part where you gently connect a usb-C charging cable and connect it to a 5v charger , then plug the battery THEN plug the charger and see if the green light start pulsing .
IF IT DOES YOU BASICALLY WON
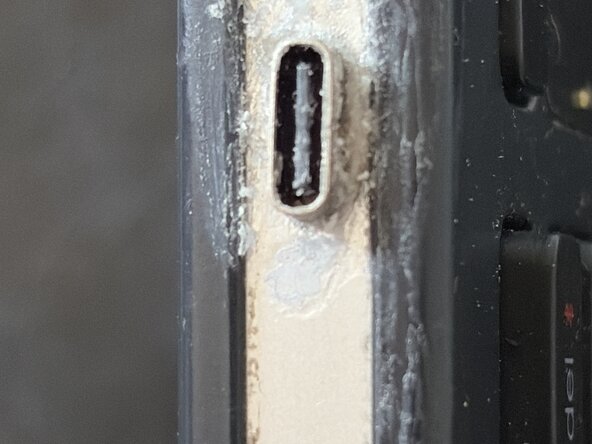
you can use the hot iron to slowly enlarge the micro usb-C hole in the plastic keyboard slot where * long silver top part
Of you did this right the new usb-C connector can be squeezed into the new hold and fits pretty snug , you can use crazy glue inside to reinforce .
I suggest getting a usb-c to magnetic charger adapter so you never have to push on this connector again but do as you please .
****
Tips
A small curved soldering tip is really good for this job
USE FLUX , no flux means cold solder and that won’t work at all , and things just click together with flux .
Jumper cable 30awg is great
-
-
-
Voltage wire goes behind the board , attach to IC2 right side like in the picture
-
-
-
GND câble Connects anywhere ground but I chose here because big pad and easy access
-
-
-
Connect battery to board and very Gently connect a usbC cable to a 5v charger to confirm your charging light starts pulsing green
-
-
-
You can use a soldering iron to enlarge the hole where the usb connector comes out , go slow
-
pro tip ** use a spare connector to test and push into the hole until you are satisfied , take your time you want it to be super snug since that’s basically what’s holding the connector in place .
-
You can then push the real usbC connector in place and use crazy glue INSIDE to reinforce . I put some inside and outside and it’s very ugly , I have to clean it all up .
-
-
-
To increase longevity get something like this so you never put pressure on the connector itself .
-

 Ask FixBot



To reassemble your device, follow these instructions in reverse order.

