Introduction
This guide will show you the process to disassemble the device and replace the motherboard.
What you need
-
-
-
Open the latch that covers the charging port.
-
Remove the black sticker, then remove the screw with the indicated screwdriver.
-
Take the plastic opening tool, and run it down the side of the remote to pop the case open.
-
Detach the white clamp in order to partially disconnect the case from the motherboard.
 Ask FixBot
-
-
-
-
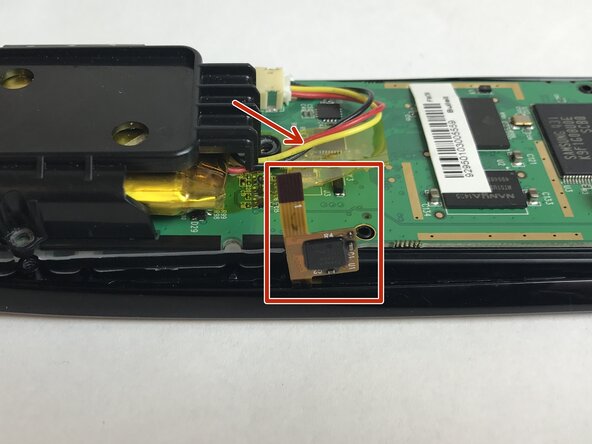
Peel back the thin yellow plastic film and detach the clip found underneath.
-
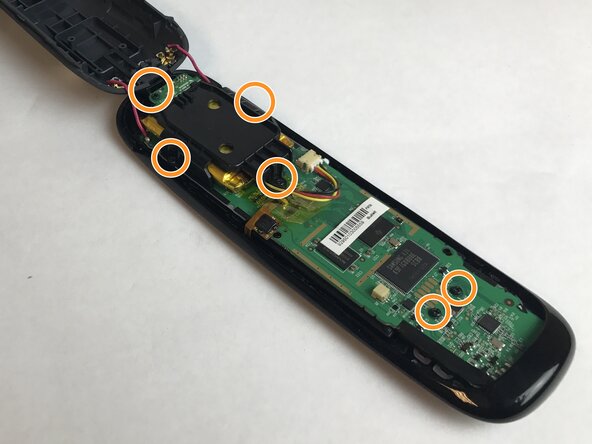
Remove the screws that connect the motherboard to the case with the suggested screwdriver.
-
-
-
Next, carefully remove the motherboard from the top piece of the case.
-
You should now be able to access all of the buttons and remove them from the case.
-
-



To reassemble your device, follow these instructions in reverse order.

Team

USF Tampa, Team S4-G2, Eyestone Fall 2017 Member of USF Tampa, Team S4-G2, Eyestone Fall 2017
USFT-EYESTONE-F17S4G2
4 Members
60 Guides authored
