Free Shipping on Domestic Orders $75+

Logitech Harmony Smart Keyboard Ribbon Flex Cable Replacement

What you need

  1. Logitech Harmony Smart Keyboard Ribbon Flex Cable Replacement, Back Panel: step 1, image 1 of 2 Logitech Harmony Smart Keyboard Ribbon Flex Cable Replacement, Back Panel: step 1, image 2 of 2
    • Turn keyboard over to the backside.

    Ask FixBot
    Add Comment

  2. Logitech Harmony Smart Keyboard Ribbon Flex Cable Replacement: step 2, image 1 of 3 Logitech Harmony Smart Keyboard Ribbon Flex Cable Replacement: step 2, image 2 of 3 Logitech Harmony Smart Keyboard Ribbon Flex Cable Replacement: step 2, image 3 of 3
    • Press and slide up on the upper battery latch, using both thumbs.

    Ask FixBot
    Add Comment

  3. Logitech Harmony Smart Keyboard Ribbon Flex Cable Replacement: step 3, image 1 of 1
    • Remove the two AA batteries and set them aside.

    Ask FixBot
    Add Comment

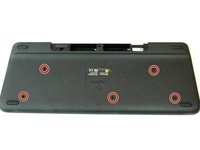
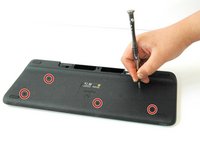
  4. Logitech Harmony Smart Keyboard Ribbon Flex Cable Replacement: step 4, image 1 of 2 Logitech Harmony Smart Keyboard Ribbon Flex Cable Replacement: step 4, image 2 of 2
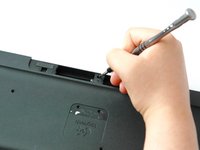
    • Unscrew all five 4.0 mm screws, using Phillips #1 screwdriver.

    Ask FixBot

    Add Comment

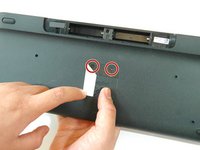
  5. Logitech Harmony Smart Keyboard Ribbon Flex Cable Replacement: step 5, image 1 of 2 Logitech Harmony Smart Keyboard Ribbon Flex Cable Replacement: step 5, image 2 of 2
    • Peel off the center sticker to reveal two hidden 4.0 mm screws.

    • Unscrew these two screws with a Phillips #1 screwdriver.

    Ask FixBot

    Add Comment

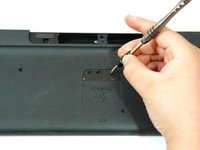
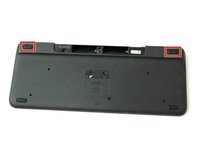
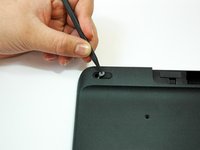
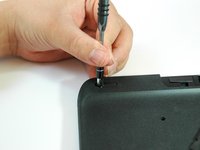
  6. Logitech Harmony Smart Keyboard Ribbon Flex Cable Replacement: step 6, image 1 of 3 Logitech Harmony Smart Keyboard Ribbon Flex Cable Replacement: step 6, image 2 of 3 Logitech Harmony Smart Keyboard Ribbon Flex Cable Replacement: step 6, image 3 of 3
    • Lift both top left and top right rubber stickers halfway, using the sharp end of the plastic spudger.

    • Unscrew a total of two 4.0 mm screws, under the rubber stickers, using a Phillips #1 screwdriver.

    Ask FixBot

    Add Comment

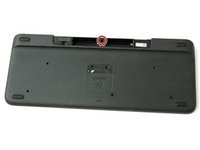
  7. Logitech Harmony Smart Keyboard Ribbon Flex Cable Replacement: step 7, image 1 of 2 Logitech Harmony Smart Keyboard Ribbon Flex Cable Replacement: step 7, image 2 of 2
    • Unscrew the top center 4.0 mm screw, in the battery compartment, using the Phillips #1 screwdriver.

    • Now, you should have a total of ten 4.0 mm screws set aside.

    Ask FixBot
    Add Comment

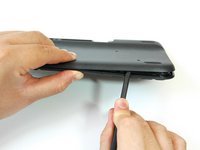
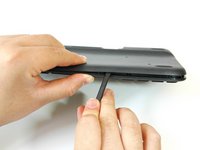
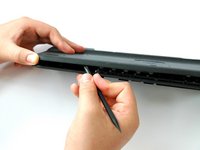
  8. Logitech Harmony Smart Keyboard Ribbon Flex Cable Replacement: step 8, image 1 of 3 Logitech Harmony Smart Keyboard Ribbon Flex Cable Replacement: step 8, image 2 of 3 Logitech Harmony Smart Keyboard Ribbon Flex Cable Replacement: step 8, image 3 of 3
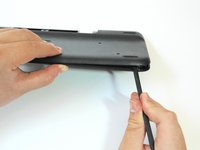
    • Wedge the flat end of the spudger between the back panel and front panel.

    • Slide the flat end of the spudger from right to left to pry the two panels apart.

    Ask FixBot
    Add Comment

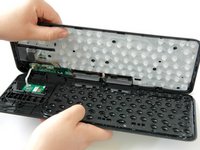
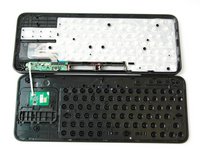
  9. Logitech Harmony Smart Keyboard Ribbon Flex Cable Replacement: step 9, image 1 of 3 Logitech Harmony Smart Keyboard Ribbon Flex Cable Replacement: step 9, image 2 of 3 Logitech Harmony Smart Keyboard Ribbon Flex Cable Replacement: step 9, image 3 of 3
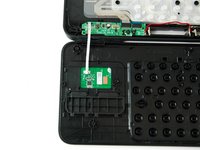
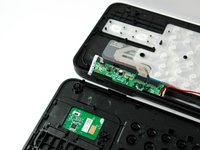
    • Separate the back panel from the front panel completely, using both hands.

    • A white ribbon flex cable will remain connected to both panels.

    • Pull the panels apart slowly and gently, or the white ribbon flex cable may be unsafely removed.

    Ask FixBot
    Add Comment

  10. Logitech Harmony Smart Keyboard Ribbon Flex Cable Replacement, Ribbon Flex Cable: step 10, image 1 of 3 Logitech Harmony Smart Keyboard Ribbon Flex Cable Replacement, Ribbon Flex Cable: step 10, image 2 of 3 Logitech Harmony Smart Keyboard Ribbon Flex Cable Replacement, Ribbon Flex Cable: step 10, image 3 of 3
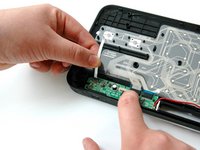
    • Grip the lower end of the ribbon flex cable (white band) using your thumb and index finger.

    • Then slide the strip out toward yourself in a scooping motion.

    • Now, you should have two completely separated panel pieces.

    Ask FixBot

    Add Comment

  11. Logitech Harmony Smart Keyboard Ribbon Flex Cable Replacement: step 11, image 1 of 3 Logitech Harmony Smart Keyboard Ribbon Flex Cable Replacement: step 11, image 2 of 3 Logitech Harmony Smart Keyboard Ribbon Flex Cable Replacement: step 11, image 3 of 3
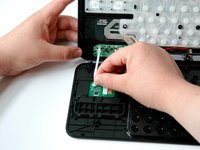
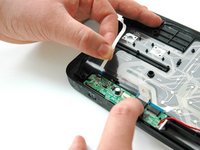
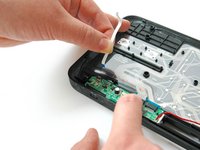
    • Grip the other lower end of the ribbon flex cable using your thumb and index finger.

    • Gently slide the cable up and out of the green card.

    Ask FixBot

    Add Comment

Conclusion

To reassemble your device, follow these instructions in reverse order.

Cancel: I did not complete this guide.

Hayley Nichols

Member since: 09/05/17

525 Reputation

4 Guides authored

Team

CSU Fullerton, Team S1-G2, Bruce Fall 2017 Member of CSU Fullerton, Team S1-G2, Bruce Fall 2017

CSUF-BRUCE-F17S1G2

3 Members

10 Guides authored

1 Guide Comment

Where can I get a replacement flex ribbon cable, the same as shown here?

Eman - Reply Share

Add Comment

View Statistics:

Past 24 Hours: 4

Past 7 Days: 8

Past 30 Days: 40

All Time: 1,317