Free Shipping on Domestic Orders $75+

Logitech G935 Battery Replacement

Views: 698

View statistics:

Past 24 Hours:
11
Past 7 Days:
40
Past 30 Days:
167
All Time:
698
Comments: 0

No one has left comments on this guide. Will you be first?

Go to guide comments
Completed: 0

No one has marked this guide "completed." Will you be the first?

Favorites: 0

No one has favorited (and subscribed to) this guide. Will you be the first?

Time Required: 5 - 10 minutes
Difficulty: Easy
OEM Guide

iFixit collaborated with the manufacturer to make this guide.

Logitech

Logitech and iFixit are working together to help people repair their Logitech devices.

Logitech G935 Battery Replacement

Introduction

Go to step 1 ↓

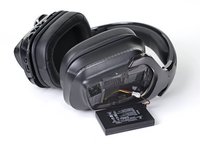
Follow this guide to remove and replace the battery on a Logitech G935 headset. You may need to do this repair if the battery no longer holds a charge.

For your safety, discharge the battery below 25% before disassembling your device. This reduces the risk of a dangerous thermal event if the battery is accidentally damaged during the repair. If your battery is swollen, take appropriate precautions.

What you need

    1. Logitech G935 Battery Replacement, Turn off the headset: step 1, image 1 of 1
      • The wireless switch functions as the power switch on the G935 headset. It is located above the G3 button.

      • Shift the wireless switch down to turn off the headset.

      • The blue background should be covered by the switch when the headset is turned off.

      Ask FixBot

      Add Comment

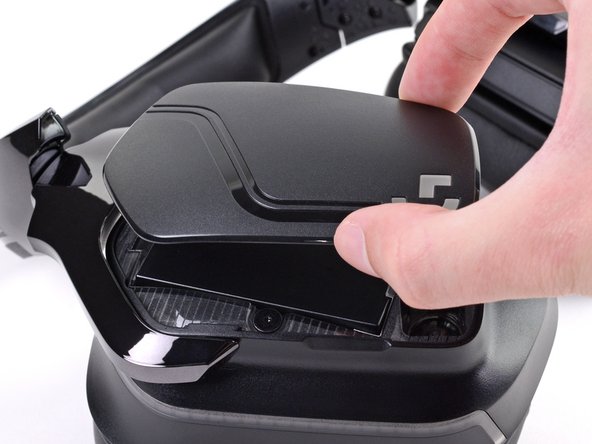
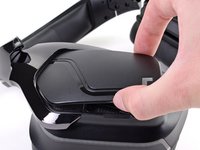
    2. Logitech G935 Battery Replacement, Lift the ear cup door: step 2, image 1 of 2 Logitech G935 Battery Replacement, Lift the ear cup door: step 2, image 2 of 2
      • Two magnets secure the ear cup door to the headset—one on the left side and one on the bottom.

      • A clip on the top right of the ear cup door also secures it to the headset.

      • Use the indent on the right ear cup door to lift and detach the magnets from the headset.

      Ask FixBot

      Add Comment

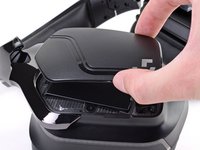
    3. Logitech G935 Battery Replacement, Remove the ear cup door: step 3, image 1 of 2 Logitech G935 Battery Replacement, Remove the ear cup door: step 3, image 2 of 2
      • Lift and remove the right ear cup door.

      • During reassembly, insert the clip into its slot before placing the magnets down so that the door is properly aligned.

      Ask FixBot

      Add Comment

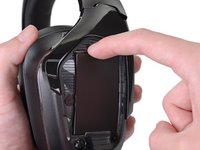
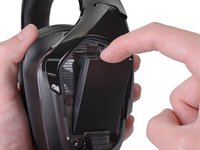
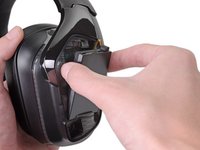
    4. Logitech G935 Battery Replacement, Remove the battery: step 4, image 1 of 2 Logitech G935 Battery Replacement, Remove the battery: step 4, image 2 of 2
      • Do not try to completely remove the battery from the headset. It is still attached by the cable connector in the top right of the battery recess.

      • While removing the battery, keep it as close to the recess as possible to prevent straining the cables.

      • Pull on the tab at the top of the battery to dislodge it from the recess.

      Ask FixBot

      Add Comment

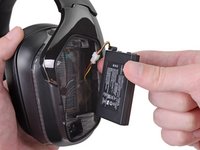
    5. Logitech G935 Battery Replacement: step 5, image 1 of 2 Logitech G935 Battery Replacement: step 5, image 2 of 2
      • Remove the battery from its recess.

      • During reassembly, place the bottom of the battery in the recess, then press the top of the battery into place.

      • Make sure the battery cable isn't trapped under the battery before pressing it into place. The cable should fit in the gap on the right side of the battery recess.

      Ask FixBot

      Add Comment

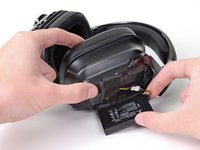
    6. Logitech G935 Battery Replacement: step 6, image 1 of 2 Logitech G935 Battery Replacement: step 6, image 2 of 2
      • Place the headset on your work surface so that the buttons are facing up.

      • Place the battery on your work surface so that it is laying flat with the battery information facing up.

      • Place the battery as close to the ear cup as possible to avoid straining the cables.

      • You may need to twist the ear cup for the battery to lay flat.

      Ask FixBot

      Add Comment

    7. Logitech G935 Battery Replacement: step 7, image 1 of 2 Logitech G935 Battery Replacement: step 7, image 2 of 2
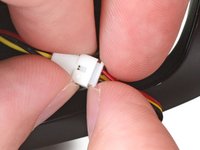
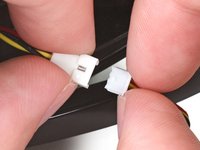
      • While holding the battery connector slot, pull the battery connector out.

      • Hold the battery connector slot and battery connector by their plastic frames and not by their cables to prevent damaging them.

      • If necessary, pull the battery connector with a rocking motion to "walk" it out of its slot.

      • You may need to use your fingernails to pull the battery connector out by its shelf.

      • When inserting the battery connector, make sure it is oriented correctly. The red cable on the battery connector should line up with the red cable on the battery slot.

      Ask FixBot

      Add Comment

    8. Logitech G935 Battery Replacement: step 8, image 1 of 1
      • Remove the battery from the headset.

      • This headset has a plastic reinforced battery pack. You can reinstall the original battery if needed.

      Ask FixBot

      Add Comment

Conclusion

Compare your new replacement part to the original part—you may need to transfer remaining components or remove adhesive backings from the new part before installing.

To reassemble your device, follow these instructions in reverse order.

Take your e-waste to an R2 or e-Stewards certified recycler.

Repair didn’t go as planned? Try some basic troubleshooting, or ask our Logitech G935 Answers community for help.

Cancel: I did not complete this guide.

Kyle Smith

Member since: 02/01/21

53,320 Reputation

124 Guides authored

0 Guide Comments

Add Comment

View Statistics:

Past 24 Hours: 11

Past 7 Days: 40

Past 30 Days: 167

All Time: 698