Free Shipping on Domestic Orders $75+

Logitech G Pro X Superlight Feet Replacement

What you need

  1. Logitech G Pro X Superlight Feet Replacement, Prepare your mouse for disassembly: step 1, image 1 of 3 Logitech G Pro X Superlight Feet Replacement, Prepare your mouse for disassembly: step 1, image 2 of 3 Logitech G Pro X Superlight Feet Replacement, Prepare your mouse for disassembly: step 1, image 3 of 3
    • Slide your mouse's power switch down so it's in the OFF position.

    • A red indicator should be visible beneath the switch.

    • Unplug all cables from your mouse.

    • Flip the mouse over so the feet are facing up.

    • Throughout your repair, it may be helpful to lay your mouse on a soft cloth to stabilize it and prevent damage while you work.

    Ask FixBot

    Add Comment

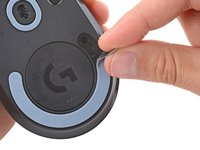
  2. Logitech G Pro X Superlight Feet Replacement, Remove the feet: step 2, image 1 of 1
    • The feet are secured to the bottom of the mouse with strong adhesive. In order to cleanly remove them, the adhesive needs to be thoroughly heated.

    • Heat an iOpener and lay it on the mouse feet for one minute to heat the adhesive.

    • Alternatively, you can use a hair dryer on the Low heat setting to soften the adhesive.

    • If you're using a hair dryer, only heat the feet a few seconds at a time or you may warp the plastic shell.

    Ask FixBot

    Add Comment

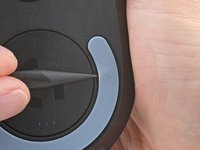
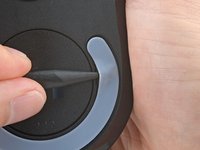
  3. Logitech G Pro X Superlight Feet Replacement: step 3, image 1 of 3 Logitech G Pro X Superlight Feet Replacement: step 3, image 2 of 3 Logitech G Pro X Superlight Feet Replacement: step 3, image 3 of 3
    • The feet have two layers—a rubberized one and an adhesive pad underneath.

    • If you're reusing the feet, be very careful not to separate the two layers or damage the feet.

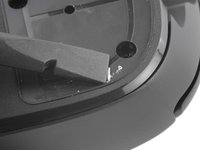
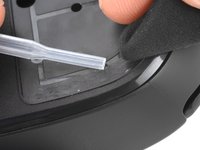
    • Carefully slide the point of a spudger under the circular foot, making sure it goes under both the foot and its adhesive pad.

    • The foot recesses have a small notch that makes it easier to slide your spudger under.

    • Gently slide the spudger farther under the foot and lift until you can grab it with your fingers.

    Ask FixBot

    Add Comment

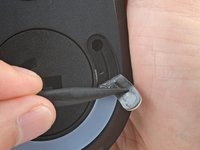
  4. Logitech G Pro X Superlight Feet Replacement: step 4, image 1 of 2 Logitech G Pro X Superlight Feet Replacement: step 4, image 2 of 2
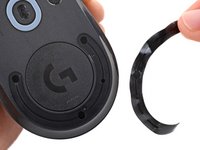
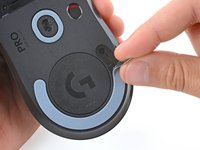
    • Peel up and remove the foot.

    • If the rubber layer separated from its adhesive pad, use the same process to remove the pad.

    Ask FixBot

    Add Comment

  5. Logitech G Pro X Superlight Feet Replacement: step 5, image 1 of 1
    Ask FixBot

    Add Comment

  6. Logitech G Pro X Superlight Feet Replacement, Reassembly information: step 6, image 1 of 3 Logitech G Pro X Superlight Feet Replacement, Reassembly information: step 6, image 2 of 3 Logitech G Pro X Superlight Feet Replacement, Reassembly information: step 6, image 3 of 3
    • To install a new foot:

    • If any of the feet got damaged during removal or separated from their adhesive pads, replace them.

    • Use a spudger to carefully scrape up and remove any remaining adhesive bits.

    • Use isopropyl alcohol and a microfiber cloth to thoroughly clean all adhesive residue from the foot recesses. Allow the surface to completely dry.

    • Remove the feet from their backing and firmly press them into place.

    Ask FixBot

    Add Comment

Conclusion

Repair didn’t go as planned? Try some basic troubleshooting, or ask our Answers community for help.

Cancel: I did not complete this guide.

2 other people completed this guide.

Spencer Day

Member since: 09/14/22

195,636 Reputation

1,243 Guides authored

Team

iFixit Member of iFixit

Staff

122 Members

27,554 Guides authored

0 Guide Comments

Add Comment

View Statistics:

Past 24 Hours: 22

Past 7 Days: 109

Past 30 Days: 1,034

All Time: 8,122