
Logitech Anywhere Mouse MX Micro Switch Replacement

Shinn Chyang Chen and 2 other contributors
Last updated on May 19, 2018
Views: 90K
View statistics:
- Past 24 Hours:
- 13
- Past 7 Days:
- 80
- Past 30 Days:
- 363
- All Time:
- 90,430
Comments: 37
12 comments on steps, 25 guide comments.
Go to guide commentsCompleted: 39 40
39 people have marked this guide "completed." Will you be next?
40 people have marked this guide "completed." Including you — great job!
Favorites: 20 21
20 people have favorited (and subscribed to) this guide. Will you be next?
21 people have favorited (and subscribed to) this guide — including you!
Community-Contributed Guide
An awesome member of our community made this guide. It was not created by iFixit staff.
Introduction
Go to step 1 ↓It's an easy procedure to fix the problem. You can watch the mouse being disassembled for more help.
- Take the mouse shell apart, held by 4 screws
- Unsolder and replace the micro switch
I have found 3 different manufacturers which sell micro switch replacement part for Logitech Anywhere. I only have tried E-Switch.
- E-Switch TS20100F070S (Digi-Key | Mouser Electronic)
- Omron D2LS (eBay | Digi-Key | Mouser Electronic)
- Kailh MI873101S01 (eBay)
- ZIPPY DA T Type (Original micro switch)
What you need
Parts
Tools


-
-
-
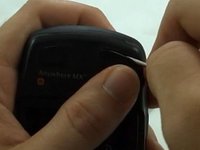
2 screws are located under the battery stickers.
-
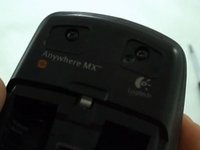
2 screws, one under each of the sliding pads under the mouse's nose.
 Ask FixBot
-
-
-
Peel off the battery sticker to reveal 2 screws.
-
Remove those screws with a phillips screwdriver.
-
-
-
Lift the edge of the foot gliders with a screwdriver.
-
Remove those screws with a phillips screwdriver.
-
-
-
-
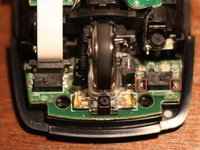
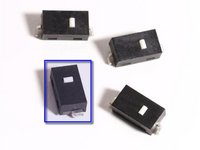
Desolder the micro switch and replace it with a new one, E-Switch TS20100F070S. Some have trouble to desolder the switch. You can eventually clip the tab to remove the switch. Once the switch is remove you can easily remove the solder tab.
-
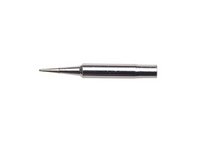
I use a Weller ST7 0.03" X0.79 mm ST Series Conical Tip to remove and solder the micro switch
-
Just remember, the micro switch doesn't have a polarity. But the connectors will guide you which side the micro switch needs to face.
-
E-Switch TS20100F070S
-
-




To reassemble your device, follow these instructions in reverse order.
Cancel: I did not complete this guide.
39 other people completed this guide.

25 Guide Comments
Thanks, my mouse actually arrived out of the package with the double-click issue, and this fixed it. Needed pretty high-temp soldering iron to get OEM micro-switch off, and tight fit soldering the new one on the inside terminal, but otherwise pretty easy.
Got this mouse, had this problem, sent it off for an RMA. The one they sent back eventually developed this exact same issue. Here's to hoping I won't have to do this again for a while now. Thanks for the guide.
Ended up having to repeat the process for the right mouse button. This time I managed to knock off one of the solder pads. Eventually by applying a lot of pressure and heat though, I was able to get the switch to bind with whatever was left of it, although I still have no idea how long my fix will actually hold for. But, something to watch out for if you're doing this.
This is great as now i have a part number as when I pulled the original microswitch apart to fix it internally, the button flew away - never to be found.
These are great prices for little switches, however living in the UK means an expensive courier to £15 and a lounge wait. They simply do not sell these here in the GB :-(
The part with shipment is far cheaper than a brand new MX Anywhere mouse.
Thanks again for the info!
