Free Shipping on Domestic Orders $75+

Lite-On iHAS324 Face Plate Replacement

What you need

  1. Lite-On iHAS324 Face Plate Replacement, Chassis: step 1, image 1 of 2 Lite-On iHAS324 Face Plate Replacement, Chassis: step 1, image 2 of 2
    • Insert a paper clip into a small hole on the right side of the faceplate bellow the disc tray.

    • There may be resistance, do not be afraid to use force.

    • The tray should then pop open.

    • Pull out the tray so that it is fully extended.

    Ask FixBot

    Add Comment

  2. Lite-On iHAS324 Face Plate Replacement: step 2, image 1 of 3 Lite-On iHAS324 Face Plate Replacement: step 2, image 2 of 3 Lite-On iHAS324 Face Plate Replacement: step 2, image 3 of 3
    • Use a plastic opening tool to push the three tabs located on the right, left, and bottom side of the outer chassis to loosen the faceplate off.

    Ask FixBot

    Add Comment

  3. Lite-On iHAS324 Face Plate Replacement: step 3, image 1 of 1
    • Pull the faceplate off the chassis.

    • Do NOT pull the faceplate all the way off the disc tray, because doing so can cause damage to the faceplate.

    • There may be resistance, do not be afraid to use force.

    Ask FixBot

    Add Comment

  4. Lite-On iHAS324 Face Plate Replacement: step 4, image 1 of 1
    • Using the Phillips Head #2 screwdriver, unscrew the two 8.5 mm screws located on the bottom back of the chassis.

    Ask FixBot

    Add Comment

  5. Lite-On iHAS324 Face Plate Replacement: step 5, image 1 of 1
    • Remove the bottom plate by lifting it off the device.

    Ask FixBot

    Add Comment

  6. Lite-On iHAS324 Face Plate Replacement: step 6, image 1 of 1
    • Turn the device over.

    • Remove the top plate by pulling the sides and lifting the plate off.

    Ask FixBot

    Add Comment

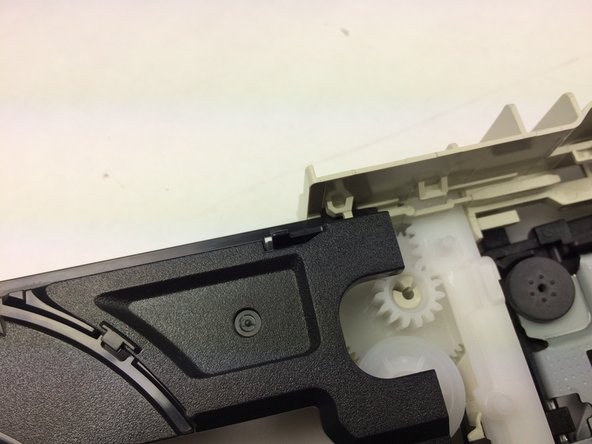
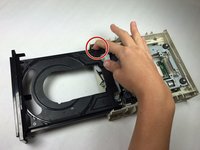
  7. Lite-On iHAS324 Face Plate Replacement, Disc Tray: step 7, image 1 of 2 Lite-On iHAS324 Face Plate Replacement, Disc Tray: step 7, image 2 of 2
    • Push the left tab in and slide the tray out on the left side.

    • Pull the gray plastic casing on the right side away from the tray.

    • Slide the right side of the tray out.

    Ask FixBot

    Add Comment

  8. Lite-On iHAS324 Face Plate Replacement, Face Plate: step 8, image 1 of 1
    • Slide the faceplate off the disc tray.

    Ask FixBot

    Add Comment

Conclusion

To reassemble your device, follow these instructions in reverse order.

Cancel: I did not complete this guide.

One other person completed this guide.

Kayla Culpepper

Member since: 03/22/15

726 Reputation

5 Guides authored

Team

Baylor, Team 5-9, Williams Spring 2015 Member of Baylor, Team 5-9, Williams Spring 2015

BU-WILLIAMS-S15S5G9

3 Members

10 Guides authored

0 Guide Comments

Add Comment

View Statistics:

Past 24 Hours: 0

Past 7 Days: 4

Past 30 Days: 39

All Time: 925