
Lexmark Intuition S505 Scanner Unit Replacement

Raymond and 9 other contributors
Last updated on Oct 13, 2026
Views: 1.9K
View statistics:
- Past 24 Hours:
- 3
- Past 7 Days:
- 18
- Past 30 Days:
- 108
- All Time:
- 1,916
Comments: 0
No one has left comments on this guide. Will you be first?
Go to guide commentsCompleted: 3 4
3 people have marked this guide "completed." Will you be next?
4 people have marked this guide "completed." Including you — great job!
Favorites: 2 3
2 people have favorited (and subscribed to) this guide. Will you be next?
3 people have favorited (and subscribed to) this guide — including you!
Student In Progress
This guide is being worked on by hardworking students.
Bullets!
Better coordination with markups and the color/type of bullets will help make this guide more clear!
Confusing Text
Some of this guide's text is confusing, duplicated, or off-topic. Clarify it by editing!
Incorrect Tools
Help make this guide better by using the correct tools in images and/or text.
Better Introduction
Improve this guide by completing or revising its introduction.
Introduction
Go to step 1 ↓The scanner unit allows users to scan copies.
What you need
Tools
-
Tweezers4.9
-


-
-
-
Hold the button down with the flat end away from the printer. When you hear a click, the duplex unit can be removed from the printer.
 Ask FixBot
-
-
-
From the back of the printer, remove the duplex unit towards you with the unit facing up.
-
-
-
-
-
Locate the two screw holes that connect the two cylindrical extensions from the top portion of the scanner unit to the printer.
-
Unscrew the two size#6 (5-mm head) Phillips 1-mm screws connecting the scanner unit to the printer.
-
-
-
Firmly press the hinges inward toward the middle of the printer on both sides at the same time.
-
The hinges should be then easily lifted up and removed.
-
-
-
Locate the three screws connecting the plastic tray to the printer.
-
Remove the three size#6 (5-mm head) Phillips 1-mm screws connecting the scanner unit to the printer.
-
-
-
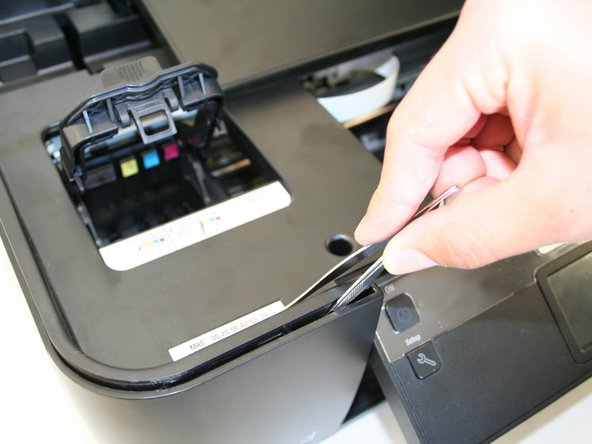
To remove the plastic cover, use a plastic opening tool or a tweezer to slowly move in between the crease around the printer to unlock it the plastic hinges at the inside edges of the printer.
-
-
-
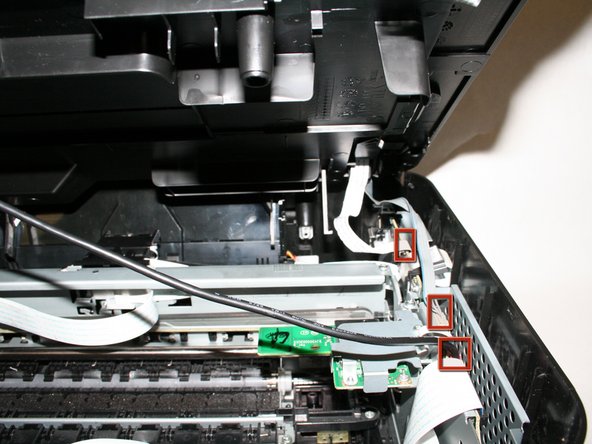
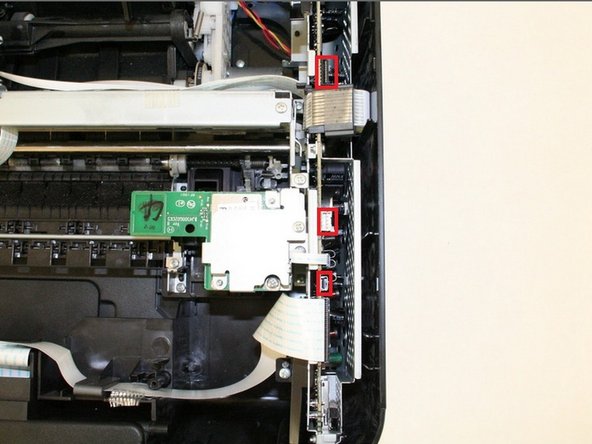
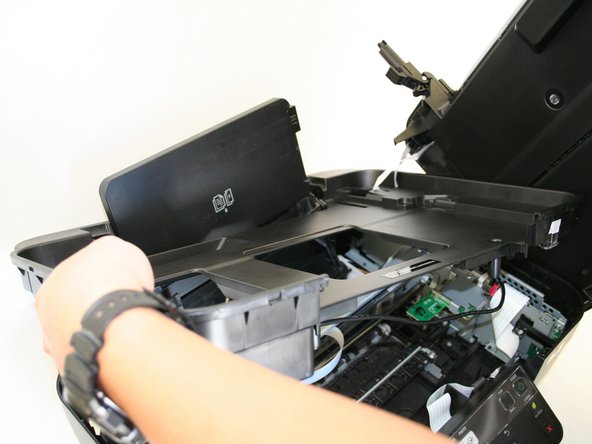
Slowly raise the scanner unit so that it exposes the three cables connecting the scanner unit to the printer.
-
-
-
Locate the three ports for the cables located on the side of scanner unit and make sure they are unplugged.
-
-
-
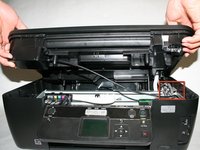
Remove the top part of the scanner unit with the plastic cover by lifting it up from the bottom portion of the printer.
-
-





To reassemble your device, follow these instructions in reverse order. Take your e-waste to an R2 or e-Stewards certified recycler.
Cancel: I did not complete this guide.
3 other people completed this guide.

Team

Cal Poly, Team 18-38, Regan Winter 2013 Member of Cal Poly, Team 18-38, Regan Winter 2013
CPSU-REGAN-W13S18G38
4 Members
48 Guides authored
