
LexiBook Tablet One Camera Replacement

Jordan and 3 other contributors
Last updated on Jun 19, 2015
Views: 620
View statistics:
- Past 24 Hours:
- 1
- Past 7 Days:
- 12
- Past 30 Days:
- 93
- All Time:
- 620
Comments: 0
No one has left comments on this guide. Will you be first?
Go to guide commentsCompleted: 1 2
1 person has marked this guide "completed." Will you be next?
2 people have marked this guide "completed." Including you — great job!
Favorites: 0 1
No one has favorited (and subscribed to) this guide. Will you be the first?
1 person has favorited (and subscribed to) this guide — and that's you!
Introduction
Go to step 1 ↓In this guide you will learn the basics for replacing the camera in the LexiBook Tablet One. This guide will include removing the battery. A plastic spudger and pencil may be useful for this guide.
What you need
Tools
-
Spudger4.9


-
-
-
Find the seam in the casing. Insert the blue plastic opening tool, and slide to either side carefully undoing the clips. The clips are hidden within the casing and are spaced roughly 1.5 in. apart.
 Ask FixBot
-
-
-
Insert a spudger between the speaker and the casing. Gently pop the speaker out, and set the panel to the side.
-
-
-
Using a plastic spudger, wedge the tool between the battery and LCD. Repeatedly gouge and work around the edges of the battery until the adhesive breaks free. You will have to apply generous pressure, as long as you push horizontally the components should not be further damaged.
-
-
-
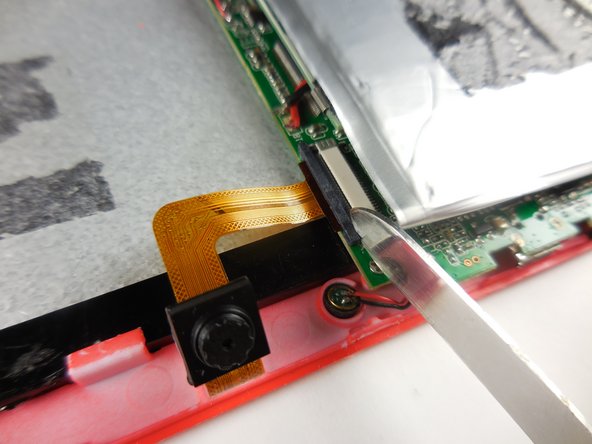
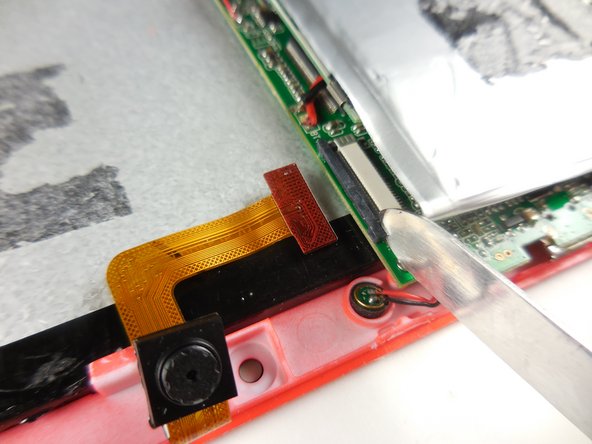
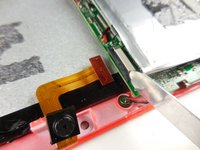
Remove the ribbon cable leading to the camera by carefully using a flat headed tool to open the ribbon clip.
-
Gently slide the ribbon cable out while holding the clip open.
-
-
-
-
When inserting your new camera, maintain the clip's open position and slide the new ribbon cable in.
-
-



To reassemble your device, follow these instructions in reverse order.
Cancel: I did not complete this guide.
One other person completed this guide.

Team

Colorado Springs, Team 2-5, Panko Spring 2015 Member of Colorado Springs, Team 2-5, Panko Spring 2015
UCCS-PANKO-S15S2G5
3 Members
60 Guides authored
