
Lens Replacement

Marina Bayardo and 2 other contributors
Last updated on May 23, 2019
Views: 2.2K
View statistics:
- Past 24 Hours:
- 5
- Past 7 Days:
- 25
- Past 30 Days:
- 114
- All Time:
- 2,177
Comments: 0
No one has left comments on this guide. Will you be first?
Go to guide commentsCompleted: 0 1
No one has marked this guide "completed." Will you be the first?
1 person has marked this guide "completed." It's you — great job!
Favorites: 0 1
No one has favorited (and subscribed to) this guide. Will you be the first?
1 person has favorited (and subscribed to) this guide — and that's you!
Action Shots
Be an action hero! This guide needs images that better demonstrate how to perform specific actions.
Markup Mishap
This guide needs better markups. Help out by correcting or making some markup annotations.
Missing Details
Some of this guide's details are missing. Help users by adding tools, difficulty, or time.
What you need
Tools

-
-
-
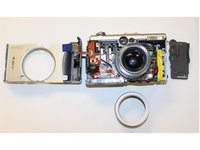
Step 2. Remove all the screws: Keep all the screws and disconnect the cables carefully.
-
Step 3. Lift: After removing all the cables, lift up and flip over the PCB.
-
-
-
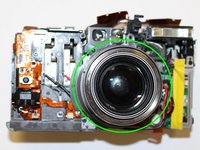
Step 4. Remove: Remove marked screws on top and around the lent.
-
**Remove all the parts, be aware that there are a lot of screws and keep count them a long the way of the dissambley **
-
-
-
-
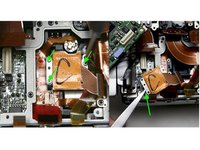
Step 5. Carefully remove as much of the glue as possible before proceeding to the next step.
-
Step 6. Remove the marked focus spacers.
-
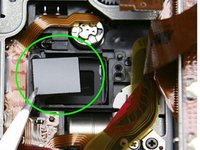
Place a bead of silicone adhesive on each side of the ir filter to fix it in position and allow to cure.
-


 Ask FixBot




To reassemble your device, follow these instructions in reverse order.

Team

University of Memphis, Team 3-2, Kim Fall 2015 Member of University of Memphis, Team 3-2, Kim Fall 2015
UM-KIM-F15S3G2
4 Members
60 Guides authored
