Free Shipping on Domestic Orders $75+

Lenovo Yoga Tab 3 10 Camera Replacement

What you need

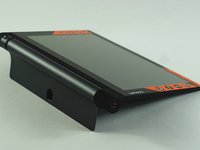
    1. Lenovo Yoga Tab 3 10 Camera Replacement, Back Cover: step 1, image 1 of 1
      • Open the built-in kickstand.

      Ask FixBot
      Add Comment

    2. Lenovo Yoga Tab 3 10 Camera Replacement: step 2, image 1 of 3 Lenovo Yoga Tab 3 10 Camera Replacement: step 2, image 2 of 3 Lenovo Yoga Tab 3 10 Camera Replacement: step 2, image 3 of 3
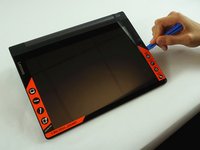
      • Remove the sticker located directly under the the built-in kickstand to reveal two 0.75 mm screws.

      • Remove the microSD card slot cover. Remove any microSD card (if inserted).

      • Using a Phillips head screwdriver, remove the three 0.75 mm screws.

      Ask FixBot
      Add Comment

    3. Lenovo Yoga Tab 3 10 Camera Replacement: step 3, image 1 of 3 Lenovo Yoga Tab 3 10 Camera Replacement: step 3, image 2 of 3 Lenovo Yoga Tab 3 10 Camera Replacement: step 3, image 3 of 3
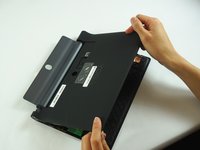
      • Orient the device so the screen is facing you.

      • Carefully insert the spudger along the seam between the screen and back cover and gently separate the back cover from the device frame.

      • Continue to detach the backplate from the frame by moving the spudger around the perimeter.

      • Some force will be required to detach the small plastic braces securing the backplate to the device.

      Ask FixBot

      Add Comment

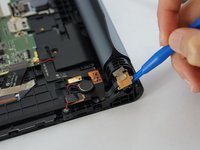
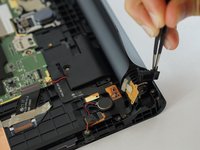
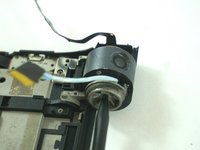
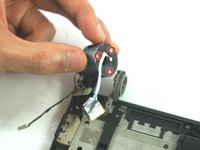
    1. Lenovo Yoga Tab 3 10 Camera Replacement, Camera: step 4, image 1 of 3 Lenovo Yoga Tab 3 10 Camera Replacement, Camera: step 4, image 2 of 3 Lenovo Yoga Tab 3 10 Camera Replacement, Camera: step 4, image 3 of 3
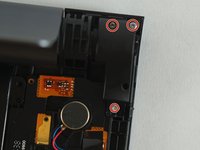
      • Remove the 3 screws from the auxiliary port cover.

      • Use the spudger to gently push the auxiliary module out of the way.

      • Remove the detachable plastic latch located in front of the hinge.

      Ask FixBot

      Add Comment

    2. Lenovo Yoga Tab 3 10 Camera Replacement: step 5, image 1 of 1
      • Use a spudger to gently remove the hinge.

      Ask FixBot

      Add Comment

    3. Lenovo Yoga Tab 3 10 Camera Replacement: step 6, image 1 of 1
      • Carefully lift the kickstand away from the frame.

      • The battery is located inside of the kickstand. Ensure proper handling and care.

      Ask FixBot

      Add Comment

    4. Lenovo Yoga Tab 3 10 Camera Replacement: step 7, image 1 of 2 Lenovo Yoga Tab 3 10 Camera Replacement: step 7, image 2 of 2
      • Use the pointed end of a spudger to push in the camera's locking mechanism.

      • Upon releasing the camera lock lift the camera out and locate the three screws.

      Ask FixBot

      Add Comment

    5. Lenovo Yoga Tab 3 10 Camera Replacement: step 8, image 1 of 3 Lenovo Yoga Tab 3 10 Camera Replacement: step 8, image 2 of 3 Lenovo Yoga Tab 3 10 Camera Replacement: step 8, image 3 of 3
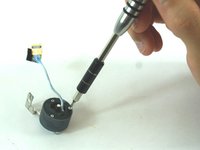
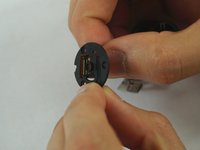
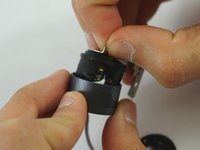
      • Use a J000 Philips screwdriver to remove the three screws.

      • Remove the camera cover that seals the camera case.

      • Remove the camera from the shell.

      Ask FixBot

      Add Comment

    6. Lenovo Yoga Tab 3 10 Camera Replacement: step 9, image 1 of 1
      • Separate the camera from its casing.

      Ask FixBot

      Add Comment

Conclusion

To reassemble your device, follow these instructions in reverse order.

Cancel: I did not complete this guide.

2 other people completed this guide.

Phanudej

Member since: 02/20/17

1,208 Reputation

5 Guides authored

Team

USF Tampa, Team S3-G2, Sullivan Spring 2017 Member of USF Tampa, Team S3-G2, Sullivan Spring 2017

USFT-SULLIVAN-S17S3G2

4 Members

54 Guides authored

1 Guide Comment

Thanks for describing in details with bit and peaces very neatly and clearly. I fix the problem of my Lenovo Yoga 3 with help of this. Great job you have done.. keep it up… Sisira

Sisira Kumara - Reply Share

Add Comment

View Statistics:

Past 24 Hours: 0

Past 7 Days: 2

Past 30 Days: 29

All Time: 4,643