Introduction
This guide will show you how to properly replace your faulty fan in your Lenovo V15 laptop.
The fan, which is the component responsible for cooling other important components that can overheat from excessive use, like the CPU or the GPU, is important to be working properly within your laptop. Signs that could indicate you need to replace your fan in your laptop are your fan not spinning, excessive heat at the bottom of the laptop, loud noises, or slower processing are all ways to tell you need to replace your fan.
Before you begin the process of this replacement, you need to power off the device and be sure it is not plugged into anything once you start.
What you need
-
-
-
Flip the laptop over so that the lower case is facing up.
-
Remove the following Phillips #1 screws:
-
Six 7 mm-long
-
Four 4 mm-long
 Ask FixBot
-
-
-
Insert an opening pick into the seam between the lower case and chassis.
-
Slide the opening pick around the entire perimeter until all of the retaining clips are fully released.
-
Lift and remove the lower case.
-
-
-
-
-
Use your fingernails to "walk" the battery connector out of its socket.
-
-
-
-
-
-
Use the tip of a spudger to pry up and disconnect the two Wi-Fi card antenna connectors.
-
Unseat the antenna cables from the fan retaining hooks.
-
-
-
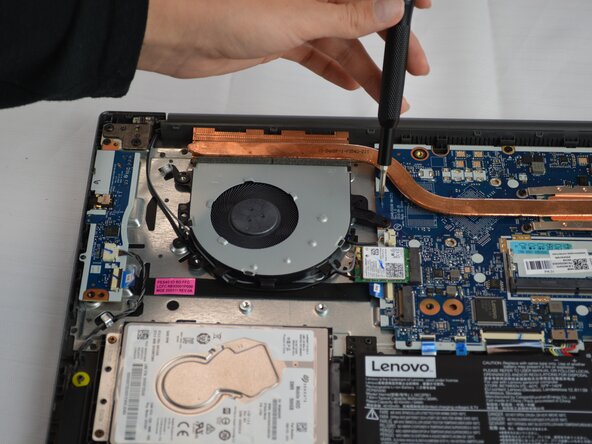
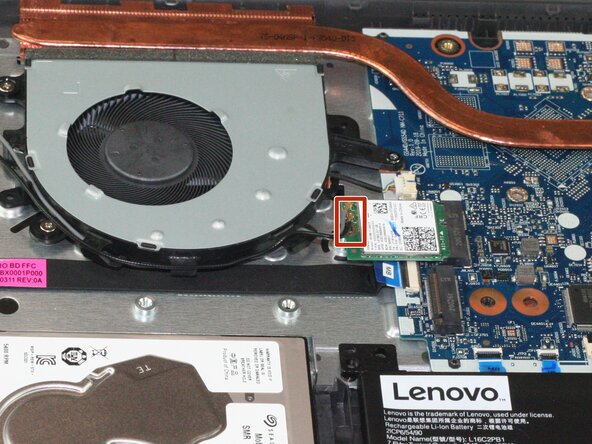
Use your fingernails to "walk" the fan connector out of its motherboard socket.
-






To reassemble your device, follow the above steps in reverse order.
Take your e-waste to an R2 or e-Stewards certified recycler.
Repair didn’t go as planned? Try some basic troubleshooting or ask our Answers community for help.
Cancel: I did not complete this guide.
One other person completed this guide.

Team

Texas Tech, Team 23-23, Weston Fall 2025 Member of Texas Tech, Team 23-23, Weston Fall 2025
TTU-WESTON-F25S23G23
4 Members
60 Guides authored
