Introduction
If your device isn’t charging or loses charge quickly, it may be time to replace the battery. Follow the instructions below to replace the battery in the Lenovo V15-ADA.
Before you begin this repair, make sure your laptop is powered off and unplugged from the charger.
What you need
-
-
-
Remove the 10 marked screws using a Phillips #1 screwdriver from the back plate.
-
M2.5 × 7 mm, Phillips-head (6) (RED circles)
-
M2.5 × 4 mm, Phillips-head (4) (ORANGE circles)
 Ask FixBot
-
-
-
After removing all ten screws, use a plastic spudger to separate the bottom cover from the laptop.
-
Gently slide the tool around the edges until the clips begin to release.
-
Once all the clips are loose, lift the cover off and set it aside.
-
-
-
-
-
-
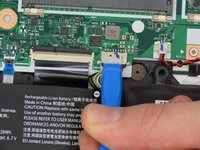
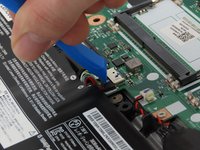
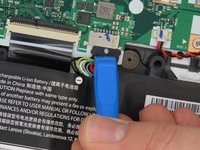
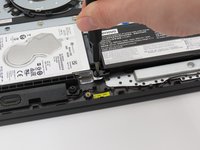
To start the removal of the battery, disconnect the ribbon cable connecting the battery to the computer.
-
-
-
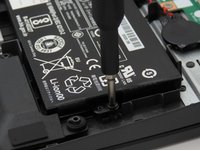
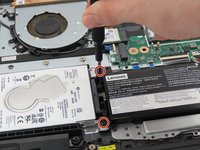
The battery is held in place by 3 screws. Use the Phillips #0 screwdriver to remove the screws that secure the battery.
-
M2 × 6 mm, Phillips-head, nylok-coated (3)
-
-





To reassemble your device, follow these instructions in reverse order.

Team

University of Kentucky, Team 1-2, Martin Spring 2024 Member of University of Kentucky, Team 1-2, Martin Spring 2024
UKY-MARTIN-S24S1G2
4 Members
60 Guides authored
