Free Shipping on Domestic Orders $75+

Lenovo V15 G2 IJL Back Cover Replacement

What you need

    1. Lenovo V15 G2 IJL Back Cover Replacement, Back Cover: step 1, image 1 of 3 Lenovo V15 G2 IJL Back Cover Replacement, Back Cover: step 1, image 2 of 3 Lenovo V15 G2 IJL Back Cover Replacement, Back Cover: step 1, image 3 of 3
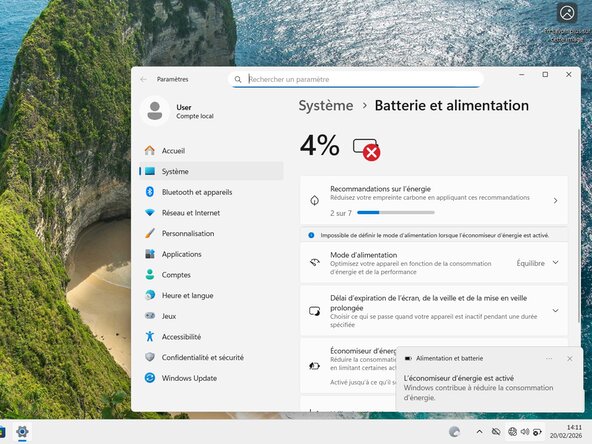
      • Let the laptop’s battery level drop below 25% before beginning the repair, as a fully charged battery could pose a fire risk if damaged.

      • Disconnect all cables and completely power off the laptop.

      Ask FixBot

      Add Comment

    2. Lenovo V15 G2 IJL Back Cover Replacement: step 2, image 1 of 1
      • Turn the laptop upside down so that the rubber feet are facing upward.

      Ask FixBot

      Add Comment

    3. Lenovo V15 G2 IJL Back Cover Replacement: step 3, image 1 of 2 Lenovo V15 G2 IJL Back Cover Replacement: step 3, image 2 of 2
      • Use a Phillips #00 screwdriver to remove the screws securing the back cover.

      • Seven 6.7 mm-long screws.

      • Four 3.8 mm-long screws.

      Ask FixBot

      Add Comment

    4. Lenovo V15 G2 IJL Back Cover Replacement: step 4, image 1 of 1
      • Insert an opening pick between the upper-right corner of the back cover and the frame.

      Ask FixBot

      Add Comment

    5. Lenovo V15 G2 IJL Back Cover Replacement: step 5, image 1 of 1
      • Slide the pick down along the back cover's edges to disengage the clips.

      • You will feel the clips release as you slide the pick along the edges.

      • When sliding the pick, remember to keep it angled upwards to release the clips.

      Ask FixBot

      Add Comment

    6. Lenovo V15 G2 IJL Back Cover Replacement: step 6, image 1 of 2 Lenovo V15 G2 IJL Back Cover Replacement: step 6, image 2 of 2
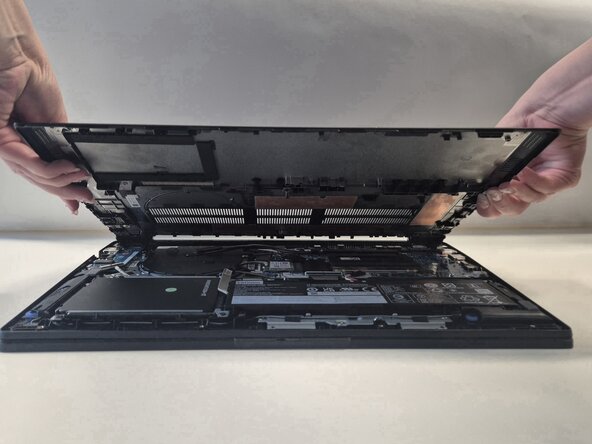
      • Remove the back cover.

      • During reassembly, snap the top corners of the back cover with the tabs on the plate. Press down firmly alongside the edges to fit back together the back cover and the hinge cover.

      Ask FixBot

      Add Comment

Conclusion

To reassemble your device, follow these instructions in reverse order.

Take your e-waste to an R2 or e-Stewards certified recycler.

Repair didn’t go as planned? Try some basic troubleshooting, or ask our Answers community for help.

Cancel: I did not complete this guide.

0 Guide Comments

Add Comment

View Statistics:

Past 24 Hours: 1

Past 7 Days: 16

Past 30 Days: 50

All Time: 124