
Lenovo V14 G2 ALC RAM Replacement

Mihai Victor and 2 other contributors
Last updated on Aug 1, 2024
Views: 959
View statistics:
- Past 24 Hours:
- 2
- Past 7 Days:
- 18
- Past 30 Days:
- 102
- All Time:
- 959
Comments: 0
No one has left comments on this guide. Will you be first?
Go to guide commentsCompleted: 1 2
1 person has marked this guide "completed." Will you be next?
2 people have marked this guide "completed." Including you — great job!
Favorites: 0 1
No one has favorited (and subscribed to) this guide. Will you be the first?
1 person has favorited (and subscribed to) this guide — and that's you!
Community-Contributed Guide
An awesome member of our community made this guide. It was not created by iFixit staff.
Introduction
Go to step 1 ↓Hi, i my name is Mihai and i want to show you how to replace the RAM (Random Access Memory) on this laptop (Lenovo V14 G2 ALC)
What you need
Parts


Tools


-
-
-
Next step, close the lid and put the laptop upside down and unscrew all these screws with a philips head screwdriver.
-
-
-
Insert the pry tool/guitar pick in the top center of the laptop and create an gap then slide the pry tool or the guitar pick till you hear plastic cracking
-
-
-
Now continue prying from the corners and the back panel should came off pretty easily.
-
-
-
-
Lift the panel from the top and you will have access to the motherboard
-
-
-
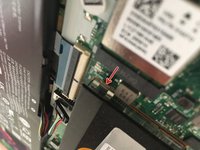
You have these clips around the cover, bend them slowly so you can lift up the cover
-
-
-
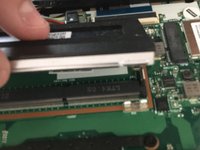
Make sure to install the ram module correctely according to the pins and press down on the ram module till you hear a click.
-
-
-
Put the cover back on but don't screw it in yet, just press on it lightly and powerup your laptop and see if the ram works, open taskmanager -> performance or enter the bios and check the amount of mb
-
-
-
Put the cover back on and be careful when putting the screws because the little screws need to be screwed in the bottom part of the laptop and the big ones need to be screwed in the top and middle part!
-
 Ask FixBot




To reassemble your device, follow these instructions in reverse order. It's easy
Cancel: I did not complete this guide.
One other person completed this guide.
