Introduction
If your trackpad for the Lenovo Thinkpad X220 is working improperly, this guide will help you remove and replace the trackpad.
What you need
-
-
Turn laptop over to expose the battery.
-
Slide and unlock the sliders while removing the battery casing at the same.
-
Place battery in a safe spot.
 Ask FixBot
-
-
-
Grab the Phillips screwdriver with the JIS, J00 head.
-
Remove all screws on the backside where the battery was removed.
-
You should have 10 screws total.
-
Place the 10 screws in a safe spot.
-
-
-
-
Close laptop.
-
Flip laptop over to battery side is facing down.
-
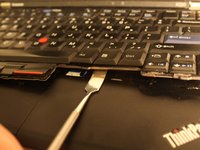
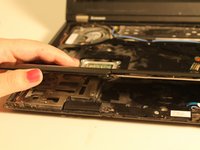
The screen needs to be open when separating the keyboard and trackpad from the base.
-
Using the Metal Spudger, place between the trackpad and the keyboard and lift up to remove.
-
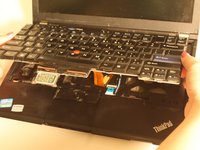
Pull keyboard towards yourself.
-
Grab the tab on the ribbon wire, pull off to release the keyboard.
-
-
-
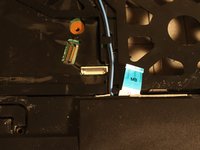
Now, you can get to the trackpad ribbon wire.
-
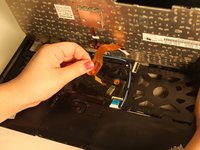
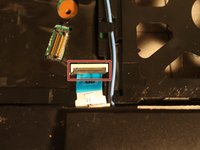
The trackpad ribbon wire in blue, unhinge the clamp to release the blue ribbon wire.
-
Get a hold of the trackpad and pull up and out of the laptop.
-
Carefully slide new trackpad into the hinges.
-
With the keyboard, clamp the ribbon back into place.
-
Slide replacement keyboard in.
-
Press the sides of the keyboard to secure placement.
-


To reassemble your device, follow these instructions in reverse order.
Cancel: I did not complete this guide.
2 other people completed this guide.

Team

Eastern Washington University, Team 2-4, Andersen Winter 2016 Member of Eastern Washington University, Team 2-4, Andersen Winter 2016
EWU-ANDERSEN-W16S2G4
5 Members
7 Guides authored