
Free Shipping on Domestic Orders $75+

Lenovo Thinkpad X220 Keyboard Replacement

What you need

  1. Lenovo Thinkpad X220 Keyboard Replacement, Battery: step 1, image 1 of 3 Lenovo Thinkpad X220 Keyboard Replacement, Battery: step 1, image 2 of 3 Lenovo Thinkpad X220 Keyboard Replacement, Battery: step 1, image 3 of 3
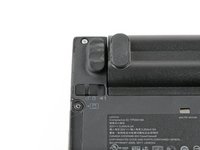
    • Locate the two switches that lock the battery.

    • Then push the left switch outward into the "unlocked" position.

    • This switch will remain in the unlocked position.

    Ask FixBot

    Add Comment

  2. Lenovo Thinkpad X220 Keyboard Replacement: step 2, image 1 of 2 Lenovo Thinkpad X220 Keyboard Replacement: step 2, image 2 of 2
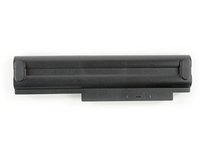
    • Now push and hold the right switch to the right while using the other hand to gently slide the battery upwards out of the laptop.

    Ask FixBot

    Add Comment

  3. Lenovo Thinkpad X220 Keyboard Replacement: step 3, image 1 of 2 Lenovo Thinkpad X220 Keyboard Replacement: step 3, image 2 of 2
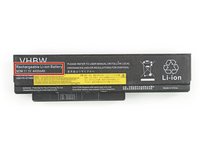
    • This is a rechargeable Li-Ion battery that has a capacity of 4400 mAh, if you have the 6 cell model.

    • The 4 or 9 cell model has different ratings.

    Ask FixBot

    Add Comment

  4. Lenovo Thinkpad X220 Keyboard Replacement, Keyboard: step 4, image 1 of 1
    • Put the laptop upside down.

    • Unscrew the two keyboard retention screws.

    Ask FixBot

    Add Comment

  5. Lenovo Thinkpad X220 Keyboard Replacement: step 5, image 1 of 2 Lenovo Thinkpad X220 Keyboard Replacement: step 5, image 2 of 2
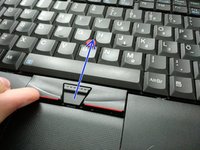
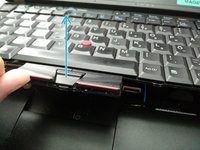
    • Put the laptop back on its feet, open the lid and push the keyboard from the TrackPoint click buttons.

    • After that, pull it from the laptop assembly.

    Ask FixBot

    Add Comment

  6. Lenovo Thinkpad X220 Keyboard Replacement: step 6, image 1 of 2 Lenovo Thinkpad X220 Keyboard Replacement: step 6, image 2 of 2
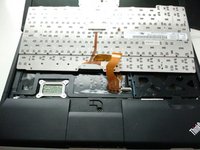
    • You should now have access to the keyboard's connector.

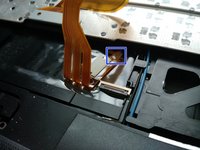
    • Pull it gently from the grabbing tip.

    Ask FixBot

    Add Comment

  7. Lenovo Thinkpad X220 Keyboard Replacement: step 7, image 1 of 1
    • The keyboard is now totally unplugged from the laptop.

    • Here you go! Plug a new keyboard on the connector and follow the steps in the reverse order to finish your repair.

    Ask FixBot

    Add Comment

Finish Line

Cancel: I did not complete this guide.

10 other people completed this guide.

alphaLONE

Member since: 07/01/11

995 Reputation

3 Guides authored

0 Guide Comments

Add Comment

View Statistics:

Past 24 Hours: 2

Past 7 Days: 14

Past 30 Days: 68

All Time: 7,553