What you need
-
-
-
Make sure to power down and turn off your device before proceeding with the repair.
-
Flip your laptop over so that the backside is facing you.
 Ask FixBot
-
-
-
Using a Phillips #1 screwdriver, remove the eight screws securing the backplate.
-
Don’t try to force screws which won't come out. They are held in place by a stopper on the reverse side. This will not prevent you from removing the backplate.
-
-
-
-
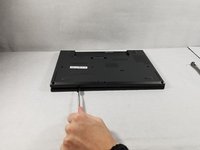
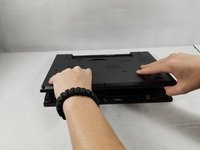
Using the metal spudger, wedge it in the seam where the backplate meets the front plate and run the tool along the seam to separate the backplate.
-
-
-
-
-
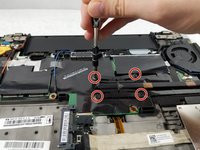
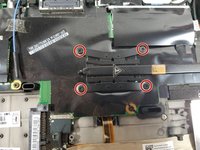
Use the Phillips #1 screwdriver to remove the four screws securing the fan to gain access to the processor.
-
-
-
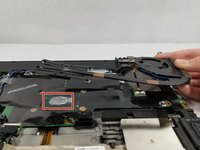
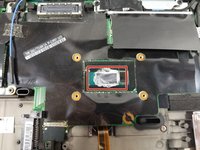
Lift the fan assembly to gain access to the thermal paste. From here, the thermal paste can be wiped away and replaced. Make sure to only apply new thermal paste to the larger die; don't apply any to the smaller one.
-
-






To reassemble your device, follow these instructions in reverse order.
Cancel: I did not complete this guide.
6 other people completed this guide.

Team

UMass Dartmouth, Team S1-G5, Simcock Fall 2018 Member of UMass Dartmouth, Team S1-G5, Simcock Fall 2018
UMASSD-SIMCOCK-F18S1G5
3 Members
96 Guides authored
1 Guide Comment
I replaced the SSD and decided to replace the heat conductive paste too. It was a good move as the paste had completely dried out. The replacement was effortless and the provided instructions were spot on, confirming my assumptions. Lenovo devices are excellent for self-repair.
