Free Shipping on Domestic Orders $75+

Lenovo Thinkpad T410i LCD Screen Replacement

What you need

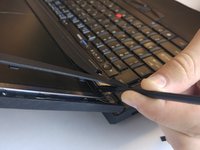
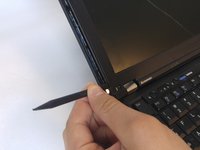
    1. Lenovo Thinkpad T410i LCD Screen Replacement, Screen Bezel: step 1, image 1 of 2 Lenovo Thinkpad T410i LCD Screen Replacement, Screen Bezel: step 1, image 2 of 2
      • Use a spudger to remove the plastic covers from the LCD screen.

      Ask FixBot

      Add Comment

    2. Lenovo Thinkpad T410i LCD Screen Replacement: step 2, image 1 of 1
      • Remove the two 6.0mm screws on each side using Philips #0 head screwdriver as shown in the picture.

      Ask FixBot

      Add Comment

    3. Lenovo Thinkpad T410i LCD Screen Replacement: step 3, image 1 of 1
      • Use a spudger to separate the bezel of the LCD screen.

      Ask FixBot

      Add Comment

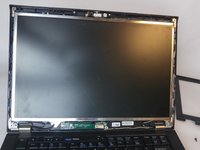
    4. Lenovo Thinkpad T410i LCD Screen Replacement: step 4, image 1 of 3 Lenovo Thinkpad T410i LCD Screen Replacement: step 4, image 2 of 3 Lenovo Thinkpad T410i LCD Screen Replacement: step 4, image 3 of 3
      • Continue along the edges lifting up and prying off the plastic LCD bezel.

      Ask FixBot

      Add Comment

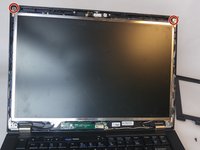
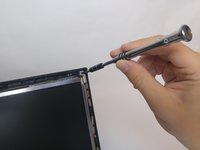
    1. Lenovo Thinkpad T410i LCD Screen Replacement, LCD screen: step 5, image 1 of 2 Lenovo Thinkpad T410i LCD Screen Replacement, LCD screen: step 5, image 2 of 2
      • Use a Philips #0 head screwdriver to remove the two 6.0mm screws from the top corners of the LCD screen.

      Ask FixBot

      Add Comment

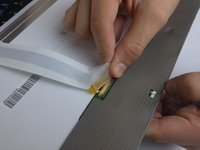
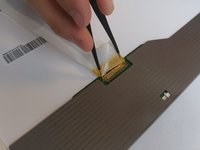
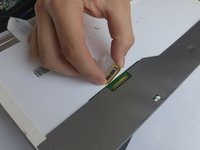
    2. Lenovo Thinkpad T410i LCD Screen Replacement: step 6, image 1 of 3 Lenovo Thinkpad T410i LCD Screen Replacement: step 6, image 2 of 3 Lenovo Thinkpad T410i LCD Screen Replacement: step 6, image 3 of 3
      • Place the LCD screen safely down on its front.

      • Pulling the screen too far away from the screen may damage delicate ribbon cable.

      • Peel the tape off the ribbon cable's contacts.

      • Carefully detach the ribbon cable from the LCD screen.

      • Poking the golden contacts may easily damage them.

      Ask FixBot

      Add Comment

    3. Lenovo Thinkpad T410i LCD Screen Replacement: step 7, image 1 of 1
      • Remove the screen from your device.

      Ask FixBot

      Add Comment

Conclusion

To reassemble your device, follow these instructions in reverse order.

Cancel: I did not complete this guide.

3 other people completed this guide.

Harsh Patel

Member since: 10/02/17

287 Reputation

2 Guides authored

Team

USF Tampa, Team S1-G2, Thompson Fall 2017 Member of USF Tampa, Team S1-G2, Thompson Fall 2017

USFT-THOMPSON-F17S1G2

4 Members

72 Guides authored

0 Guide Comments

Add Comment

View Statistics:

Past 24 Hours: 0

Past 7 Days: 5

Past 30 Days: 29

All Time: 978