Free Shipping on Domestic Orders $75+

Lenovo ThinkPad Yoga 370 Fan Replacement

What you need

    1. Lenovo ThinkPad Yoga 370 Fan Replacement, Battery: step 1, image 1 of 1
      • Device needs to be powered off and unplugged.

      • Remove the stylus from the device and set it aside.

      Ask FixBot

      Add Comment

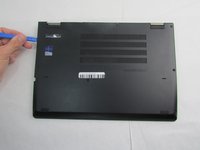
    2. Lenovo ThinkPad Yoga 370 Fan Replacement: step 2, image 1 of 2 Lenovo ThinkPad Yoga 370 Fan Replacement: step 2, image 2 of 2
      • Using the Phillips #00 screwdriver unscrew the eight circled 4mm screws until you hear a click.

      • The screws will remain attached to the back cover.

      Ask FixBot

      Add Comment

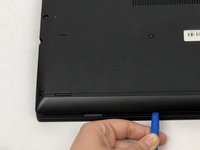
    3. Lenovo ThinkPad Yoga 370 Fan Replacement: step 3, image 1 of 2 Lenovo ThinkPad Yoga 370 Fan Replacement: step 3, image 2 of 2
      • Note that while the screws are undone, the bottom cover is still attached by several plastic clips around the edges.

      • Using the plastic opening tool, work around the edges of the bottom cover to undo the plastic clips.

      Ask FixBot

      Add Comment

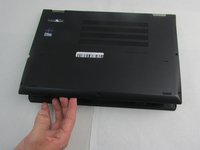
    4. Lenovo ThinkPad Yoga 370 Fan Replacement: step 4, image 1 of 2 Lenovo ThinkPad Yoga 370 Fan Replacement: step 4, image 2 of 2
      • Gently remove the cover by placing your fingers around the edges.

      Ask FixBot
      Add Comment

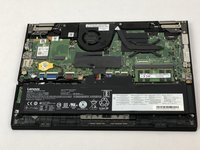
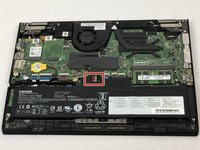
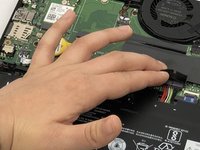
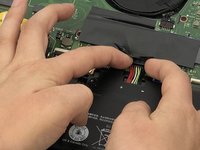
    5. Lenovo ThinkPad Yoga 370 Fan Replacement: step 5, image 1 of 3 Lenovo ThinkPad Yoga 370 Fan Replacement: step 5, image 2 of 3 Lenovo ThinkPad Yoga 370 Fan Replacement: step 5, image 3 of 3
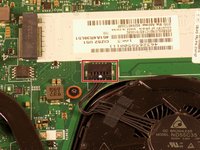
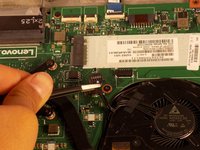
      • With your fingers, fold back the plastic cover highlighted.

      • Using two fingers, gently remove the battery connectors.

      Ask FixBot
      Add Comment

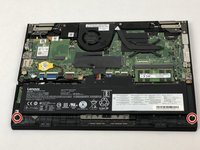
    6. Lenovo ThinkPad Yoga 370 Fan Replacement: step 6, image 1 of 3 Lenovo ThinkPad Yoga 370 Fan Replacement: step 6, image 2 of 3 Lenovo ThinkPad Yoga 370 Fan Replacement: step 6, image 3 of 3
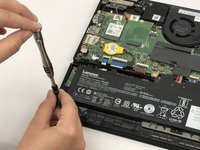
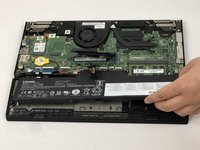
      • Using the Phillips #00 screwdriver, remove the two 4mm screws.

      • Remove the battery.

      • Make sure to only replace with a battery that matches your computer, any other battery could ignite or explode.

      Ask FixBot

      Add Comment

    1. Lenovo ThinkPad Yoga 370 Fan Replacement, Fan: step 7, image 1 of 2 Lenovo ThinkPad Yoga 370 Fan Replacement, Fan: step 7, image 2 of 2
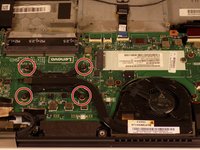
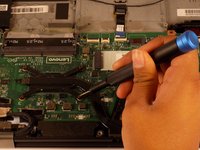
      • Remove the four 2 mm screws holding the heatsink to the motherboard using the Phillips #00 screwdriver.

      Ask FixBot

      Add Comment

    2. Lenovo ThinkPad Yoga 370 Fan Replacement: step 8, image 1 of 2 Lenovo ThinkPad Yoga 370 Fan Replacement: step 8, image 2 of 2
      Tool used on this step:
      Tweezers
      $4.99
      Buy
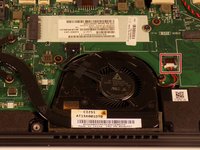
      • Disconnect the fan's bundled cable from the motherboard using a small set of tweezers or simply pull them out gently.

      • Pull evenly on the full width of the cable so that no individual wires are overly strained.

      Ask FixBot
      Add Comment

    3. Lenovo ThinkPad Yoga 370 Fan Replacement: step 9, image 1 of 2 Lenovo ThinkPad Yoga 370 Fan Replacement: step 9, image 2 of 2
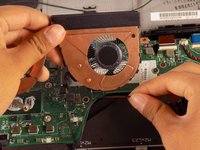
      • The fan is not ready to be removed yet. When lifting the fan from the frame, keep it within 2 inches from the motherboard until the attached wire is removed.

      • Lift the fan and heatsink from the motherboard; then flip both toward the motherboard.

      • Detach the wire from the perimeter of the fan casing.

      • Remove the fan and heatsink.

      • When reinstalling the heatsink, remember to reapply thermal paste to the CPU die.

      Ask FixBot
      Add Comment

Conclusion

To reassemble your device, follow these instructions in reverse order.

Cancel: I did not complete this guide.

2 other people completed this guide.

0 Guide Comments

Add Comment

View Statistics:

Past 24 Hours: 0

Past 7 Days: 11

Past 30 Days: 44

All Time: 1,546