Free Shipping on Domestic Orders $75+

Lenovo ThinkPad X280 CMOS Battery Replacement

What you need

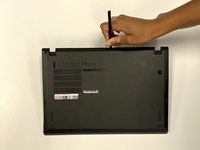
    1. Lenovo ThinkPad X280 CMOS Battery Replacement, Back Panel: step 1, image 1 of 1
      • To begin, ensure that the device is completely powered off and not connected to an energy supply.

      • Close the device and flip it over to expose the back panel.

      Ask FixBot

      Add Comment

    2. Lenovo ThinkPad X280 CMOS Battery Replacement: step 2, image 1 of 2 Lenovo ThinkPad X280 CMOS Battery Replacement: step 2, image 2 of 2
      • Use a Phillips #1 screwdriver to unscrew the five captive screws on the back panel until a small pop is heard.

      • These are captive screws and do not come out completely.

      Ask FixBot

      Add Comment

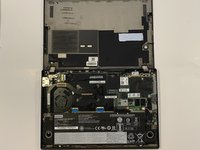
    3. Lenovo ThinkPad X280 CMOS Battery Replacement: step 3, image 1 of 2 Lenovo ThinkPad X280 CMOS Battery Replacement: step 3, image 2 of 2
      • Gently wedge an opening tool or spudger under the back panel, and loosen the clips around the perimeter until the back panel comes off.

      • Remove the back cover.

      Ask FixBot

      Add Comment

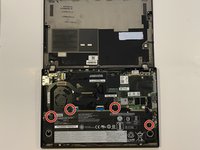
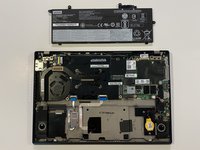
    1. Lenovo ThinkPad X280 CMOS Battery Replacement, Battery: step 4, image 1 of 3 Lenovo ThinkPad X280 CMOS Battery Replacement, Battery: step 4, image 2 of 3 Lenovo ThinkPad X280 CMOS Battery Replacement, Battery: step 4, image 3 of 3
      • Using the Phillips #1 screwdriver, remove the four 5 mm screws that are holding the battery down.

      • Remove the battery.

      Ask FixBot

      Add Comment

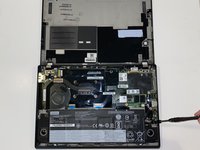
    1. Lenovo ThinkPad X280 CMOS Battery Replacement, CMOS Battery: step 5, image 1 of 1
      Tool used on this step:
      Tweezers
      $4.99
      Buy
      • Use tweezers to gently unplug the CMOS Battery from the port on the right side.

      Ask FixBot

      Add Comment

    2. Lenovo ThinkPad X280 CMOS Battery Replacement: step 6, image 1 of 1
      • Work the wire out from its holding brackets and is now free to be removed.

      Ask FixBot

      Add Comment

Conclusion

To reassemble your device, follow these instructions in reverse order.

Cancel: I did not complete this guide.

4 other people completed this guide.

0 Guide Comments

Add Comment

View Statistics:

Past 24 Hours: 8

Past 7 Days: 51

Past 30 Days: 226

All Time: 7,896