Introduction
The storage is a critical part of your computer, and if your workload becomes too demanding, it may be time to upgrade it. Thankfully, storage upgrades for this laptop are relatively simple.
You can check your remaining free storage in Task Manager (Ctrl + Shift + Esc).
Some models of this laptop were configured with a spinning HDD, which is significantly slower than newer SSDs, which are far less prone to failure, and now cost significantly less than they did at launch. If you are still running a HDD, moving to an SSD is a worthwhile upgrade - just make sure to transfer your data first.
-
-
-
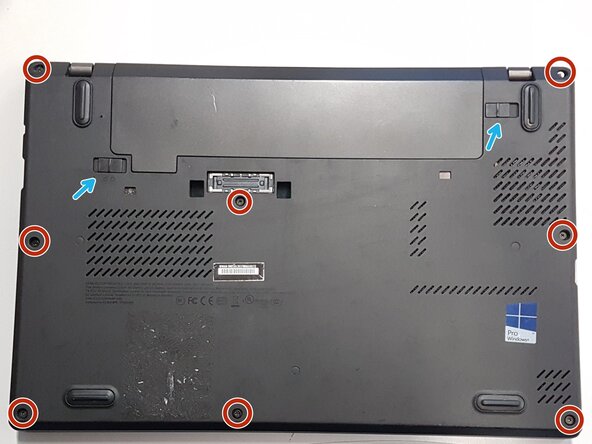
Physically remove battery 2. Release it by pushing clips 1 and 2 highlighted with blue arrows, then slide out the battery.
-
Unscrew the 8 screws holding the back panel in place
-
Use a plastic prying tool to release all the clips holding the panel in place.
 Ask FixBot
-
-
-
-
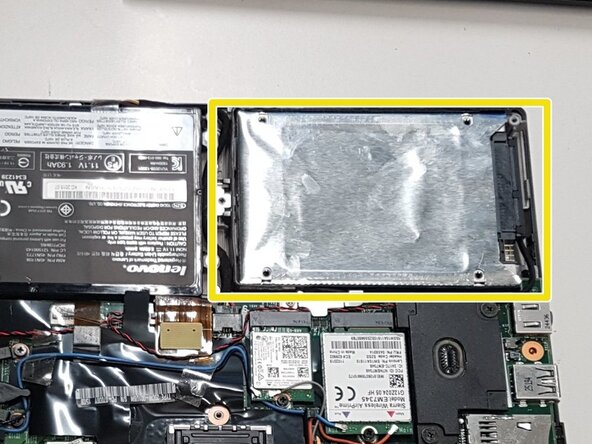
Remove the retaining screw(s) holding the 2.5-inch hard drive or SSD bracket.
-
Lift the drive slightly, disconnect the SATA cable from the side of the drive, and pull it out.
-
-
-
Peel or slide the rubber/plastic side rails (brackets) off the old drive and attach them to your new 2.5-inch SSD.
-
Plug the SATA drive cable firmly into the new SSD.
-
Place the new drive into the storage bay and secure it with its retaining screws.
-
-


Once you have replaced your storage, simply reseat the back cover and screw it back on. You'll need your AC adapter to power your device back on & re-enable the internal battery.
Don't forget to reinstall your external battery!

