Introduction
If your Lenovo ThinkPad X1 Gen 1 Extreme (model number 20MF-000LUS used in this guide) is overheating or making clicking noises, use this guide to remove the fan.
While this laptop has been noted to get quite hot and loud, this should typically only occur when charging or using high intensity applications. The laptop should not be overheating when idle.
Keep in mind that an entire replacement of the fan may not be necessary, as the problem could potentially be built up dust or a foreign object. If this is the case, removing the fan and cleaning it out with compressed air could solve the issue.
What you need
-
-
-
Orient the laptop so that it is bottom up, and the trackpad is closest to you.
-
Unscrew the seven captive screws with a Phillips #00 screwdriver.
-
Slide a blue opening pick in the gap between the bottom panel and chassis, and pry off the one clip on each side.
-
Remove the back cover from the device.
 Ask FixBot
-
-
-
-
-
Use a Phillips #00 head screwdriver to remove the four 4 mm screws above the battery.
-
-
-
Lift the speaker modules on either side of the battery out of its pegs, and unwind the cable from the front of the battery.
-
Set the speaker modules out of the way.
-
-
-
-
-
Tool used on this step:Tweezers$4.99
-
Use tweezers to peel the plastic cover off the connector.
-
Use a plastic spudger or your fingernail to pry up the battery connector straight up from the motherboard.
-
-
-
-
Tool used on this step:Phillips #00 Screwdriver$5.49
-
Unscrew the 3mm screw holding down the wireless adapter using a Phillips #00 screwdriver.
-
Slide the adapter out of its connector.
-
Detach the black and gray cables and separate them from the frame of the fan by gently pulling upwards.
-
-
-
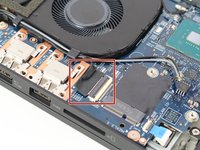
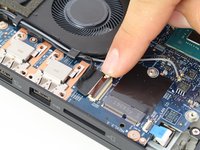
Unlatch and remove the cable connecting to the frame of the fan by flipping the thin black tab up.
-
Separate the cable from the frame of the fan.
-
-
-
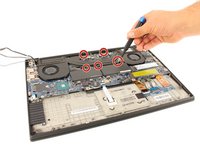
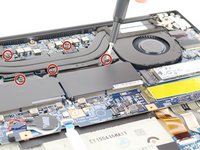
Loosen the five screws connecting the fan to the motherboard using a Philips #00 head screwdriver.
-
-
-
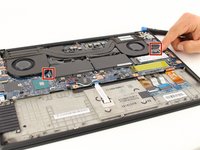
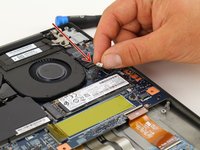
Gently disconnect the two cables located on right and left side of the fan.
-
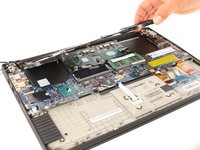
Lift the fan up and out and remove it from the device.
-
-






To reassemble your device, follow these instructions in reverse order.
Cancel: I did not complete this guide.
4 other people completed this guide.

Team

Cal Poly, Team S7-G3, Regan Winter 2020 Member of Cal Poly, Team S7-G3, Regan Winter 2020
CPSU-REGAN-W20S7G3
4 Members
60 Guides authored
2 Guide Comments
You only need to complete steps 1, 8, & 9. The cables for the wireless card come out of the side of the fan assembly without unplugging them. If you want to disconnect the battery for peace of mind you can do that without removing the battery. Definitely don't need to remove the speakers. I came across this guide looking for a replacement fan part but have done this particular job twice and removed the fan on another occasion to bench test it, so I've done the process 3 times. Seems like the author was hunting for additional steps for more brownie points but it's much simpler than that.
Most steps are unnecessary, you just need to take out the heatsink, which you can do without removing anything else. HOWEVER the fans each have a small cable soldered directly to the heatsink.
So please prepare for some soldering when you're gonna replace the fans. Don't do like me and trust a random guide like this one, so that you can't use you laptop for half a week before your friend can help you solder.
