Free Shipping on Domestic Orders $75+

Lenovo ThinkPad T540p Thermal Paste Replacement

What you need

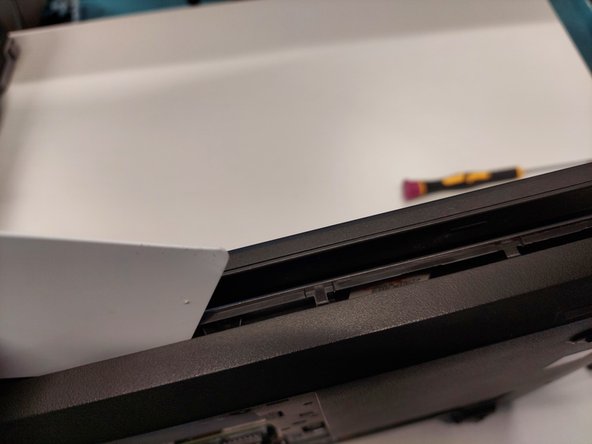
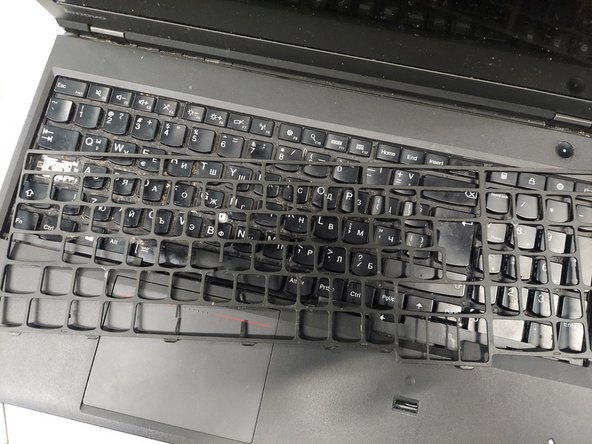
    1. Lenovo ThinkPad T540p Thermal Paste Replacement, Opening the laptop: step 1, image 1 of 3 Lenovo ThinkPad T540p Thermal Paste Replacement, Opening the laptop: step 1, image 2 of 3 Lenovo ThinkPad T540p Thermal Paste Replacement, Opening the laptop: step 1, image 3 of 3
      • Unscrew all screws holding the back panel in place and disconnect the battery.

      • Use a prying tool to release all the clips and remove the panel.

      • Remove the plastic trim around the keyboard keys.

      Ask FixBot

      Add Comment

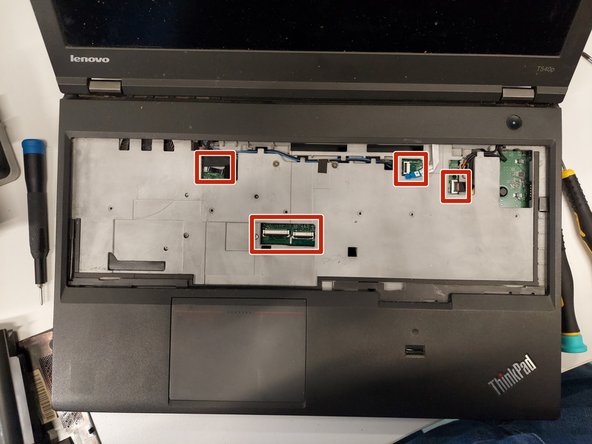
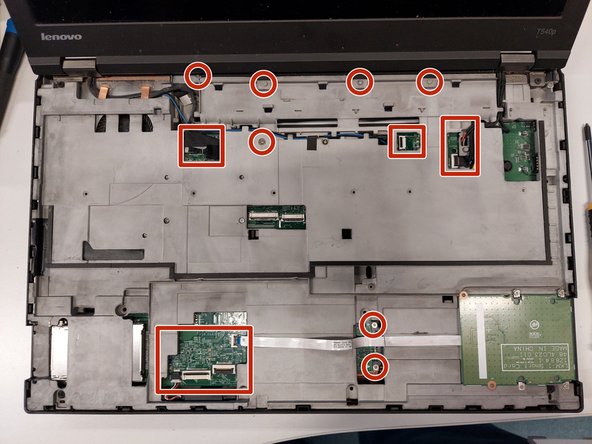
    2. Lenovo ThinkPad T540p Thermal Paste Replacement, Opening the laptop: step 2, image 1 of 3 Lenovo ThinkPad T540p Thermal Paste Replacement, Opening the laptop: step 2, image 2 of 3 Lenovo ThinkPad T540p Thermal Paste Replacement, Opening the laptop: step 2, image 3 of 3
      • Remove the several little screws that hold the keyboard and disconnect it.

      • Disconnect every single connector that you see.

      • Unscrew the bottom plate and once again make sure you disconnected everything.

      Ask FixBot

      Add Comment

    3. Lenovo ThinkPad T540p Thermal Paste Replacement, Opening the laptop: step 3, image 1 of 1
      • Remove the pads and unscrew the display.

      Ask FixBot

      Add Comment

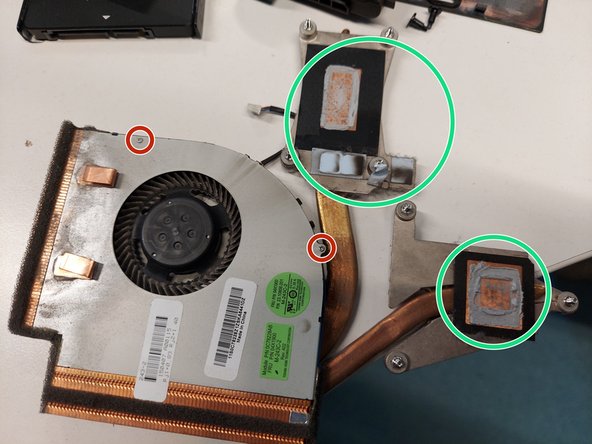
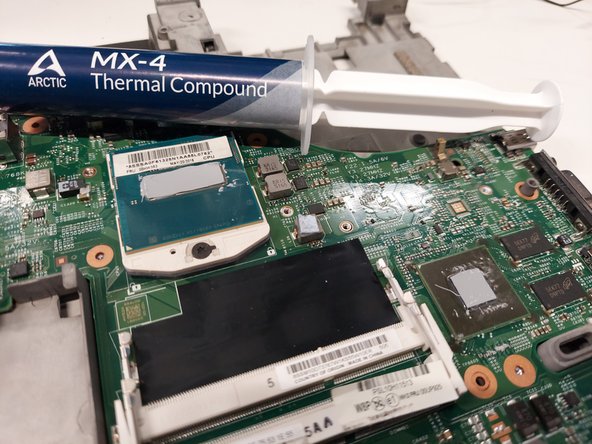
    4. Lenovo ThinkPad T540p Thermal Paste Replacement, Changing the thermal paste: step 4, image 1 of 3 Lenovo ThinkPad T540p Thermal Paste Replacement, Changing the thermal paste: step 4, image 2 of 3 Lenovo ThinkPad T540p Thermal Paste Replacement, Changing the thermal paste: step 4, image 3 of 3
      • Unscrew the 7 screws holding the CPU heatsink and disconnect the fan.

      • Clean the old thermal paste both from the cooler and the CPU. It is best to use isopropyl alcohol and cotton swabs or paper towel, but be careful not to go too hard on the CPU. Also change the thermal pads.

      • Now is a good idea to upgrade the RAM and also the CPU if needed.

      • It is also recommended to use compressed air to remove any dust in the laptop and the fan. You can also open it to clean it from the inside.

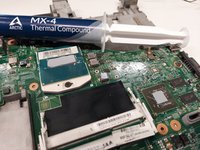
      • Dont use too much thermal paste, just enough to cover some portion of the pad. If you have a spreader, use it. The thermal paste will apply evenly after you tighten the heatsink.

      • Last, put the heatsink back carefully and tighten the screws in order 1 -> 7 to ensure even pressure. Dont forget to plug in the fan cable.

      Ask FixBot

      Add Comment

Conclusion

To reassemble your device, follow these instructions in reverse order.

Cancel: I did not complete this guide.

3 other people completed this guide.

Simeon Brankov

Member since: 11/08/20

10,409 Reputation

78 Guides authored

2 Guide Comments

Thanks a lot.

xiangmin cai - Reply Share

Hi, glad to hear I helped!

Simeon Brankov - Reply Share

Add Comment

View Statistics:

Past 24 Hours: 4

Past 7 Days: 31

Past 30 Days: 107

All Time: 2,095