Free Shipping on Domestic Orders $75+

Lenovo ThinkPad T440p Fan Replacement

Views: 5.5K

View statistics:

Past 24 Hours:
2
Past 7 Days:
36
Past 30 Days:
125
All Time:
5,495
Comments: 2

1 comment on steps, 1 guide comment.

Go to guide comments
Completed: 3

3 people have marked this guide "completed." Will you be next?

Favorites: 1

1 person has favorited (and subscribed to) this guide. Will you be next?

Time Required: 6 minutes
Difficulty: Moderate
Lenovo ThinkPad T440p Fan Replacement

Introduction

Go to step 1 ↓

The fan is critical to keeping you computer cool and preventing overheating within the Lenovo ThinkPad T440p. When replacing, be sure to only loosen the screws of the heat sink as they are attached to the component. This guide does not require any difficult steps but be careful when removing cables. Make sure to use a spudger and not any tool containing metals or sharp points as it could damage the cable.

What you need

Tools

    1. Lenovo ThinkPad T440p Fan Replacement, Battery: step 1, image 1 of 1
      • Flip the laptop so that the back is facing up.

      Ask FixBot

      Add Comment

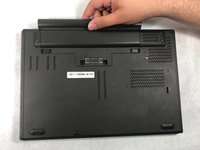
    2. Lenovo ThinkPad T440p Fan Replacement: step 2, image 1 of 2 Lenovo ThinkPad T440p Fan Replacement: step 2, image 2 of 2
      • Slide the battery latches to the unlocked position.

      Ask FixBot

      Add Comment

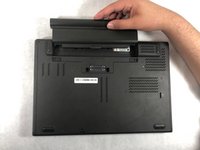
    3. Lenovo ThinkPad T440p Fan Replacement: step 3, image 1 of 2 Lenovo ThinkPad T440p Fan Replacement: step 3, image 2 of 2
      • Slide the battery pack out of the battery slot.

      Ask FixBot

      Add Comment

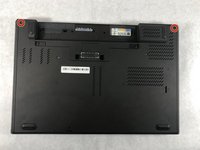
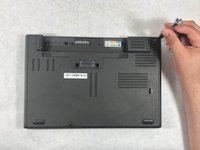
    1. Lenovo ThinkPad T440p Fan Replacement, Back Cover: step 4, image 1 of 2 Lenovo ThinkPad T440p Fan Replacement, Back Cover: step 4, image 2 of 2
      • Use a Phillips #1 screwdriver to remove the two 8mm screws holding the back cover.

      Ask FixBot
      Add Comment

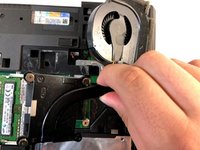
    2. Lenovo ThinkPad T440p Fan Replacement: step 5, image 1 of 1
      • Slide down the back cover.

      Ask FixBot
      Add Comment

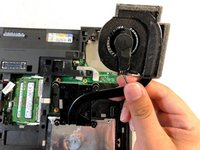
    3. Lenovo ThinkPad T440p Fan Replacement: step 6, image 1 of 1
      • Remove the back cover.

      Ask FixBot
      Add Comment

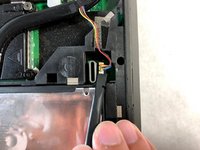
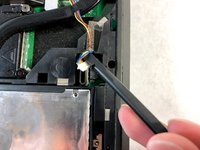
    1. Lenovo ThinkPad T440p Fan Replacement, Fan: step 7, image 1 of 2 Lenovo ThinkPad T440p Fan Replacement, Fan: step 7, image 2 of 2
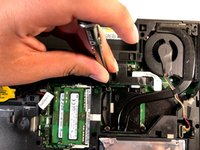
      • Using the spudger detach the cable that is connected to the computer.

      Ask FixBot

      Add Comment

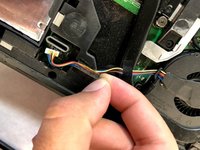
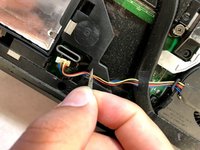
    2. Lenovo ThinkPad T440p Fan Replacement: step 8, image 1 of 2 Lenovo ThinkPad T440p Fan Replacement: step 8, image 2 of 2
      • Remove the tape that is over the cable.

      Ask FixBot

      Add Comment

    3. Lenovo ThinkPad T440p Fan Replacement: step 9, image 1 of 3 Lenovo ThinkPad T440p Fan Replacement: step 9, image 2 of 3 Lenovo ThinkPad T440p Fan Replacement: step 9, image 3 of 3
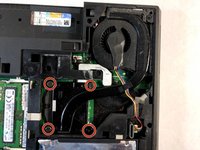
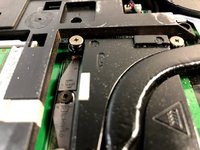
      • Screws are attached to the heat sink. Do not try to remove them; just have the screws loosened.

      • Unscrew the four screws that are attached to the heat sink by using a Phillips #0 screwdriver.

      Ask FixBot

      Add Comment

    4. Lenovo ThinkPad T440p Fan Replacement: step 10, image 1 of 3 Lenovo ThinkPad T440p Fan Replacement: step 10, image 2 of 3 Lenovo ThinkPad T440p Fan Replacement: step 10, image 3 of 3
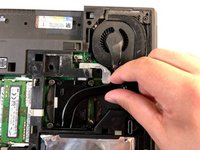
      • Remove the fan.

      Ask FixBot

      Add Comment

Conclusion

To reassemble your device, follow these instructions in reverse order.

Cancel: I did not complete this guide.

3 other people completed this guide.

Christian Abad

Member since: 03/20/19

1,780 Reputation

7 Guides authored

Team

1 Guide Comment

The guide could go one step further as this model features a replaceable CPU.

cubytus - Reply Share

Add Comment

View Statistics:

Past 24 Hours: 2

Past 7 Days: 36

Past 30 Days: 125

All Time: 5,495