
Lenovo ThinkPad T431S Screen Replacement

Christine Portanova and 4 other contributors
Last updated on Jun 3, 2020
Views: 1.4K
View statistics:
- Past 24 Hours:
- 1
- Past 7 Days:
- 15
- Past 30 Days:
- 59
- All Time:
- 1,353
Comments: 2
2 comments on steps.
Completed: 1 2
1 person has marked this guide "completed." Will you be next?
2 people have marked this guide "completed." Including you — great job!
Favorites: 0 1
No one has favorited (and subscribed to) this guide. Will you be the first?
1 person has favorited (and subscribed to) this guide — and that's you!
Introduction
Go to step 1 ↓This guide will show you how to locate and replace the Lenovo T431s screen. The screen is what gives your visuals on your computer. If you have a blotchy screen, poor visuals, or physical screen damage, you might need to replace your screen.
What you need
Tools


-
-
-
Use the Jimmy tool to remove the screen bezel with a gentle prying motion.
 Ask FixBot
-
-
-
Remove the four 3.0 mm screws in the four corners of the screen with a Phillips #1 screwdriver bit.
-
While removing the screws, pry the screen off with an opening tool.
-
-
-
-
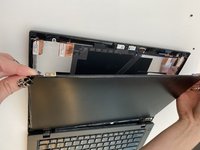
Lift screen off of top panel to reveal LCD power plug/connector.
-
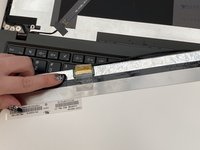
There will be a wire attaching the screen to the rest of the device.
-
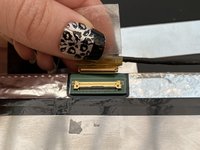
Remove the tape on the wire so you can unplug the connection, pulling upwards.
-
-


To reassemble your device, follow these instructions in reverse order.
Cancel: I did not complete this guide.
One other person completed this guide.

Team

Embry-Riddle Aeronautical University, Team S14-G2, Lamothe Spring 2020 Member of Embry-Riddle Aeronautical University, Team S14-G2, Lamothe Spring 2020
ERAU-LAMOTHE-S20S14G2
4 Members
60 Guides authored
