Free Shipping on Domestic Orders $75+

Lenovo ThinkPad T430s Fan Assembly Replacement

What you need

  1. Lenovo ThinkPad T430s Fan Assembly Replacement, Battery: step 1, image 1 of 3 Lenovo ThinkPad T430s Fan Assembly Replacement, Battery: step 1, image 2 of 3 Lenovo ThinkPad T430s Fan Assembly Replacement, Battery: step 1, image 3 of 3
    • Flip your ThinkPad on its back.

    • In the bottom left corner of your ThinkPad, slide the lever to the left. Hold the lever there.

    • Use your other hand to lift the battery up by prying the notch to the left of the lever.

    • Tilt the battery up and remove it from the ThinkPad.

    Ask FixBot

    Add Comment

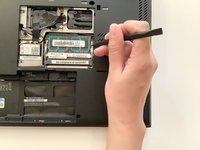
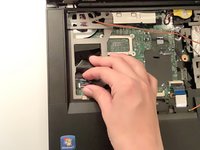
  2. Lenovo ThinkPad T430s Fan Assembly Replacement, RAM Stick: step 2, image 1 of 3 Lenovo ThinkPad T430s Fan Assembly Replacement, RAM Stick: step 2, image 2 of 3 Lenovo ThinkPad T430s Fan Assembly Replacement, RAM Stick: step 2, image 3 of 3
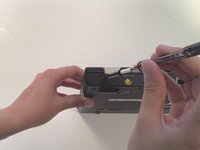
    • With the Phillips #0 screwdriver, loosen the two 30 mm screws holding down the RAM stick plate.

    • Pry up the plate and set it aside.

    Ask FixBot

    Add Comment

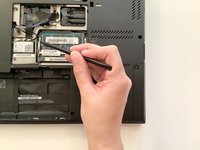
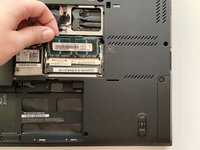
  3. Lenovo ThinkPad T430s Fan Assembly Replacement: step 3, image 1 of 3 Lenovo ThinkPad T430s Fan Assembly Replacement: step 3, image 2 of 3 Lenovo ThinkPad T430s Fan Assembly Replacement: step 3, image 3 of 3
    • Use the pointy end of the spudger to bend the bars holding the RAM stick in place.

    • Lift the RAM stick up and out of the stick holder.

    Ask FixBot

    Add Comment

  4. Lenovo ThinkPad T430s Fan Assembly Replacement, Hard Drive: step 4, image 1 of 1
    • Unscrew the 40 mm screw with the Phillips head #1 screwdriver.

    Ask FixBot

    Add Comment

  5. Lenovo ThinkPad T430s Fan Assembly Replacement: step 5, image 1 of 1
    • Pull the hard drive out with the black ribbon attached to it.

    Ask FixBot

    Add Comment

  6. Lenovo ThinkPad T430s Fan Assembly Replacement, Motherboard: step 6, image 1 of 3 Lenovo ThinkPad T430s Fan Assembly Replacement, Motherboard: step 6, image 2 of 3 Lenovo ThinkPad T430s Fan Assembly Replacement, Motherboard: step 6, image 3 of 3
    • Flip your ThinkPad over so the back faces up.

    • With the Phillips #0 screwdriver, remove the seven 5 mm screws on the outer edge of the case.

    • Remove the two 7 mm screws in the upper corners of the case.

    • Remove the five 5 mm screws in the battery compartment.

    Ask FixBot

    Add Comment

  7. Lenovo ThinkPad T430s Fan Assembly Replacement: step 7, image 1 of 3 Lenovo ThinkPad T430s Fan Assembly Replacement: step 7, image 2 of 3 Lenovo ThinkPad T430s Fan Assembly Replacement: step 7, image 3 of 3
    • In the RAM compartment, pry the black, white, and grey wires up from the Wi-Fi card with the pointy end of the spudger.

    • Remove the 3 mm screw holding down the Wi-Fi card with the Phillips #0 screwdriver.

    • Pull out the Wi-Fi card.

    • Remove the 6 mm and 3 mm screws in the RAM stick compartment.

    Ask FixBot

    Add Comment

  8. Lenovo ThinkPad T430s Fan Assembly Replacement: step 8, image 1 of 1
    • Remove the 5 mm and 3 mm screws in the hard drive compartment.

    Ask FixBot

    Add Comment

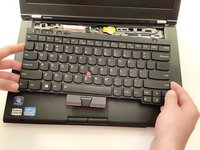
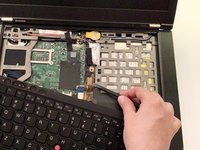
  9. Lenovo ThinkPad T430s Fan Assembly Replacement: step 9, image 1 of 3 Lenovo ThinkPad T430s Fan Assembly Replacement: step 9, image 2 of 3 Lenovo ThinkPad T430s Fan Assembly Replacement: step 9, image 3 of 3
    • Flip the ThinkPad right side up and open the lid.

    • Wedge the flat end of the spudger between the keyboard and the palm rest. Push the keyboard away from you until it pops out.

    • Lift the keyboard from the palm rest to expose the ribbon connecting the keyboard to the motherboard.

    • Pry the keyboard ribbon up from the motherboard with the flat end of the spudger.

    • Set the keyboard aside.

    Ask FixBot

    Add Comment

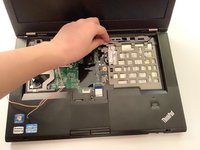
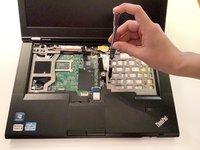
  10. Lenovo ThinkPad T430s Fan Assembly Replacement: step 10, image 1 of 3 Lenovo ThinkPad T430s Fan Assembly Replacement: step 10, image 2 of 3 Lenovo ThinkPad T430s Fan Assembly Replacement: step 10, image 3 of 3
    • Remove the two 5 mm screws from the case covering the disk drive.

    • Thread the wires that come from the RAM compartment up through the hole in the motherboard. Unwind them from the computer case.

    • Wedge the flat end of the spudger in between the palm rest and the bottom case. Unsnap the edges of the palm rest and case until they disconnect.

    • Lift the palm rest up from the motherboard.

    Ask FixBot

    Add Comment

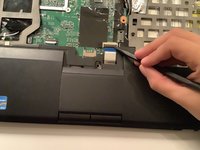
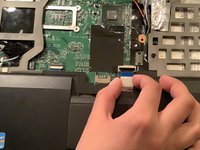
  11. Lenovo ThinkPad T430s Fan Assembly Replacement: step 11, image 1 of 3 Lenovo ThinkPad T430s Fan Assembly Replacement: step 11, image 2 of 3 Lenovo ThinkPad T430s Fan Assembly Replacement: step 11, image 3 of 3
    • Pull the red, blue, and white wires in the left corner away from the motherboard.

    • Peel the snap securing the ribbon with the pointy end of the spudger.

    • Pull the ribbon back towards you.

    Ask FixBot

    Add Comment

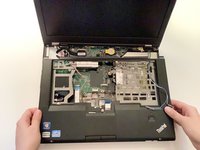
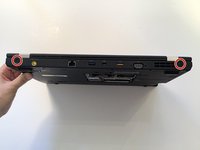
  12. Lenovo ThinkPad T430s Fan Assembly Replacement: step 12, image 1 of 3 Lenovo ThinkPad T430s Fan Assembly Replacement: step 12, image 2 of 3 Lenovo ThinkPad T430s Fan Assembly Replacement: step 12, image 3 of 3
    • Rotate the ThinkPad so the back side faces you.

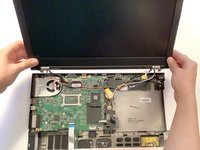
    • With the Phillips #1 screwdriver, unscrew the two 7 mm screws from the corners.

    • Lift the screen and pull it out of the hinges. Set the screen down behind the rest of the ThinkPad.

    Ask FixBot

    Add Comment

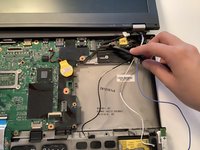
  13. Lenovo ThinkPad T430s Fan Assembly Replacement: step 13, image 1 of 3 Lenovo ThinkPad T430s Fan Assembly Replacement: step 13, image 2 of 3 Lenovo ThinkPad T430s Fan Assembly Replacement: step 13, image 3 of 3
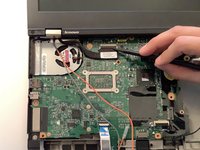
    • With the pointy end of the spudger, lift the plastic snap holding down the SN4 LVDS cable. Pull the cable out of the clasp towards you.

    • Pry the SN4 LED cable out of where it connects to the motherboard.

    • Set the display aside.

    Ask FixBot

    Add Comment

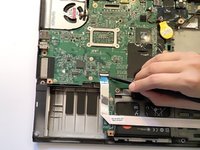
  14. Lenovo ThinkPad T430s Fan Assembly Replacement: step 14, image 1 of 3 Lenovo ThinkPad T430s Fan Assembly Replacement: step 14, image 2 of 3 Lenovo ThinkPad T430s Fan Assembly Replacement: step 14, image 3 of 3
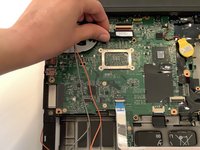
    • With the pointy end of the spudger, lift the plastic snap securing the ribbon at the front of the ThinkPad.

    • Pull the ribbon out of the clasp towards you.

    Ask FixBot

    Add Comment

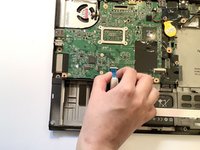
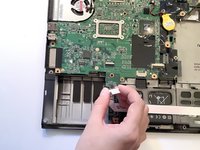
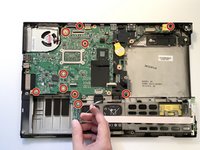
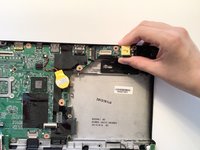
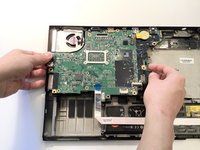
  15. Lenovo ThinkPad T430s Fan Assembly Replacement: step 15, image 1 of 3 Lenovo ThinkPad T430s Fan Assembly Replacement: step 15, image 2 of 3 Lenovo ThinkPad T430s Fan Assembly Replacement: step 15, image 3 of 3
    • Unscrew the 9 mm screw, five 5 mm screws, and four 3 mm screws on the motherboard using a Phillips #0 screwdriver.

    • When you remove the screws, the small motherboard stick in the top right corner will pop out of the case. Pull it out.

    • Lift the motherboard out of the case.

    Ask FixBot

    Add Comment

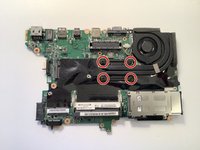
  16. Lenovo ThinkPad T430s Fan Assembly Replacement: step 16, image 1 of 3 Lenovo ThinkPad T430s Fan Assembly Replacement: step 16, image 2 of 3 Lenovo ThinkPad T430s Fan Assembly Replacement: step 16, image 3 of 3
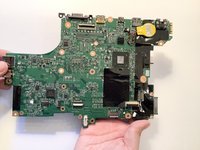
    • Flip the motherboard over so the back faces up.

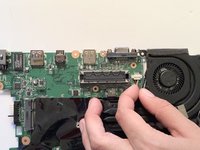
    • Loosen the four screws securing the heat sink to the motherboard. The silver metal rectangle on the front of the motherboard will fall off. Set it aside.

    • Lift the fan and heat sink away from the motherboard.

    Ask FixBot

    Add Comment

Conclusion

To reassemble your device, follow these instructions in reverse order.

Cancel: I did not complete this guide.

3 other people completed this guide.

0 Guide Comments

Add Comment

View Statistics:

Past 24 Hours: 0

Past 7 Days: 17

Past 30 Days: 69

All Time: 2,467