Free Shipping on Domestic Orders $75+

Lenovo ThinkPad P50s Fan Assembly Replacement

Views: 797

View statistics:

Past 24 Hours:
1
Past 7 Days:
22
Past 30 Days:
95
All Time:
797
Comments: 4

1 comment on steps, 3 guide comments.

Go to guide comments
Completed: 0

No one has marked this guide "completed." Will you be the first?

Favorites: 0

No one has favorited (and subscribed to) this guide. Will you be the first?

Time Required: 30 - 45 minutes
Difficulty: Moderate
Featured Student Guide

This guide has been the hard work of our awesome students and is found to be exceptionally cool by the iFixit staff.

Lenovo ThinkPad P50s Fan Assembly Replacement

Introduction

Go to step 1 ↓

Take a look at the overheating troubleshooting guide and see if you can resolve your issue before proceeding. If none of the solutions worked, this guide will show you how to remove and replace the fan of your Lenovo ThinkPad P50s Laptop. The fan is responsible for keeping the laptop at a reasonable temperature, and ensuring your laptop doesn't overheat and damage other components, like the motherboard, CPU, etc.

Before you begin this guide, you should disable the built-in battery. Here is a link with instructions on how to do so on page 123. Make sure your laptop is off and unplugged from the AC charger.

When replacing the fan, you may need to reapply thermal paste. Refer to the How to Apply Thermal Paste guide for detailed instructions.

What you need

Tools

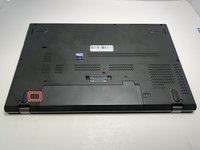
    1. Lenovo ThinkPad P50s Fan Assembly Replacement, Battery: step 1, image 1 of 2 Lenovo ThinkPad P50s Fan Assembly Replacement, Battery: step 1, image 2 of 2
      • Flip the device over so the bottom is facing you.

      Ask FixBot
      Add Comment

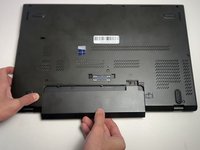
    2. Lenovo ThinkPad P50s Fan Assembly Replacement: step 2, image 1 of 2 Lenovo ThinkPad P50s Fan Assembly Replacement: step 2, image 2 of 2
      • Use your thumb to slide the right lock switch button outward.

      Ask FixBot
      Add Comment

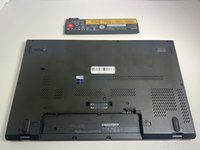
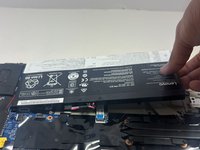
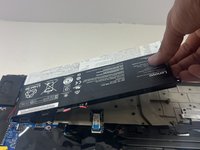
    3. Lenovo ThinkPad P50s Fan Assembly Replacement: step 3, image 1 of 3 Lenovo ThinkPad P50s Fan Assembly Replacement: step 3, image 2 of 3 Lenovo ThinkPad P50s Fan Assembly Replacement: step 3, image 3 of 3
      • With your thumb slide the left lock switch button outward while sliding the battery out with your other hand.

      • When replacing the battery, make sure that the connectors are aligned properly.

      • You may hear a click when the battery is fully seated and the lock engages.

      Ask FixBot

      Add Comment

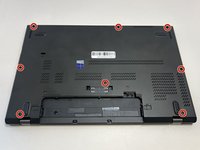
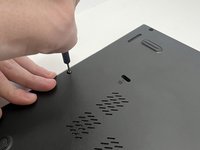
    1. Lenovo ThinkPad P50s Fan Assembly Replacement, Base Cover: step 4, image 1 of 2 Lenovo ThinkPad P50s Fan Assembly Replacement, Base Cover: step 4, image 2 of 2
      • Use a Phillips #00 screwdriver to unscrew the eight 2 mm captive screws.

      • These screws should not be removed entirely; you will be able to take off the base cover once they are loosened.

      Ask FixBot

      Add Comment

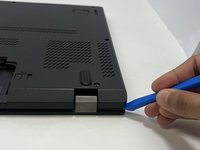
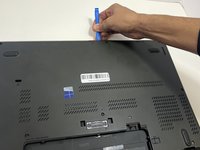
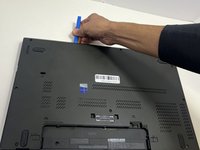
    2. Lenovo ThinkPad P50s Fan Assembly Replacement: step 5, image 1 of 3 Lenovo ThinkPad P50s Fan Assembly Replacement: step 5, image 2 of 3 Lenovo ThinkPad P50s Fan Assembly Replacement: step 5, image 3 of 3
      • With the plastic opening tool, pry up the base cover.

      • Slide the opening tool around the edge of the laptop to release the snap tabs.

      • You may need to use opening picks to hold the tabs apart, as the base is securely attached and tends to snap back into place.

      Ask FixBot

      Add Comment

    3. Lenovo ThinkPad P50s Fan Assembly Replacement: step 6, image 1 of 2 Lenovo ThinkPad P50s Fan Assembly Replacement: step 6, image 2 of 2
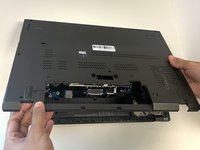
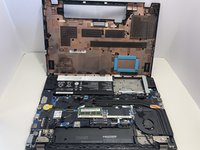
      • Lift the base cover off the laptop.

      Ask FixBot
      Add Comment

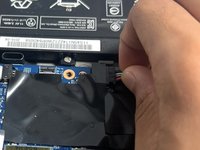
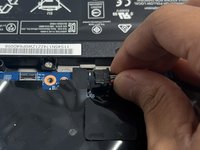
    1. Lenovo ThinkPad P50s Fan Assembly Replacement, Battery Pack: step 7, image 1 of 3 Lenovo ThinkPad P50s Fan Assembly Replacement, Battery Pack: step 7, image 2 of 3 Lenovo ThinkPad P50s Fan Assembly Replacement, Battery Pack: step 7, image 3 of 3
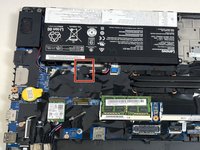
      • With your fingers or a spudger, disconnect the battery cable from the motherboard.

      • Use the point of a spudger to push on alternating sides of the connector to "walk" it out of its socket.

      • It may take a lot of alternating before the connector comes out. Be patient, and don't pull on the cables.

      • To reconnect the cable, align the connector and use a spudger or clean fingernail to push it fully into the socket.

      • Don't push or pull on the cables themselves, or you may damage the connector.

      Ask FixBot
      Add Comment

    2. Lenovo ThinkPad P50s Fan Assembly Replacement: step 8, image 1 of 1
      • Use a Phillips #00 screwdriver to remove the five 2.5 mm retaining screws.

      Ask FixBot

      Add Comment

    3. Lenovo ThinkPad P50s Fan Assembly Replacement: step 9, image 1 of 2 Lenovo ThinkPad P50s Fan Assembly Replacement: step 9, image 2 of 2
      • Lift the battery away from the device to remove it.

      Ask FixBot

      Add Comment

    1. Lenovo ThinkPad P50s Fan Assembly Replacement, Fan assembly: step 10, image 1 of 2 Lenovo ThinkPad P50s Fan Assembly Replacement, Fan assembly: step 10, image 2 of 2
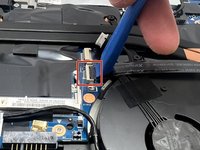
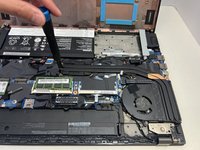
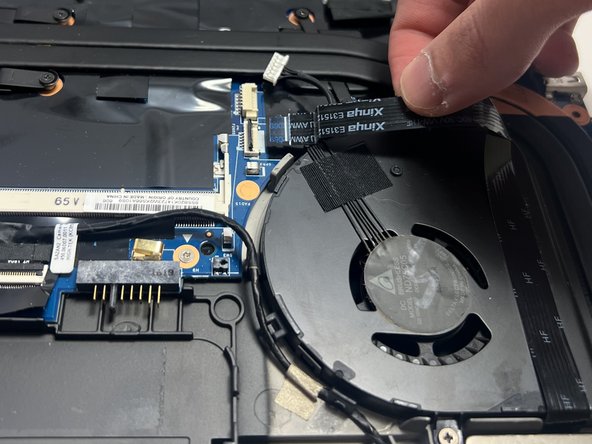
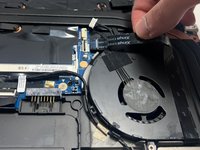
      • Use the point of a spudger to push on alternating sides of the fan connector to "walk" it out of its socket.

      • It may take a lot of alternating before the connector comes out. Be patient, and don't pull on the cables.
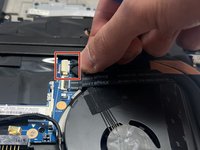
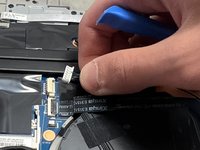
      • To reconnect the cable, align the connector and use a spudger or clean fingernail to push it fully into the socket.

      • Don't push or pull on the cables themselves, or you may damage the connector.

      Ask FixBot

      Add Comment

    2. Lenovo ThinkPad P50s Fan Assembly Replacement: step 11, image 1 of 3 Lenovo ThinkPad P50s Fan Assembly Replacement: step 11, image 2 of 3 Lenovo ThinkPad P50s Fan Assembly Replacement: step 11, image 3 of 3
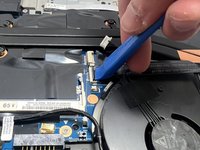
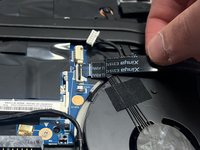
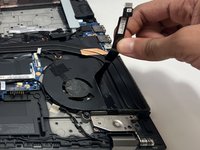
      • Use the opening tool to lift up the locking flap on the power button cable.

      • Use tweezers or your fingers to gently pull the cable out of its socket.

      Ask FixBot

      Add Comment

    3. Lenovo ThinkPad P50s Fan Assembly Replacement: step 12, image 1 of 3 Lenovo ThinkPad P50s Fan Assembly Replacement: step 12, image 2 of 3 Lenovo ThinkPad P50s Fan Assembly Replacement: step 12, image 3 of 3
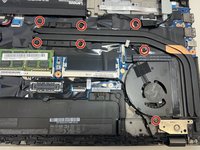
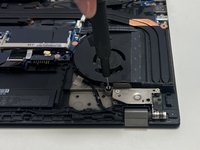
      • Use a Phillips #00 screwdriver to loosen the seven 2.5 mm captive screws securing the fan assembly to the motherboard.

      Ask FixBot

      Add Comment

    4. Lenovo ThinkPad P50s Fan Assembly Replacement: step 13, image 1 of 3 Lenovo ThinkPad P50s Fan Assembly Replacement: step 13, image 2 of 3 Lenovo ThinkPad P50s Fan Assembly Replacement: step 13, image 3 of 3
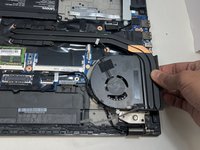
      • Gently peel back the power button cable.

      Ask FixBot

      Add Comment

    5. Lenovo ThinkPad P50s Fan Assembly Replacement: step 14, image 1 of 3 Lenovo ThinkPad P50s Fan Assembly Replacement: step 14, image 2 of 3 Lenovo ThinkPad P50s Fan Assembly Replacement: step 14, image 3 of 3
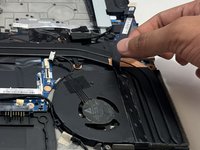
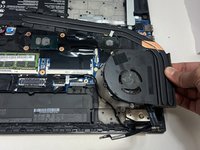
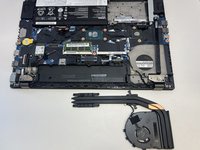
      • Lift the fan off the board to remove it.

      Ask FixBot

      Add Comment

Conclusion

To reassemble your device, follow these instructions in reverse order. Take your e-waste to an R2 or e-Stewards certified recycler.

Cancel: I did not complete this guide.

Evan G

Member since: 09/09/24

193 Reputation

2 Guides authored

3 Guide Comments

Thanks! This was very helpful - exactly what I needed.

Bob Myers

Bob - Reply Share

This isn't a ThinkPad P50..

Barboskin - Reply Share

Hi @barboskin, thanks for your message. This guide is for the Lenovo ThinkPad P50s laptop, which may have a slightly different configuration. You can find guides for the Lenovo ThinkPad P50 on this device page. Unfortunately, there isn't a fan replacement guide for the P50 yet. If you'd like to create a guide to share with the community, we have instructions on the Community page. Thanks!

Sarah Westberg - Reply Share

Add Comment

View Statistics:

Past 24 Hours: 1

Past 7 Days: 22

Past 30 Days: 95

All Time: 797