Introduction
This guide is meant to help the readers to safely replace the SSD card of their Lenovo ThinkPad L390. SSDs are storage devices that have replaced an older method of storage called HDD. SSD stands for solid state drive and they operate by storing data in flash memory.
If you have noticed that your Lenovo ThinkPad L390's processing, loading, or responsiveness has decreased, it may be time to replace your SSD card. Replacing or upgrading the SSD card of your Lenovo ThinkPad L390 can help it to run faster, respond quicker, and load applications smoother. To ensure the best performance of your Lenovo ThinkPad L390, you should look into replacing or upgrading your SSD card around every 5-7 years or when the aforementioned symptoms appear.
Note:
- Before beginning this guide, make sure to power off your laptop completely and disconnect from any external power source.
What you need
-
-
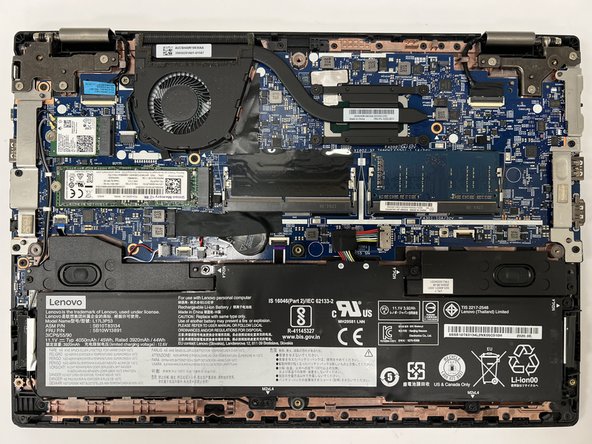
Power off your laptop and disconnect the charger and any peripheries before beginning disassembly.
-
Unscrew the nine 5 mm Phillips #00 screws that secure the lower case.
 Ask FixBot
-
-
-
Insert an opening tool in the gap between the lower case and the chassis.
-
Pry around the entire perimeter of the lower case until it fully releases.
-
Lift the lower case up and off.
-
-
-
-
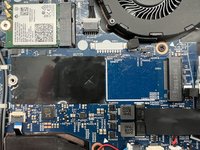
Use your fingernails or two opening tools to gently "walk" the battery connector directly out of its socket.
-
-
-
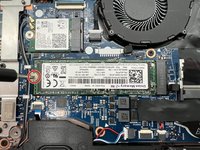
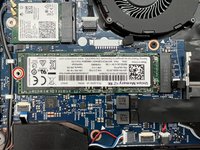
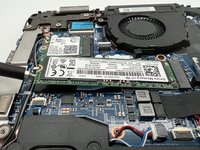
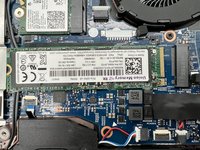
Remove the 3 mm screw from that secures the SSD with a Phillips #1 screwdriver.
-
-
-
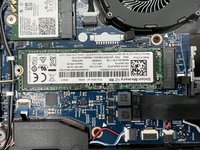
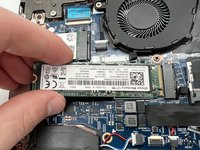
Pinch and pull the SSD card to remove it from its connecting port on the motherboard.
-


To reassemble your device, follow the above steps in reverse order.
Take your e-waste to an R2 or e-Stewards certified recycler.
Cancel: I did not complete this guide.
3 other people completed this guide.

Team

University of North Texas, Team 5-4, Kilpatrick Fall 2024 Member of University of North Texas, Team 5-4, Kilpatrick Fall 2024
UNT-KILPATRICK-F24S5G4
4 Members
5 Guides authored