
Lenovo ThinkPad Helix Battery Replacement

Manuel Parra Rocha and 3 other contributors
Last updated on Mar 20, 2024
Views: 9.2K
View statistics:
- Past 24 Hours:
- 6
- Past 7 Days:
- 30
- Past 30 Days:
- 143
- All Time:
- 9,186
Comments: 1
1 guide comment.
Go to guide commentsCompleted: 7 8
7 people have marked this guide "completed." Will you be next?
8 people have marked this guide "completed." Including you — great job!
Favorites: 0 1
No one has favorited (and subscribed to) this guide. Will you be the first?
1 person has favorited (and subscribed to) this guide — and that's you!
Introduction
Go to step 1 ↓This guide provides information on how to replace a Lenovo ThinkPad Helix battery.
Replacing a battery is essential to keep your device on and running for use. When following these steps remeber to maintain a safe work space and a place to store screws that way you do not lose anything.
Lenovo adds that; “Use only the authorized battery specified for your tablet. Any other battery could ignite or explode.” This is essential to keep you and your device safe, intact and usable.
What you need
Parts

Tools


-
-
-
Using a plastic opening tool or opening pick, gently pry the screen off.
-
Once you're able to lift a little bit of the screen away from the tablet, work your way around until screen is separated from tablet. Stop for step two.
 Ask FixBot
-
-
-
Lift the screen up slowly.
-
Open the clips of the ZIF connectors and gently grab the cable to pull it out.
-
-
-
-
-
Using a Phillips #00 screwdriver, unscrew the four nylon-coated 3 mm screws holding the battery in place.
-
-
-
-
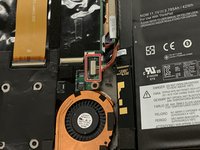
Disconnect the battery cable from the motherboard.
-
Lift the battery out of the device.
-
-


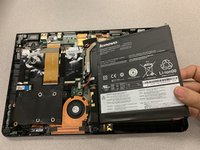
To reassemble your device, follow these instructions in reverse order.
Cancel: I did not complete this guide.
7 other people completed this guide.

Team

Gateway, Team S1-G6, Saknee Fall 2019 Member of Gateway, Team S1-G6, Saknee Fall 2019
GCC-SAKNEE-F19S1G6
4 Members
36 Guides authored
