Introduction
This guide provides thorough instruction on the proper replacement technique for the Lenovo ThinkPad Edge E520's Hard Drive.
What you need
-
-
-
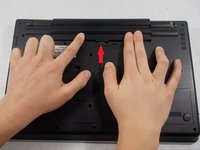
Flip the computer so that the back is facing upwards.
-
Locate the switch used to release the battery.
-
-
-
-
Slide the switch towards the unlocked lock icon.
-
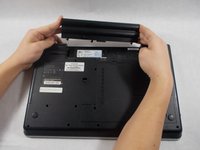
While holding it in the unlocked position, slide the battery towards the hinge.
-
Fully separate the battery pack from the back of the laptop.
-
-
-
-
Flip over the laptop and position it with the battery being furthest away from you.
-
Remove the four screws on the edges of the T-Shaped plate with a Phillips #0 screwdriver.
-
Remove the T-Shaped plate from the back of the computer. It should come off easily if all four aforementioned screws are removed.
-
-
-
-
-
Position the laptop so that the battery compartment is facing away from you.
-
Remove the two bracket screws on the bottom of the hard drive.
-
Gently lift out the hard drive with its bracket still attached.
-
Remove the bracket from the hard drive.
-
-

 Ask FixBot




To reassemble your device, follow these instructions in reverse order.
Cancel: I did not complete this guide.
4 other people completed this guide.

Team

UMass Dartmouth, Team S1-G2, Simcock Spring 2018 Member of UMass Dartmouth, Team S1-G2, Simcock Spring 2018
UMASSD-SIMCOCK-S18S1G2
4 Members
96 Guides authored
